OSW Wheel Button Plate
prusaprinters
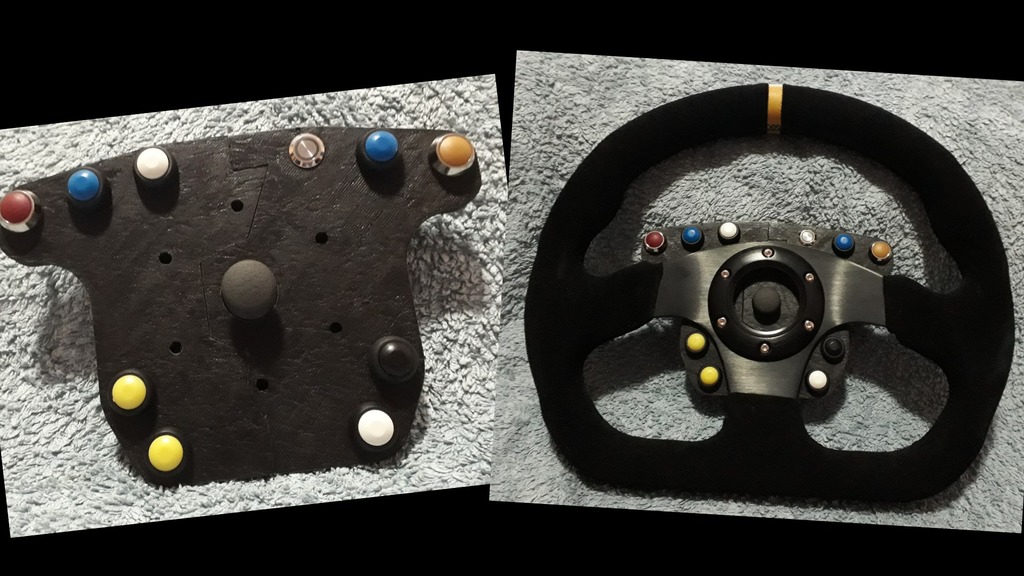
<h3> OSW Button Plate - DIY Direct Drive Wheel Button Plate</h3> <p>The button plate is designed to be compatible with a 320mm Beltenick steering wheel. It should be compatible to similar wheel with Sparko/Momo drill pattern.<br/> <a href="https://www.rennsportshop.com/de-fahrzeug-technik-lenkraeder-lenkradzubehoer-beltenick-rmd-qualitaetslenkraeder-BK-LR32000-Beltenick-Lenkrad-Racing-320mm.html">https://www.rennsportshop.com/de-fahrzeug-technik-lenkraeder-lenkradzubehoer-beltenick-rmd-qualitaetslenkraeder-BK-LR32000-Beltenick-Lenkrad-Racing-320mm.html</a></p> <p>This project is part of the Open Sim Button Box Project. Full source files and description may be found at the project's GitHub page<br/> <a href="https://github.com/KaiserSoft/OpenSimButtonBox/tree/master/Wheel%20Button%20Box">https://github.com/KaiserSoft/OpenSimButtonBox/tree/master/Wheel%20Button%20Box</a></p> <p>The plate is comatible to the Magnetic Paddle Shifter I have posted here as well.<br/> <a href="https://www.thingiverse.com/thing:2601233">https://www.thingiverse.com/thing:2601233</a></p> <p>Demonstration Videos<br/> <a href="https://www.youtube.com/watch?v=CnJ3shNiE3g">https://www.youtube.com/watch?v=CnJ3shNiE3g</a><br/> <figure class="media"> <oembed url="https://www.youtube.com/watch?v=k06J8A-eg9A"></oembed> </figure> </p> <h3> Print Settings</h3> <p><strong>Printer:</strong></p> <p>MendelMax 1.5</p> <p><strong>Rafts:</strong></p> <p>No</p> <p><strong>Supports:</strong></p> <p>No</p> <p><strong>Resolution:</strong></p> <p>0.25mm</p> <p><strong>Infill:</strong></p> <p>25% to 30%</p> <h3> Post-Printing</h3> <p><strong>Required Parts</strong></p> <ul> <li>Arduino Pro Micro 16MHz - Will not work with most other Arduinos since they can not act as a HID. Teensy should work as well but it is more expensive.</li> <li><p>10x push buttons with a thread diameter of around 12mm. The kind with a metal body works as well but they are heavier.</p> </li> <li><p>1x Arduino Joystick Module - pay close attention to the circuit board since there are different types and the button box only works when the dimensions are correct.</p> </li> <li><p>Coiled Micro USB Cable - this connects the button box to your PC. It needs to be coiled so it can flex all the way to the end stops.</p> <h3>Custom Section</h3> </li> </ul> <p><strong>Build Instructions</strong></p> <ul> <li>Print the button box and do basic cleanup. Rough up the sides where the box is split and use glue to join the two halves back together. You don't need much glue since this only makes it easier to install the buttons and cables. The button box will be held in place by the screws connecting the wheel to the mounting hub on the OSW motor.</li> <li>Install the buttons and solder the wires in place. Cut the wires long enough so that they can exit the arduino box at the bottom.</li> <li>Desolder the connection pin header on your joystick module.</li> <li>Solder wires to the joystick module and run them to the arduino box as well</li> <li>Ensure that every button is working by using the continuity test setting on your multi meter</li> <li>Ensure the joystick is working by testing the resistance</li> <li>Add wires for the magnetic paddle shifters as well. I recommend that you don't connect the sifters yet. Simply run wires and solder them to the paddle shifter wires once you are ready to assemble it all.</li> <li>Connect all wires as described in "CONFIG.h". Buttons use the "Button_X_Pin" and the joystick the "Joystick_X_Pin" setting.</li> <li>Remove some of the plastic on the outside of the micro USB connector. This makes the connector shorter and makes in easier to push it through the hole inside the button box.</li> <li>Connect the coiled USB cable to the arduino and upload the scetch to the board</li> <li>Test every button and joystick</li> <li>Test the buttons again</li> <li>Push the arduino into the arduino box at the bottom. Pull extra wires into the button box body and hide them in the wire channel.</li> <li>Test the buttons again</li> <li>Fill the arduino box with hot glue or silicone sealant. This ensures that the micro USB connector will not disconnect and that the arduino will not move</li> <li>Run the rest of the USB cable through wire channel at the bottom of the unit</li> <li>Assemble everything and connect the padde shifters</li> <li>Mount everything to the OSW and attach the wheel</li> <li>All done. You can use the arduino software to change which button sends which command (CONFIG.h file)</li> <li>Have fun! </li> </ul> Category: Games
With this file you will be able to print OSW Wheel Button Plate with your 3D printer. Click on the button and save the file on your computer to work, edit or customize your design. You can also find more 3D designs for printers on OSW Wheel Button Plate.