Otto DIY Robot (Modified by Jason Workshop)
thingiverse
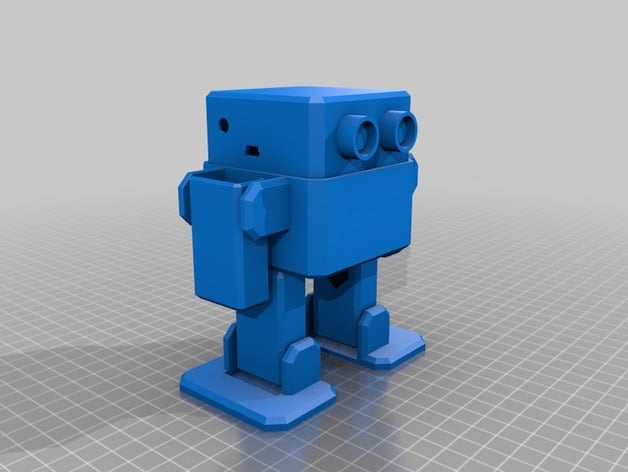
Who is Otto? An interactive robot that anyone can make! Otto walks, dances, makes sounds and avoids obstacles. Is completely open source, Arduino compatible, 3D printable, and with a social impact mission to create an inclusive environment for all kids. Otto was inspired by another robot BoB the BiPed and programmed using code from another open source biped robot Zowi. CC-BY-SA Otto's differences are in the assembled size (11cm x 7cm x12cm), cleaner integration of components and expressions. Using off the shelf and 3D printed parts, simple electronics connections (almost no welding required), and basic coding skills, you will be able to build your own cute Otto friend in as little as two hours! Otto is design using Autodesk 123D Design software you can modify it for customization or further improvements! Gather all the off the shelf parts that you'll need for this assembly. List of parts: Arduino Nano, preferable with the pins already weld it Arduino Nano Shield I/O Extension Board Expansion XD-212 Mini usb cable. (most Arduino dealers provide the cable) HC-06 Bluetooth Board Module (4-Pin) HC-SR04 Ultrasound sensor. Mini servo SG90 9g x6 (each one should come with 2 pointed screws and one small screw). 5V Buzzer. Female to Female breadboard connectors cable 10cm x 10. 4 AA (6V) Battery case 1.5V AA batteries x4. Mini cross screwdriver. important magnetized And then you only need to 3D print 8 parts in total: 3D printed head. 3D printed body. 3D printed left arm. 3D printed right arm. 3D printed left leg. 3D printed right leg. 3D printed left foot. 3D printed right foot. For the programming: Download & Install Arduino IDE:https://www.arduino.cc/en/Main/Software Copy Oscillator libraries to C:\Users\user\Documents\Arduino\libraries (or wherever your library folder is installed): Finally open & upload OTTO_smooth_criminal.ino code to your Arduino Nano for dancing Otto. More codes in https://github.com/OttoDIY/ Or follow this instructable http://www.instructables.com/id/Otto-Build-You-Own-Robot-in-Two-Hours/ that focuses on how to build the Otto DIY, more Ottos are coming and you can stay tuned for updates by subscribing on http://www.ottobot.org Print Settings Printer: idBox Rafts: Doesn't Matter Supports: Yes Resolution: 0.2mm Infill: 20% Notes: Recommended to use a FDM 3D printer with PLA material. You can print individually piece by piece to match the colors of the original design or optionally print all at the same time. Post-Printing
With this file you will be able to print Otto DIY Robot (Modified by Jason Workshop) with your 3D printer. Click on the button and save the file on your computer to work, edit or customize your design. You can also find more 3D designs for printers on Otto DIY Robot (Modified by Jason Workshop).