Outdoor Smart Pylon Light
prusaprinters
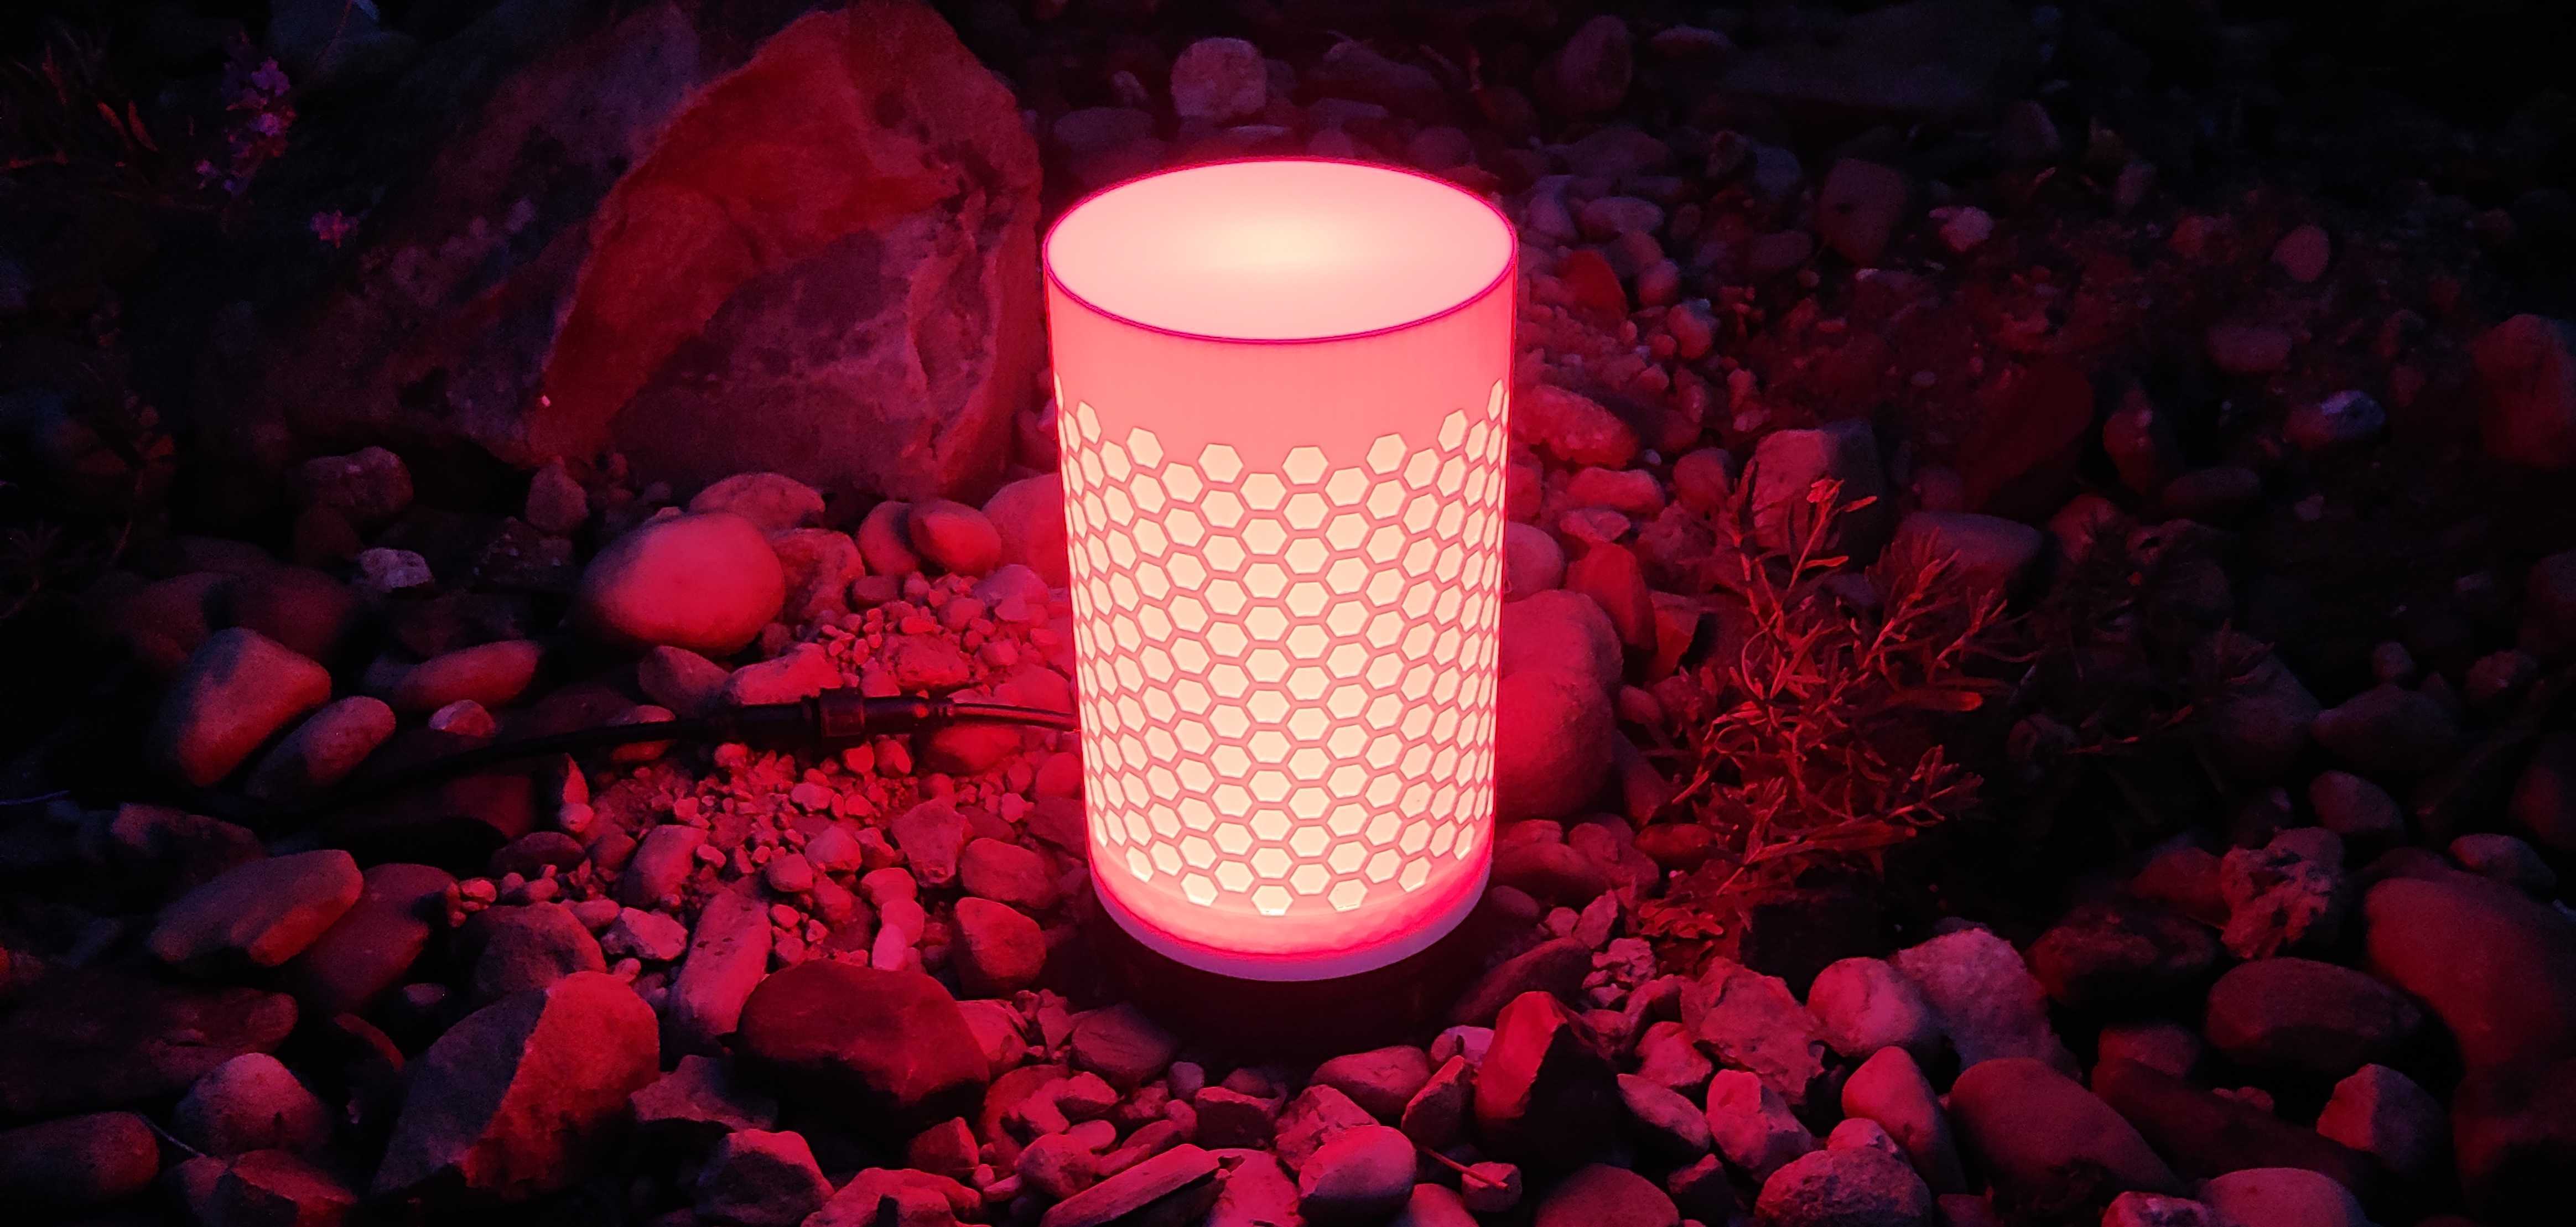
<p>This is a design I'm working on for some outdoor yard lighting. The basic design is emulating the Philips Hue Bollard lights (<a href="https://www.philips-hue.com/en-us/p/hue-white-and-color-ambiance-calla-outdoor-bollard/1741930V7">https://www.philips-hue.com/en-us/p/hue-white-and-color-ambiance-calla-outdoor-bollard/1741930V7</a>). I liked this general idea and design but felt like $100 a pop is kinda steep, so I decided to try and make my own DIY version. Depending on the prices for various parts you should be able to make ~ 6 of these for around $80</p> <p>These are intended to be chained together allowing you to run multiple of these pylons off a single esp chip. The first pylon in a chain should contain the esp chip and all others down stream dont require the esp chip. You should be able to just link up the output from one LED strip to the input on another. Voltage drop will occur after some distance, but I'm not sure how many nodes you can run without pushing additional power. I'll update this as I test more.</p> <p>This is my first outdoor electronics project so I'm not entirely certain that this design will hold up or be properly water tight.</p> <p>Each pylon can fit ~50 leds, I cheated a bit and didn't cut them into separate strip to feed into the led core because I didn't want to waste LEDs during prototyping. This actually worked a lot better than I expected, but does waste a few downward facing leds where it bends on one side, but whatev. The led core was originally built with soldering each side separately in mind so it should work either way.</p> <p>I designed this to have a few types of modules that all chain together. What separates the modules from one another is just different bases. The core and shell are the same for all modules:</p> <ul> <li>brains unit -> contains the wemo, buck converter, and leds. This should be the first unit from the power supply</li> <li>mob unit -> this contains just leds and has 2 holes in the bottom for an input line and output line</li> <li>end cap unit -> this contains just leds and has a single input line hole in the bottom</li> </ul> <p>The brain base model has a 'spring' mount for both the Wemo D1 and the buck converter. To use these mounts:</p> <ul> <li>stick one side into the cut out opposite of the spring mechanism</li> <li>let the back part sit on the finger nub protrusion, part of the nub should be sticking out over</li> <li>pull the nub and let the board sit and release tension. The board should be locked in nice and tight</li> </ul> <p>So the entry price is a bit high. but most purchases can be used for multiple units. For example the LEDs are $30 for 300 leds, this can be used for ~ 6 pylons (at 50 leds a pylon). I didn't really try to find cheap prices, really was looking for faster delivery to continue with prototyping. I assume a bit of research could lower the price a good bit once the design has been finalized.</p> <p>BOM:</p> <ul> <li>Power wire: <a href="https://www.amazon.com/gp/product/B07GD8WL5V/ref=ppx_yo_dt_b_asin_title_o04_s00?ie=UTF8&psc=1">https://www.amazon.com/gp/product/B07GD8WL5V/ref=ppx_yo_dt_b_asin_title_o04_s00?ie=UTF8&psc=1</a></li> <li>12v 3.3a outdoor power supply - <a href="https://www.amazon.com/gp/product/B07VBLKHF9/ref=ppx_yo_dt_b_asin_title_o04_s00?ie=UTF8&psc=1">https://www.amazon.com/gp/product/B07VBLKHF9/ref=ppx_yo_dt_b_asin_title_o04_s00?ie=UTF8&psc=1</a></li> <li>orings - <a href="https://www.amazon.com/gp/product/B077TPHPNC/ref=ppx_yo_dt_b_asin_title_o04_s00?ie=UTF8&psc=1">https://www.amazon.com/gp/product/B077TPHPNC/ref=ppx_yo_dt_b_asin_title_o04_s00?ie=UTF8&psc=1</a></li> <li>Outdoor connectors: <a href="https://www.amazon.com/gp/product/B07KQ487NT/ref=ppx_yo_dt_b_asin_title_o06_s00?ie=UTF8&psc=1">https://www.amazon.com/gp/product/B07KQ487NT/ref=ppx_yo_dt_b_asin_title_o06_s00?ie=UTF8&psc=1</a></li> <li>LED strip: <a href="https://www.amazon.com/gp/product/B07FVR781Z/ref=ppx_yo_dt_b_asin_title_o08_s00?ie=UTF8&psc=1">https://www.amazon.com/gp/product/B07FVR781Z/ref=ppx_yo_dt_b_asin_title_o08_s00?ie=UTF8&psc=1</a></li> <li>Wemo D1 Mini: <a href="https://docs.wemos.cc/en/latest/d1/d1_mini.html">https://docs.wemos.cc/en/latest/d1/d1_mini.html</a></li> </ul> <p>Extras stuff I ended up using but isn't necessarily required:</p> <ul> <li>Butt connectors for joining wires: <a href="https://www.amazon.com/gp/product/B015LXP1DG/ref=ppx_yo_dt_b_asin_title_o04_s01?ie=UTF8&psc=1">https://www.amazon.com/gp/product/B015LXP1DG/ref=ppx_yo_dt_b_asin_title_o04_s01?ie=UTF8&psc=1</a></li> <li>Tool for crimping butt connectors: <a href="https://www.amazon.com/gp/product/B00004SBDI/ref=ppx_yo_dt_b_asin_title_o04_s01?ie=UTF8&psc=1">https://www.amazon.com/gp/product/B00004SBDI/ref=ppx_yo_dt_b_asin_title_o04_s01?ie=UTF8&psc=1</a></li> </ul> <p>9/7/2020 - I've been running a 2 node test design for a few weeks outside now without any issues. It's weathered a few thunderstorms and hasn't shown any signs of water damage. Additional shell designs are currently in the works. Overall the design seems to work fine. Of note is it not as bright as the single Philips Hue Bollard I own, but its dimensions are of similar size.</p> <p>I've done a small bit of experimentation with different materials for the shell to try and get optimal diffusion and brightness. So far I've tested with white PETG and clear PETG, pics have been included in the slide show above of each. The clear is definitely brighter when just white light is used, but not noticeably brighter with a deeper colored hue. Clear doesn't look as nice though since you can clearly see where the LEDs are. Due to this I would recommend finding a nice white PETG. One slightly interesting thing I observed was that the filament color temperature can influence the white light color. If you use a warm color white filament your white LED color will look warmer, and conversely if you use a cool white filament the white light will look cooler. Its obvious once observed but something I hadn't considered prior. The effect is pretty small but still noticeable when changing the shells that used different filaments.</p> <p>9/16/2020</p> <ul> <li>added honeycomb cylinder shell STL file and example image. So far I think this is the best looking shell.</li> <li>added square-ish shell, image coming when print completes. Print time on this guy is long and deff requires supports inside.</li> </ul> <h3>Print instructions</h3><p>All parts are designed to be printed at a .2 resolution. After the base has been printed you need to flex the springs on the electronic holders to separate the springs from the base so they move freely. The spring design skips a layer so it shouldn't be too hard to free up (also why resolution of .2 is recommended)</p> <p>Parts will need to be re-oriented. I recommend printing shells and the core bottom up (threads last). The base can be printed right side up (control board slots facing the ceiling).</p> <p>I recommend avoiding using supports on the shell threads. Supports on the threads are extremely hard to clean up and will cause you headaches trying to screw the parts together. Even without using supports, I found that I had to clean up the threads on my shells due to minor print imperfections. A bit of a pita, but I haven't figured out a way around it yet, drop me a line if you have ideas. When printed in PLA the threads seemed to come out cleaner and worked right off the printer for me. I dont print a lot in PETG so it could be simple tuning issues w/ my setup/filament settings.</p> <p>PETG is recommended due to its UV resistance and higher temp resistance.</p>
With this file you will be able to print Outdoor Smart Pylon Light with your 3D printer. Click on the button and save the file on your computer to work, edit or customize your design. You can also find more 3D designs for printers on Outdoor Smart Pylon Light.