Over/under extrusion test
prusaprinters
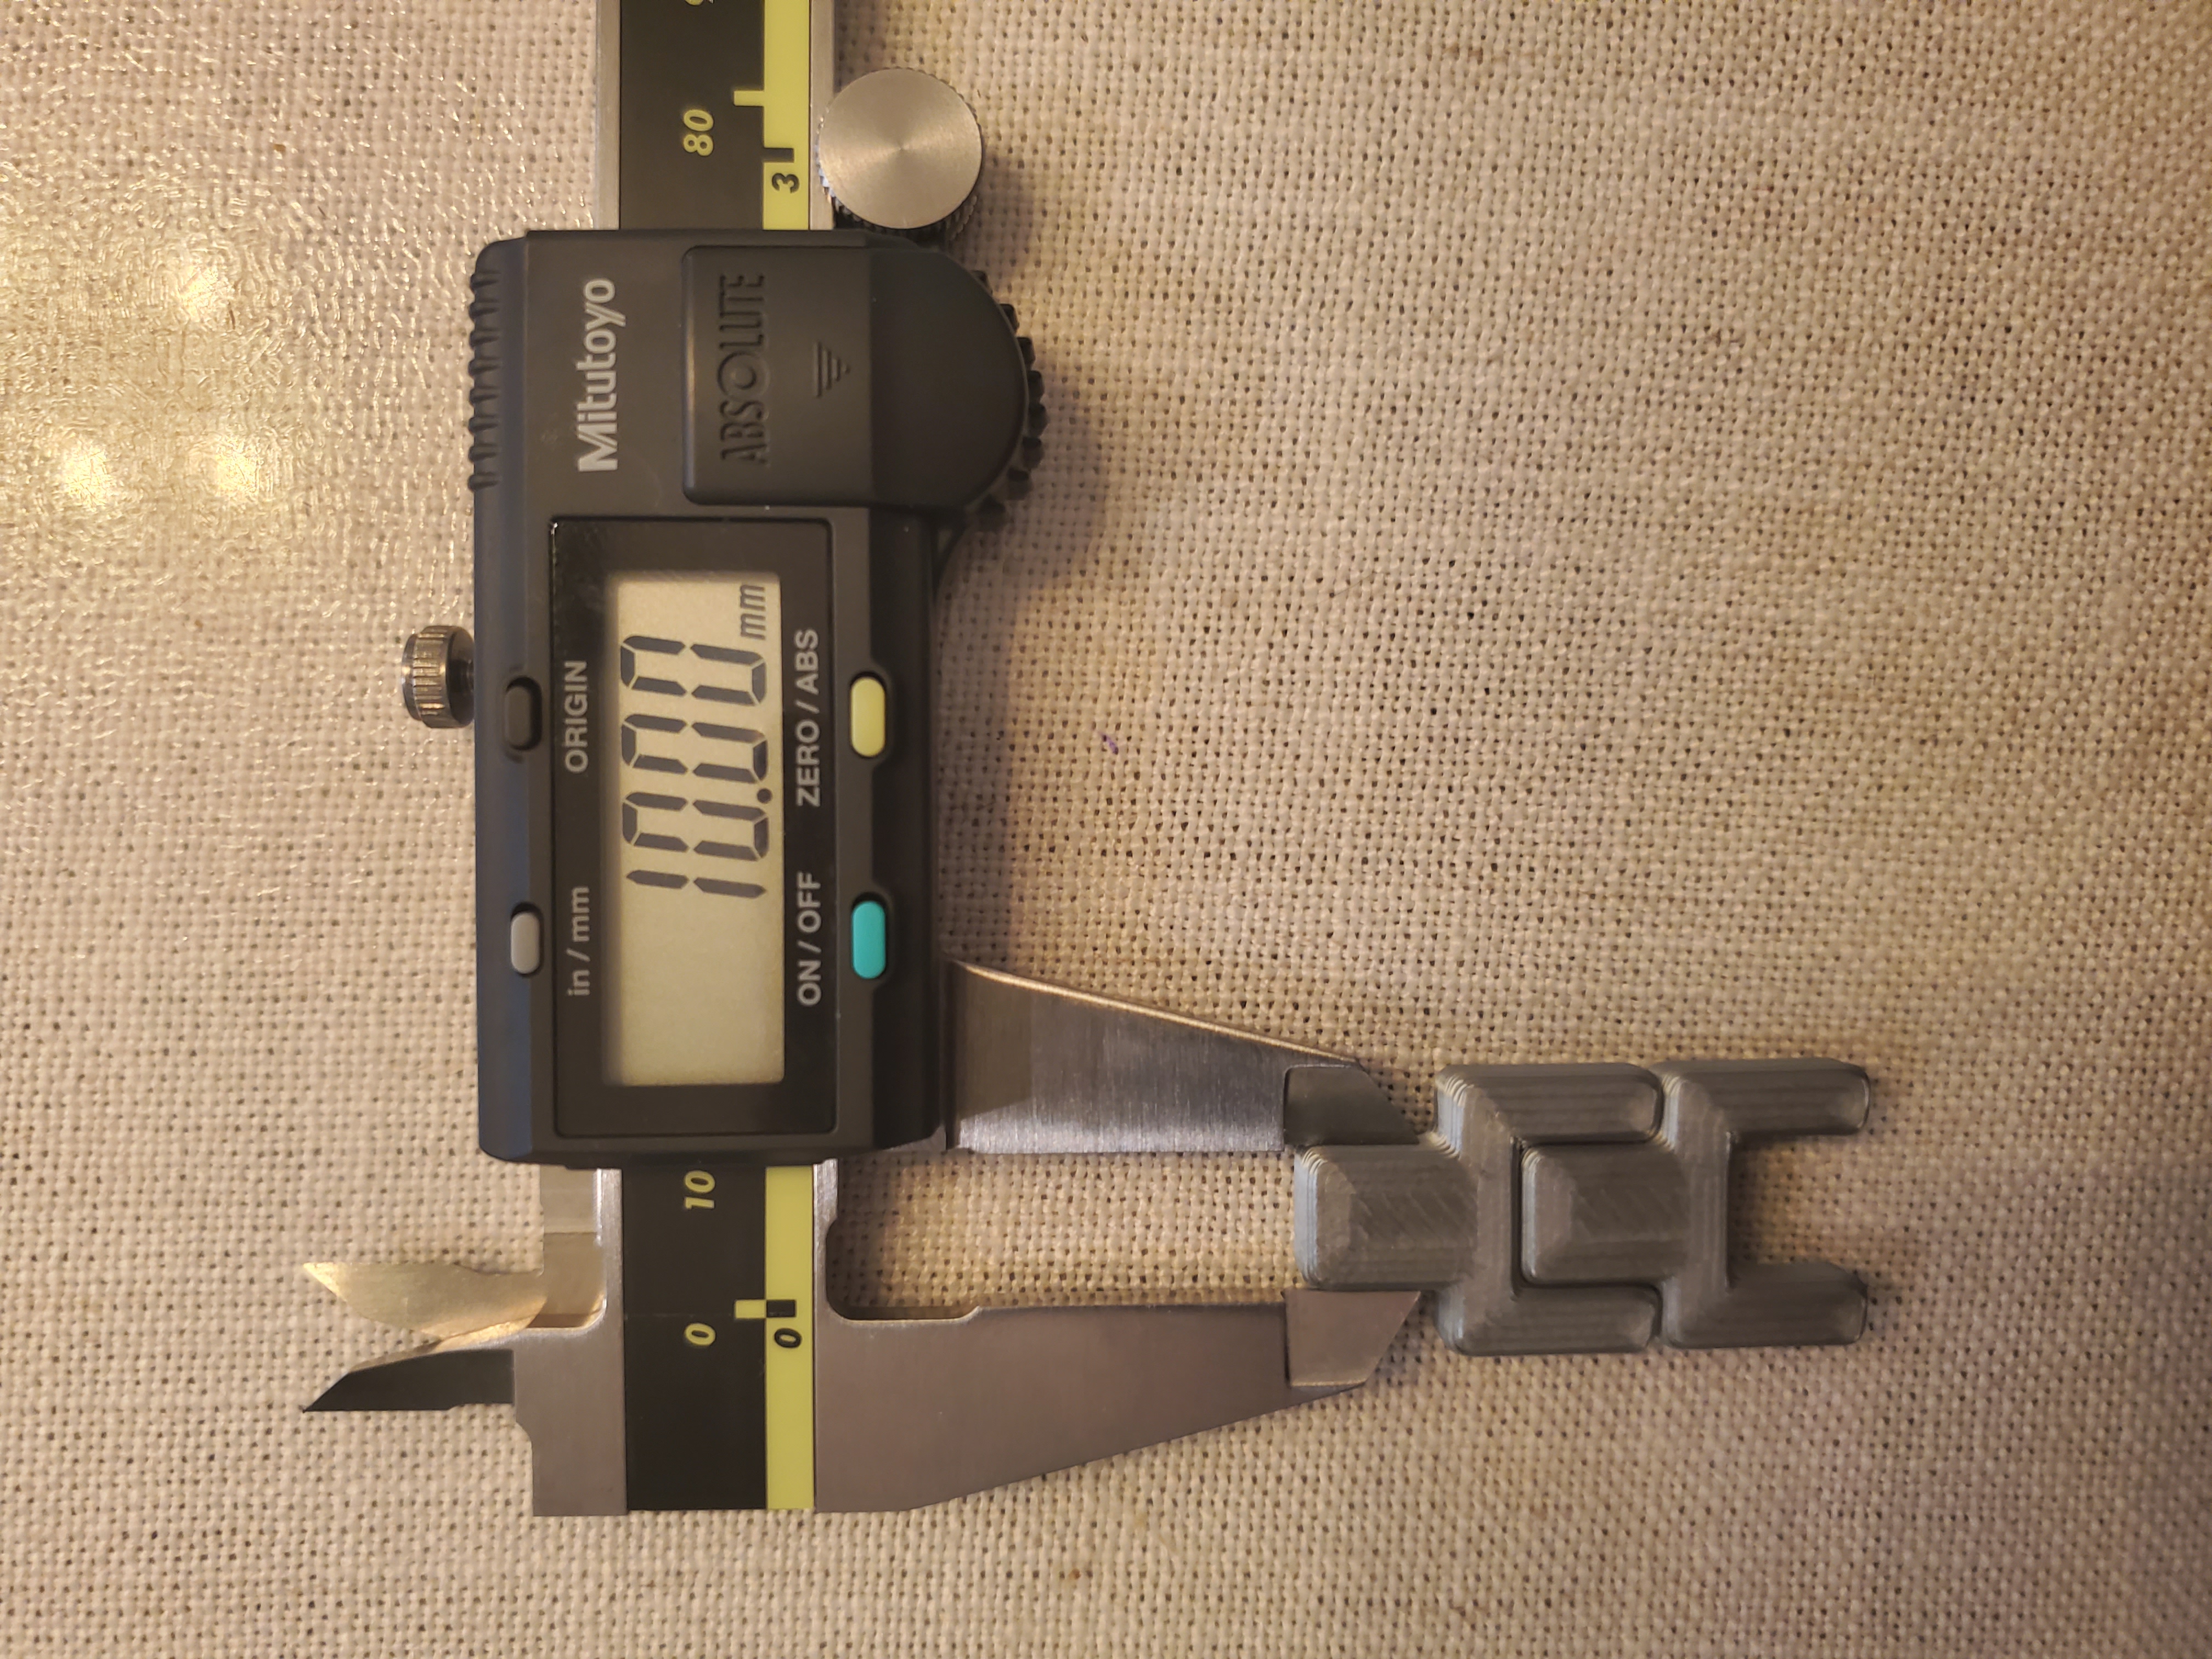
<p>Remix of <a href="https://www.thingiverse.com/thing:1622868.">https://www.thingiverse.com/thing:1622868.</a> Dimensions should be identical to the original, aside from differences in chamfer/fillet.</p><p><strong>Printing:</strong></p><p>Print with 0% infill and 3 perimeters (1.2mm shell at 0.4mm). The chamfered side faces the print bed to avoid elephant-foot issues.</p><p><strong>Test without calipers:</strong></p><p>Print two of the item. They should fit together well. Loose fit is underextrusion, tight fit is overextrusion.</p><p><strong>Test with calipers:</strong></p><p>The distance between the inside of the forks should equal the width of the other end (nominally 10mm). If the inner measurement is larger it is underextrusion, if the outer measurement is larger it is overextrusion.</p><p>There is a spreadsheet by <a href="https://www.thingiverse.com/gork">https://www.thingiverse.com/gork</a> at <a href="https://goo.gl/kbuZMi">https://goo.gl/kbuZMi</a> that can be used to calculate the proper extrusion multiplier based on your caliper measurements.</p><p><strong>Other:</strong></p><p>I have included the FreeCAD file.</p><p> </p>
With this file you will be able to print Over/under extrusion test with your 3D printer. Click on the button and save the file on your computer to work, edit or customize your design. You can also find more 3D designs for printers on Over/under extrusion test.