Overlord/Overlord Pro -> E3D v6 adapter
thingiverse
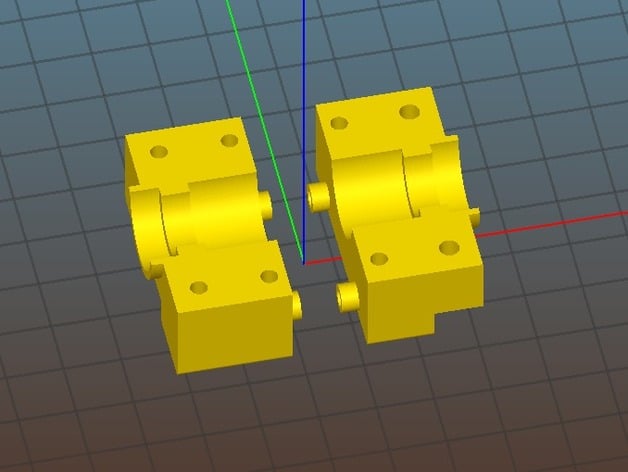
Simple groove mount adapter so an E3D v6 (or clone) can be used with the stock print head cage on the DreamMaker Overlord/Overlord Pro (I'm assuming they use the same print head; I only have access to an OLP). Print Settings Rafts: Doesn't Matter Supports: Yes Resolution: .2mm layers Infill: 20% Notes: I printed this out in ABS, but PLA should work fine too. 60mm/s How I Designed This Autodesk Fusion 360 Instructions I made this so no new parts or screws are needed. Once printed and cleaned up (and all the parts have cooled down), take your print head cage out and remove the top electronics cap. Take the PCB off. Disconnect the 2 thermistors from the PCB, and unmount the heater from the heater block (lower set screw). With the stock hotend out, remove the 4 screws that hold the nozzle and heatbreak to the heatsink, remove the retaining ferrule, and unscrew the nozzle from the heater block. Set aside for now. Remove 2 of the long M3 screws holding either the heatsink fan or the layer cooling fan, preferably from diagonal ends (so the remaining 2 screws holding the fan are in opposite diagonal corners). Clamp the E3D v6 hotend to the printed mount, and use the 2 M3 screws to hold it tight. There should be no movement from the hotend once clamped. Mount the E3D nozzle to the heater block. Back it out 1/4 - 1/2 a turn from flush. Mount the heater block to the E3D heatbreak until it stops against the nozzle. It'll be tightend up once it's hot. Hold the heater block and tighten the nozzle 1/4 a turn. Remount the heater module to the heater block, and route wires to the cutout, along with the thermistor wires. Temporarily connect the electronics to the PCB Power on printer and heat up hotend to ~200C. Holding the heater block with one wrench, tighten the nozzle with another wrench until it's snug. Don't need Superman strength here though! Once cool, slide the new hotend assembly back into the cage, making sure the heater block protrusion faces the hotend fan side (the stock heater block is offset, so one side sticks out more than the other) Reuse the shorter M3 screws that held the cage cap on to hold the new groove mount. Mount the PCB to the top of the adapter. The white spacers may not be needed. Reattach electronics and PTFE tubing. Very important step recalibrate your z-offset!
With this file you will be able to print Overlord/Overlord Pro -> E3D v6 adapter with your 3D printer. Click on the button and save the file on your computer to work, edit or customize your design. You can also find more 3D designs for printers on Overlord/Overlord Pro -> E3D v6 adapter.