Ozone generator for cars interior decontamination
thingiverse
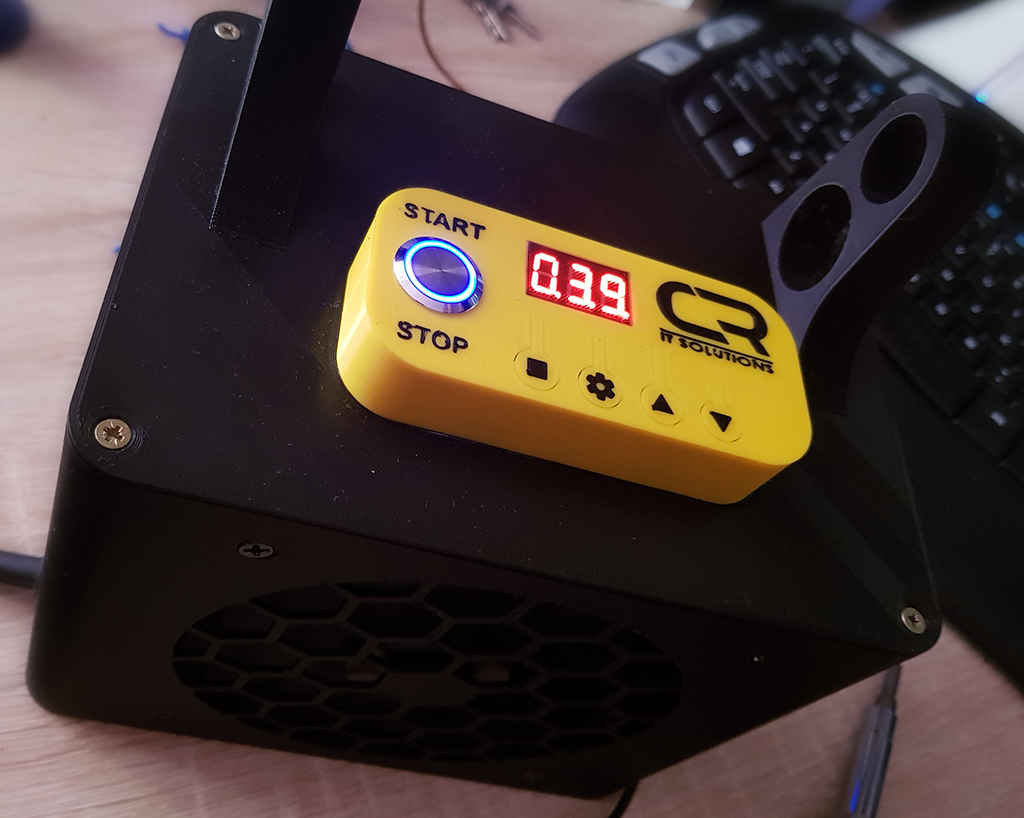
<h2>WARNINGS:</h2> <ol><li>Please be careful due to HIGH VOLTAGE (thousands of volts!) on the plates of ozone generator during operation!!! It could give you an electric shock or bring you to death!</li> <li>Please be careful due to poison properties of ozone! Turn power off and leave the room immediately if you smell ozone! Do not breath in ozone under any circumstances!!!</li></ol> ------------------------------------------------------------------------------------------------------------- I decided to prepare a DIY ozone generator to fight viruses, fungus and other smelly things that could live in your cars, a specially in AC pipes. This is quite compact and portable version. It is prepared to work with electronic timer (type JZ-801): <img src="https://i.imgur.com/CfhfloQ.jpg" /> and typical ozone generator (buy 12V/10g version): <img src="https://i.imgur.com/WX1E3hZ.jpg" /> <img src="https://i.imgur.com/SYv1S7M.jpg" /> available on Ebay, Aliexpress, Banggood, Amazon, Allegro, etc. Generators are built in couple of types of power supply (12V - for cars, 240V/50Hz, 110V/60Hz... etc - for households) and effectiveness (from 1 to 3 ozone generating plates). For car's 12V installation you shouldn't exceed 2 plates (about 70W of power) due to current limitations in car's lighter sockets. You will also need the 16mm pushbutton: <img src="https://i.imgur.com/EiXDtbL.jpg" /> and 120mmx120mm 12V computer fan: <img src="https://i.imgur.com/8wvZ6qE.jpg" /> _____________________________________________________________ <h2>How to connect everything together?</h2> I tried to show that on the picture: <img src="https://i.imgur.com/8dygv0v.jpg" /> It's strongly recommended to use soldering iron to connect wires together due to 5-6A current passing through these connections. Please use wires with conductors of at least 1.5mm2 (15 AWG)! 12V lighter plug must be equipped with 10A fuse! _____________________________ <h2>Obligatory modifications of the parts:</h2> <ol><li>Mechanical mods: <p>I looked at the ozone generator carefully and in my opinion the way of mounting it to the base is not the best. So I removed some parts of plastic case using side cutters and drill 4 holes (with 135mm x 45mm spacing) instead:</p> <img src="https://i.imgur.com/OPzZ1S4.jpg" /> <p>Design of the housing base was prepared to fit these holes.</p></li> <li>Electrical mods: <p>The display of timer have to be raised about 16mm. This is necessary to fit the panel window. Original display seats to low, directly on the board. So you have to desolder display from the board, prepare and solder to its pins some thin 20mm long wires (Ethernet cable is good source of that kind of wires), then fit it to the panel window and then fit the board in panel and solder wires to the original pads on the board:</p> <img src="https://i.imgur.com/AkGEPYF.jpg" /></li></ol> ___________________ <h2>And now... The Printing :)</h2> Base, handle and cover are really simple to print. Just in the case of cover you have to use supports under the outer edge. Use 3-4 perimeters. Some problems may occur during the panel printing, a specially if you didn't try before to print first layer with different colours. I attached 4 files to allow to print the panel in one of 2 ways: a) You may use separate STLs, adjust the exact position of them in slicer and generate 3 separate gcodes for icons, main body of panel and window of display. b) You may also start with complete_panel.stl. Open it in your slicer and divide to separate parts or models. It should ensure that the separated models are accurately positioned on the table. Then delete panel main body as well as window of display. Leave icons only. Generate gcode. Then undo delete. Leave only window and generate gcode. Again undo delete and leave this time main body of panel only. Generate gcode. So you should get 3 gcode files: body of panel, icons and window of display. As a first print icons (pick your filament colour) and leave them on the table of printer. Then print the window (you should pick some red transparent filament) and then print panel main body. As a result you should get complete panel with icons and window integrated. If it's too difficult you may print panel main body only and colorize icons by hand. In the end you should get something like this: <img src="https://i.imgur.com/6YUSDJF.jpg" /> _________________________ <h2>Assembly:</h2> First build the panel and make all of the electrical connections between timer and push button. My button was backlighted so I took additional power from NO timer output to make it work: <img src="https://i.imgur.com/fdPBcnW.jpg" /> Then superglue panel to the cover: <img src="https://i.imgur.com/6oP38cb.jpg" /> After that have to make all electrical connections between main parts: <img src="https://i.imgur.com/qVEX5V2.jpg" /> And now you can install everything in the casing: <img src="https://i.imgur.com/CMBsJVn.jpg" /> <img src="https://i.imgur.com/YgxJCBq.jpg" /> Gently push the handle into the cover holes (it fits tight but if you want may use superglue): <img src="https://i.imgur.com/ASGNLFs.jpg" /> Screw cover to the base and you are done! <img src="https://i.imgur.com/oTv3BuB.jpg" /> __________________________________________ <h2>Timer settings</h2> Please set the OP time and program P1.3 on timer panel, according to this manual: <a href="https://gofile.io/d/jsfvEI" title="JZ-801 timer manual">JZ-801 timer manual</a> __________________________________ <h2>To decontaminate your car:</h2> <ol><li>park in the shadow (solar radiation and heat increases ozone decay)</li> <li>plug the ozone generator to the lighter plug</li> <li>set the time of ozoning (I advice 40min for sedan/tourer)</li> <li>turn on car engine and leave it idle</li> <li>close all windows and doors </li> <li>set your car AC blower to highest position</li> <li>set your car AC to internal air circulation</li> <li>set your car AC temperature to minimum</li> <li>turn on AC compressor manually (if your car have that option)</li> <li>push the START/STOP button on panel of ozone generator</li> <li>leave the cabin immediately and close doors</li> <li>wait until ozone generator stops</li> <li>unplug ozone generator</li> <li>open all doors and windows for 10min to ventilate cabin</li></ol> **That's all! Good luck! :)**
With this file you will be able to print Ozone generator for cars interior decontamination with your 3D printer. Click on the button and save the file on your computer to work, edit or customize your design. You can also find more 3D designs for printers on Ozone generator for cars interior decontamination.