Packout Drawer Divider Clips
prusaprinters
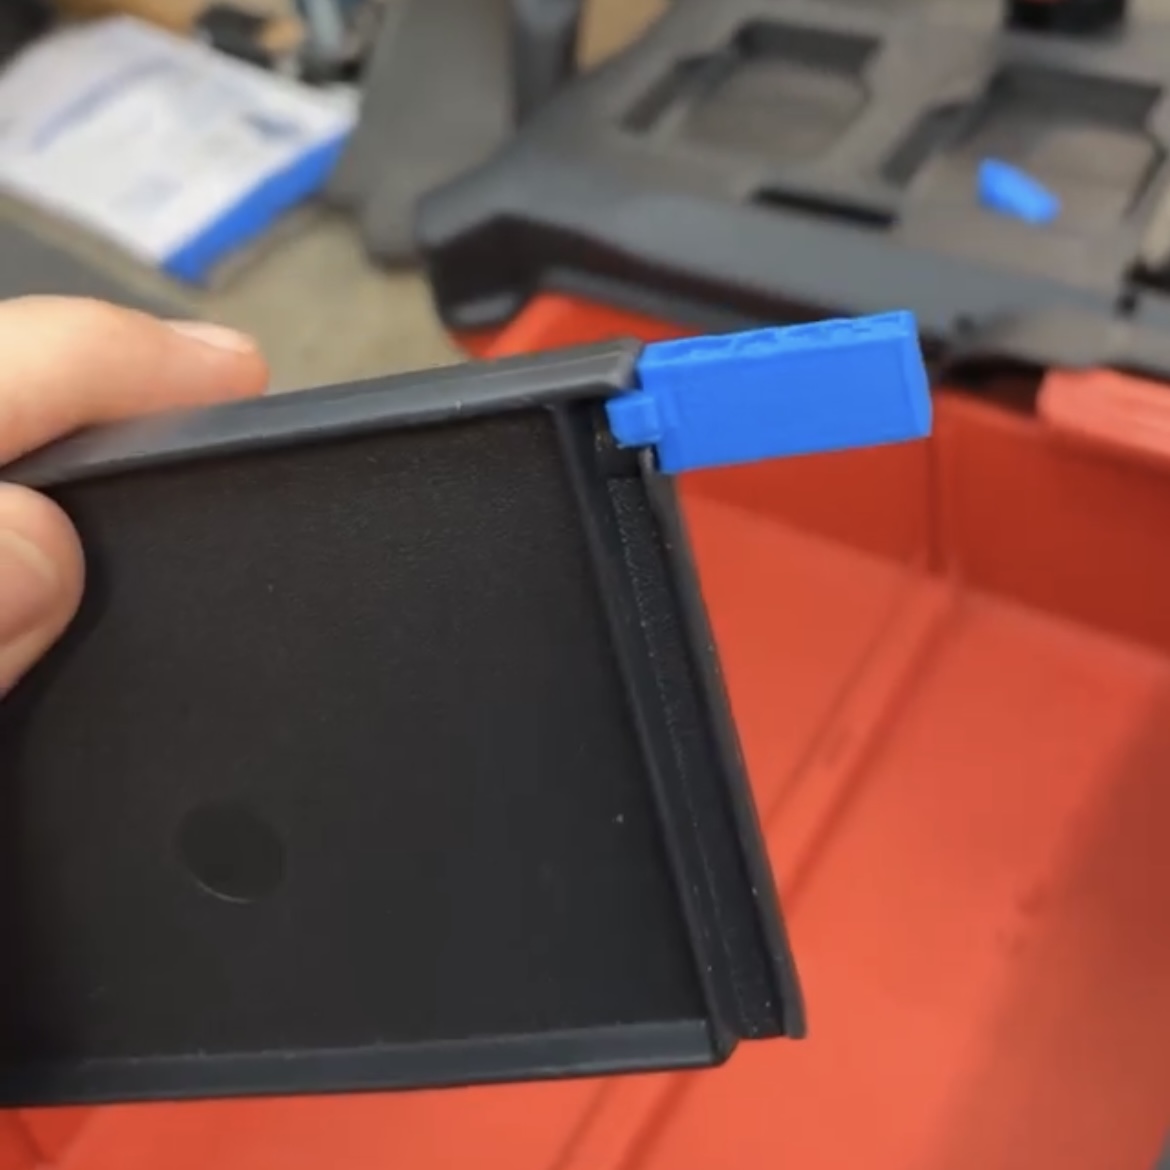
<p>This is a quick and simple print that is 90% hidden when installed. It helps prevent the annoying problem of your drawer dividers lifting up and out of the molded channel in the front of your packout drawers. </p><p>Print instructions: Recommend printing horizontally as oriented, using supports to keep the little “arms” from sagging. It's possible to print upright with the arms reaching for the sky, but they'll be weaker due to the orientation of the layer lines. Infill isn't that important, but I recommend 10% rectilinear. I recommend a .4mm nozzle or smaller. </p><p>To install, remove the divider(s) from the drawer(s). Notice that at the front of the drawer, above the U channel the divider slides into, there is a small cavity. That is where the clip will go. First attach the clip to the end of the divider, with the PMP letters upward, so that the tiny arms of the clip grab just below the top ridge but above the small “hump” in the end. (see photos). The clip should hold securely. Now to install the divider, slide the end of the clip into that cavity above the channel, and flex the divider to direct the back end into it's mating channel as well. Slide the back end all the way down and ensure the small tabs along the bottom are indexing with their corresponding notches. The front end should now be more secure, and you should have less of an issue with the dividers popping up, allowing small parts to migrate.</p>
With this file you will be able to print Packout Drawer Divider Clips with your 3D printer. Click on the button and save the file on your computer to work, edit or customize your design. You can also find more 3D designs for printers on Packout Drawer Divider Clips.