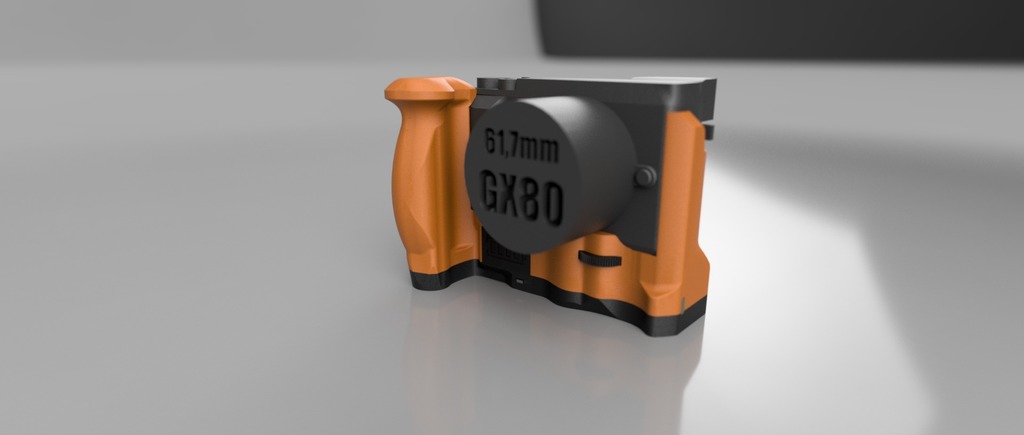
Panasonic Lumix GX80/GX85 camera battery grip
thingiverse
18650 battery grip for Lumix GX80/GX85 Capacity should be around 7000mAh (depending on batteries - over 1800 of normal shots no timelapse tested for timelapse its few tenths of thousands). You can not change SD card while it is mounted, because cable from DMW-DCC11 is blocking battery lid. <h2>THINGS YOU NEED</h2> 4x NCR18650B li-ion battery 1x 1/4" x 16mm bolt (hex head 11mm) -16mm= thread lenght, 20mm= whole lenght 1x 1/4" hex nut 11mm head and 5,5mm height 7x M3 insert nut (5x6mm) 7x M3x12mm bolt 2x switch (MSS22D18 ) 1x JST 2P Connector 1x 2s capacity indicator 1x 2s 18650 battery protection board 3x pairs 18650 battery contacts 1x DMW-DCC11 (BLG10E fake battery) 1x micro USB MT3608 DC-DC Adjustable Boost Module 2A (adjusted to 8.4V) -!!!!READ IMPORTANT INFO!!!!! some wires, epoxy glue and hot glue some(not all) battery contacts must be trimmed because there is not enough space, no big deal just corners <h1>!!!!!!! IMPORTANT !!!!!!!</h1> <h2>!!!! bolt assembly !!!!</h2> put together "bolt_gear_top" and "bolt_gear_bottom" with 1/4 x 16mm bolt (glue it) <h2>!!!! thumb gear install !!!!</h2> firstly put "thumb_gear" into place (in "main") then insert "thumb_gear_shaft" into it - if you insert "thumb_gear_shaft" into "thumb_gear" outside "main" body you will not be able to put it in place !!! <h1>!!!!!!!!! MT3608 IMPORTANT !!!!!!!!</h1> The workaround for the unaltered circuit is to turn the potentiometer adjustment screw 20 turns counterclockwise BEFORE connecting power! Apply only 3 volts power initially (such as a pair of "AA" batteries" while adjusting everything, even if your final input is going to be much higher (like a car battery). By default as assembled and shipped, the potentiometer wiper is about 3/4 of the way to the top. If your power supply is 13.8 volts, This will apply about 9 volts to pin 3, Vfb, of the chip, and instantly kill it before you can get started. Probe the center wiper pin of the potentiometer on the back of the board, and check the voltage. When the unit goes into a control loop regulation mode, this voltage will be right at 0.6 volts. If it is above 0.6 volts, it is just passing input through to output without any boost. Carefully adjust the potentiometer to bring the voltage at the output up to whatever you intend to boost to. Only then you can safely connect the input to whatever higher voltage power source, such as car battery, you are going to boost from. https://www.youtube.com/watch?v=VJkwtaycELk&t=13s
With this file you will be able to print Panasonic Lumix GX80/GX85 camera battery grip with your 3D printer. Click on the button and save the file on your computer to work, edit or customize your design. You can also find more 3D designs for printers on Panasonic Lumix GX80/GX85 camera battery grip.