Parametric Hangable Any-Direction Continuous Slip Clutch with optional Auto-Rewind Universal Spool Holder
prusaprinters
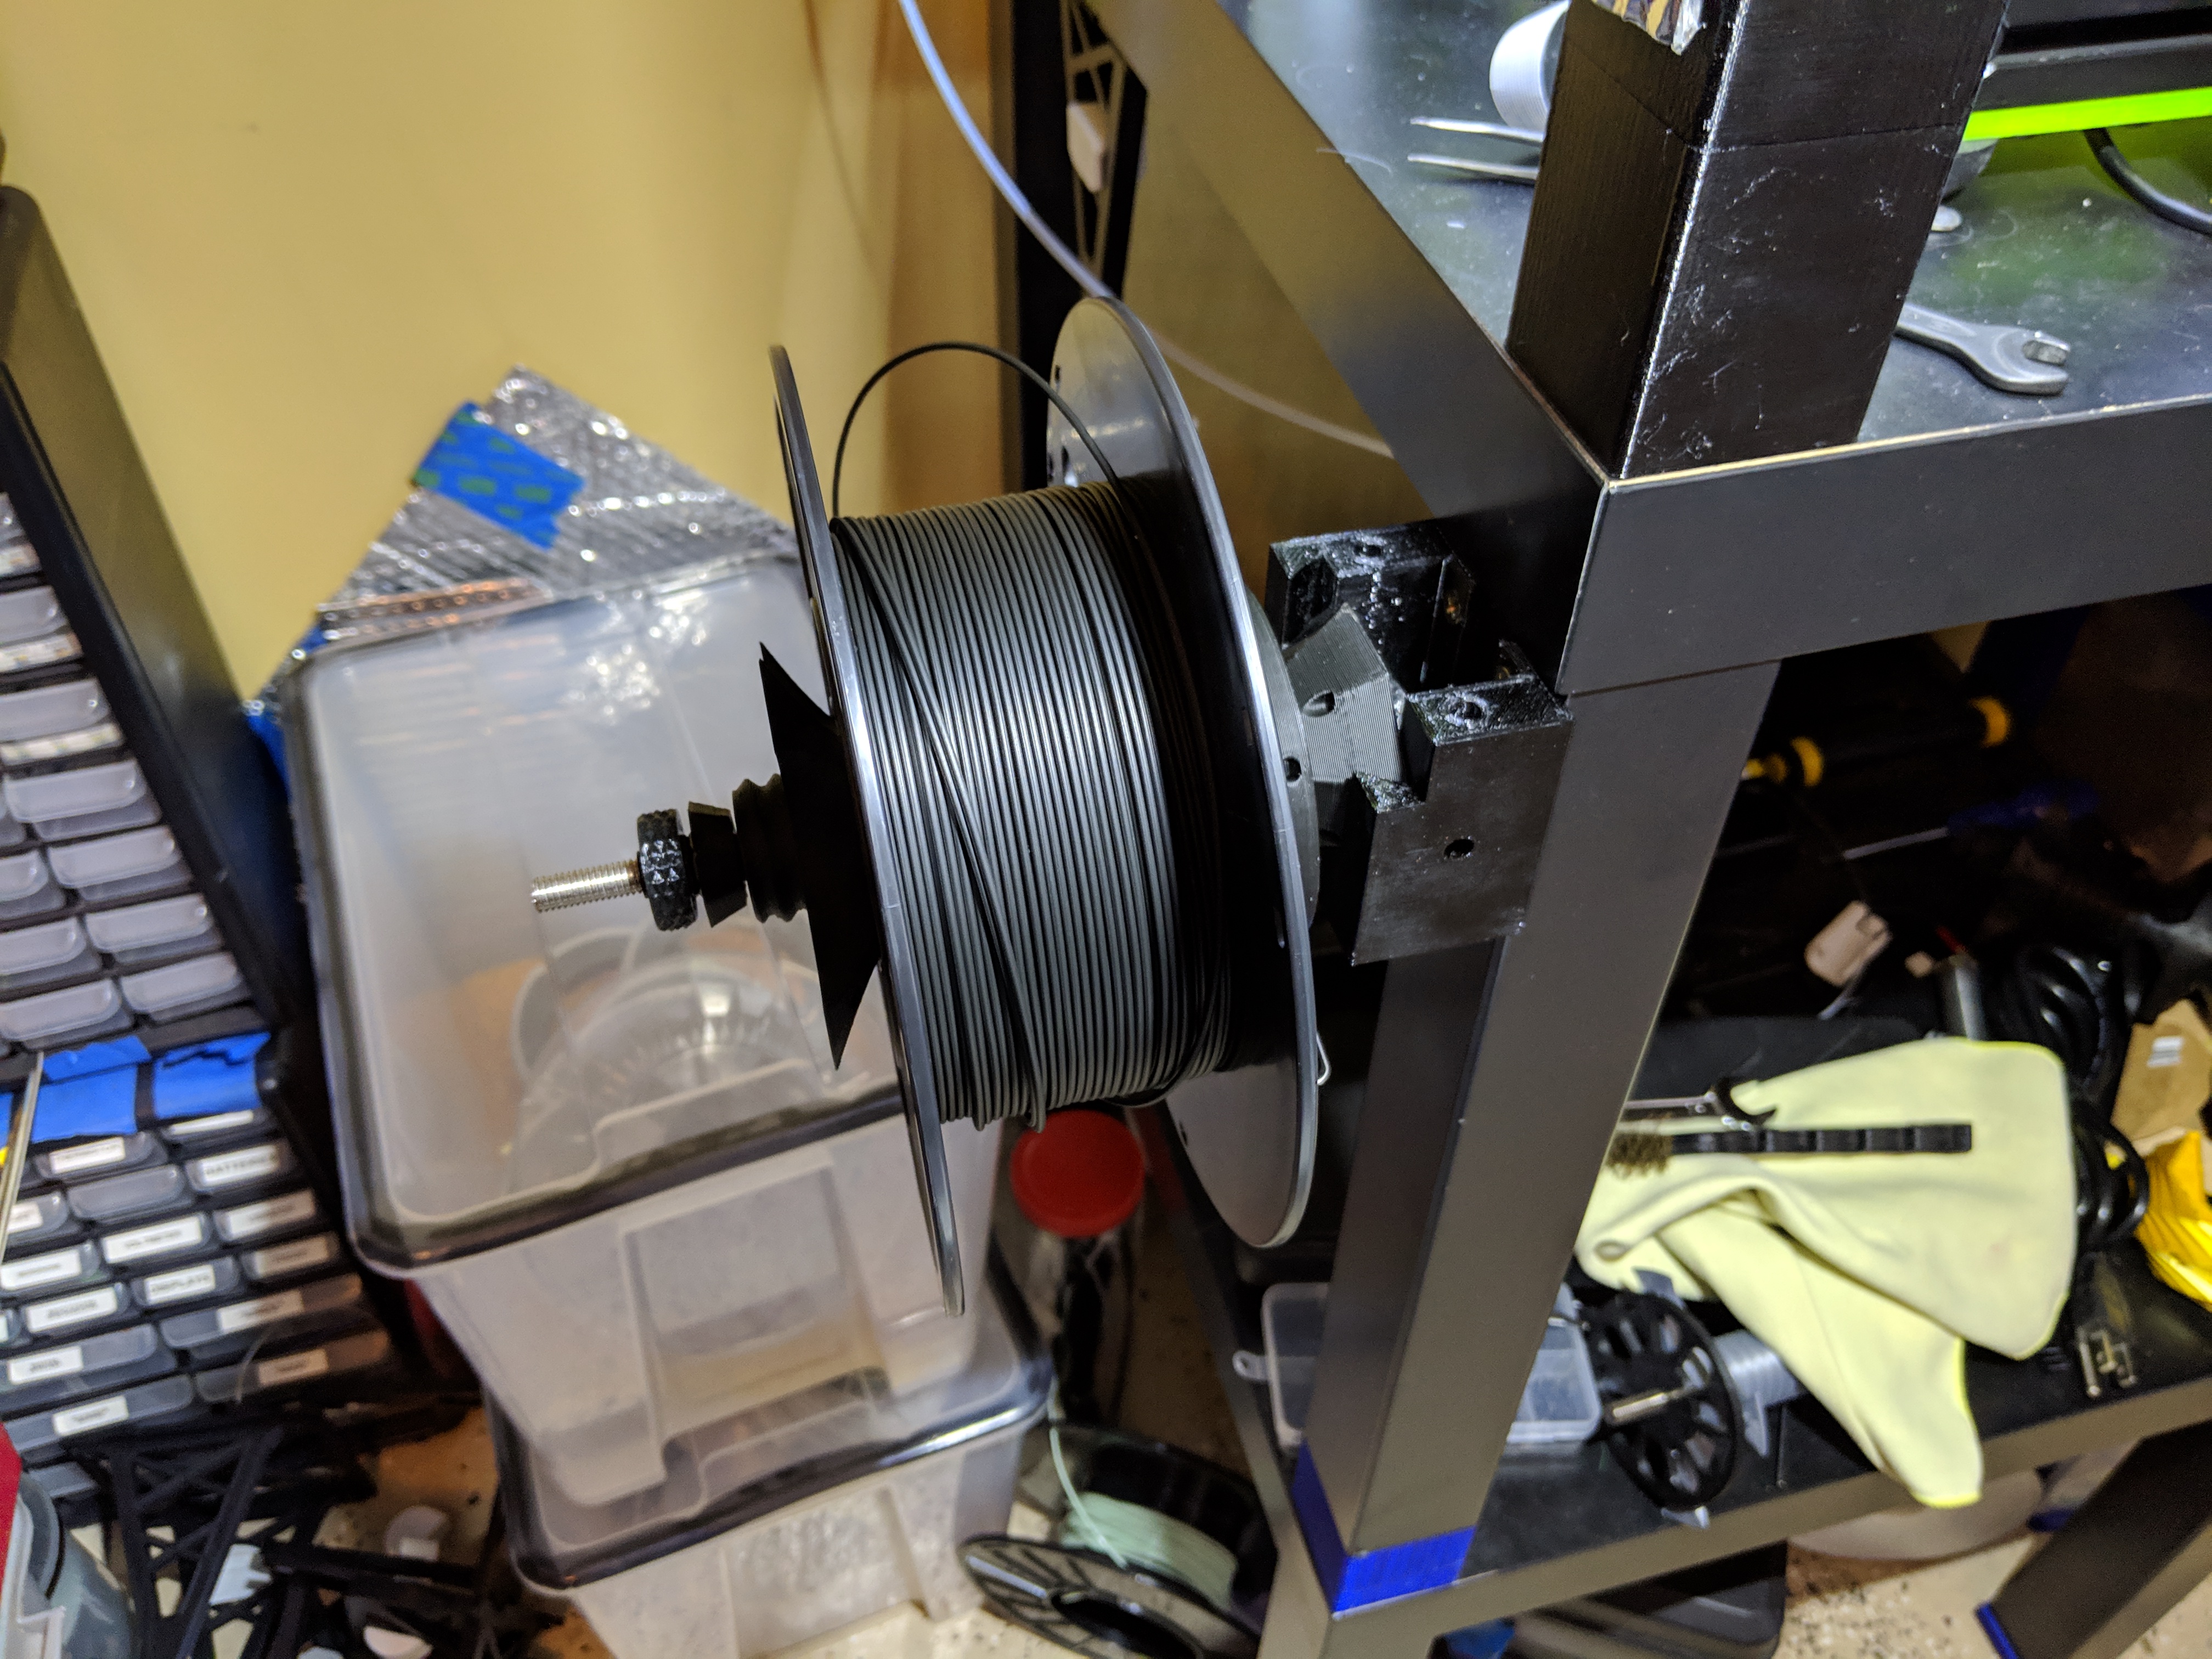
<p>VIDEO: <a href="https://youtu.be/kHT3rltCInU">https://youtu.be/kHT3rltCInU</a></p> <p>VIDEO OF WALL MOUNT: <a href="https://youtu.be/K_UAO0O55NQ">https://youtu.be/K\_UAO0O55NQ</a></p> <p>VIDEO OF NEW RETRACTABLE ID BADGE HOLDER SPRING CLUTCH: <a href="https://youtu.be/7oF00uh40uk">https://youtu.be/7oF00uh40uk</a></p> <p>I designed this to be the, "Be-all, end-all" universal spool holder. It's currently designed to hang from under a shelf/table (e.g. Ikea Lack) with the spool sitting<em>horizontally</em> (to make it easier to swap spools and load filament). However, I will be making a wall mount and a regular stand so you can use it anywhere, any which way, under any circumstances!</p> <p><strong>FEATURES</strong></p> <ul> <li>It's parametric! You can adjust<em>everything</em> to your heart's delight. Want one that uses<em>huge</em> bearings with<em>huge</em>, 3kg spools? No problem! Want to make a tiny one for sewing machine thread? No problem!</li> <li>Ever have a spool that just<em>won't behave</em> and likes to<em>unwind itself</em>? No problem! This spool holder features a<em>continuous slip clutch</em> that ensures<em>there's always tension</em> on the filament. The amount of tension applied is adjustable!</li> <li>Have a Multi-Material Upgrade that just loves to unload filament everywhere leaving a tangled mess? No problem! Print the "Retractable ID Badge Holder Auto-Rewind Clutch" instead of the regular clutch and the spool holder will auto-rewind the filament<em>in addition to acting as a continuous release clutch</em>. The release tension is adjustable just like the normal clutch.<strong>This auto-rewind mechanism is super smooth and reliable!</strong></li> <li>It comes pre-rendered for use with 22mm skate bearings or 25mm, printable Airsoft pellet bearings (model included).</li> <li>It works with a<strong>strong</strong> metal 8mm or 5/16th inch threaded rod to ensure nothing will ever break or fall apart.</li> <li>You can mount it<strong>under a shelf</strong>,<strong>on a wall</strong>, or use flat on a table with the<strong>vertical or horizontal stands</strong>.</li> <li>It's designed in such a way so as to be hangable or mountable any which way!</li> <li>It should work with<em>any size spool</em>. If you have something funky just adjust the necessary parameters in the .scad and print a customized version!<br/> Why I made this: I recently picked up Prusa's Multi-Material Upgrade 2.0 which unloads like 40cm worth of filament during filament changes. When this occurs the filament just sort of<em>spills out</em> the PTFE tubes--taking the path of least resistance--and makes a<em>giant, tangled mess</em>! I was having issues where extra "coily" (e.g. end-of-spool) filaments would get caught/self-tangled and ultimately end up with failed prints (flexibles are<em>the worst</em> in this regard).</li> </ul> <p>I tried various auto-rewinding spool holders but they all seem to have issues. The biggest one being, "it's real pain to change filaments"! Because every other one (when I started working on this) has the spool mounted vertically this means that if you place them side-by-side it's really difficult to reach behind the spools to pull and load the filament. Especially if your filament is<em>under</em> your printer (like I have with mine).</p> <p>Another problem with existing designs: They're way too easy to knock off their mounts! When reaching around the back of 5 filament spools you're likely to elbow one right off its mount or topple the whole thing over. I wanted something that would allow<em>stacking</em> the filament spools on top of each other and/or place one in front of the other while still allowing access to the ones in the back or above/below.</p> <p>This parametric universal spool holder design should solve<em>all</em> those issues.</p> <h3>Print instructions</h3><p>These parts need to be reasonably strong so go with at least 3 perimeters if using a .4mm nozzle (more if using a smaller nozzle). Infill doesn't matter much, actually! 5-15% rectlinear is probably fine for everything. I printed most of my parts at 0.35mm layer height with a 0.6mm nozzle.</p> <p>Any .stl marked like, "2x" means you need to print 2 of those items (e.g. "2x Collet.stl").</p> <p>Note: I recommend using 200mm or 8-inch long (metal) threaded rods. 150mm or 6-inch long rods won't be long enough for your average spool. This is what I'm using: <a href="https://amzn.to/2Iff9vj">https://amzn.to/2Iff9vj</a></p> <p>If you plan to use skate bearings print the "22mm" variety of the .stl files and if you plan to use the printed Airsoft pellet bearing make sure you print two of those and the "25mm" variety of the included .stl files. If you're using skate bearings you (obviously) don't need to print the "2x Airsoft Bearing 25-8-7.stl" file.</p> <p>If you're planning on using the "Retractable ID Badge Holder Auto-Rewind Clutch"<strong>I highly recommend using (good) skate bearings</strong> as the Airsoft pellet bearings can introduce too much friction for that feature to work properly.</p> <p><strong>TIP:</strong> If you're using Airsoft pellet bearings I find it's easiest to shove the pellets into the bearings while they're still stuck to the build plate! The inner race will come loose after the first pellet is inserted but the outside race should stay put making the process quicker and easier than trying to keep them both from sliding off the table while you insert the pellets =)</p> <p><strong>Assembly</strong></p> <p>NOTE: The pictures should help a lot with this--it's not Kerberos... You probably don't need these directions =)</p> <ul> <li>Start by pressing the bearings into the "Threaded Rod" (use a vice if necessary or just give em a whack with something hard).</li> <li>Screw one "Collet" (thing that tightens against the spool) all the way to the end of the "Threaded Shaft" with the flat side facing towards the lip at the end (that prevents it from going further). It should be reasonably tight at the end--this collet isn't going to move.</li> <li>Insert your<em>metal</em> threaded rod through the printed threaded rod on the opposite end of the collet.</li> <li>Screw the "Shaft Base" on to one side of the metal threaded rod and also screw a "Tension Knob" behind it so it doesn't unscrew itself (don't tight much yet--we'll do that at the end).</li> <li>Slide the "Retractable ID Badge Holder Auto-Rewind Clutch" or "Continuous Slip Clutch" on to the center shaft (or metal rod) and press it into the flat side of the collet carefully lining up the four pegs to the four holes in the collet. It should be a tight fit! Note that the clutch disc may have about ~1mm of the pegs sticking out (e.g. they won't go all the way in). That's OK!</li> <li>If you're using the "Retractable ID Badge Holder Auto-Rewind Clutch" you'll need to slide one or two retractable ID badge holders onto the two slotted sides of the clutch and then pull out the end of the cord and slot it into the center ring (probably want to remove anything like keyrings, snap clips, etc first). Then you can place the ring on the center shaft.</li> <li>Fit a nut into the "Hang Collar" and screw it on to the center shaft with the "pointy end" facing toward the spring/clutch. This is where you adjust how tight you want the tension... The tighter the Hang Collar presses against the clutch/spring the more tension there will be. You can use the "Tension Knob" to make this part easy on yourself (no need to grab a wrench). You'll probably want 4 of them but 2 or 0 is fine too.</li> <li>Fit a nut into a tension knob and screw it on to the metal threaded rod with the nut side facing towards the hang collar. Use this to "lock" the tension on the Hang Collar so it doesn't loosen.</li> <li>Make sure that any excess metal rod is sticking out the bottom of the Shaft Base and as little metal as possible is exposed above the Hang Collar then tighten the bottom tension knob against the Shaft Base to lock it in place. You may have to unscrew the Hang Collar a bit to move it up the center shaft.</li> <li>Place a spool on the spool holder's threaded rod and screw on the second collet to hold it (reasonably) tightly in place!<br/> That's it! Now you can hang/place your spool holder!</li> </ul> <p>Once the spool holder is assembled you only need to unscrew that one bottom collet to replace the filament spool. It should only take a few seconds!</p> <p><strong>Pro Tip:</strong> Is your spool holder's clutch/spring<em>squeaking</em> or "farting* as it turns? Easy fix! Just apply some graphite (or just sand it slightly and use a pencil to draw all over it haha) between the clutch/spring and the Hang Collar. It'll make it silent but won't make it so slippery as to render it ineffective (which is what would happen if you used a teflon or silicone-based lube).</p> <p><strong>Pro Tip:</strong> If you're using the under-shelf mount it's<em>real easy</em> for the filament to just fall off the sides off the spool if you're not careful. The trick is to<em>pre-tension</em> your auto-rewind spring. Spin it around a few times before you start loading the filament. That way it should be tugging on it just enough to prevent any unfortunate spillage =)</p> <p><strong>Mounting the Mounts</strong></p> <p>The "Under-Shelf Mounting Bracket" has three screw holes. Just screw it into the underside of wherever you want to hang your spool with the open side facing wherever it will be easiest to slide spools in and out of it.</p> <p>The screw holes were meant for use with screws that ~4mm diameter shafts and ~8mm (tapered) heads but whatever fits will probably be fine =)</p> <p>Just be careful not to screw them in too tight or the part will crack!</p> <p>The "Wall Mount" (both of them) have four screw holes. Just screw it into a wall or flat surface somewhere and, well, that's it. You're done.</p> <p>The "Vertical Stand" requires a "Wall Mount" to function<strong>and does not work well with auto-rewind</strong> (it'll lift itself up and move all over the place--I mean, you could just glue it or screw it in place I guess)... Line up the holes on the bottom of the Wall Mount with the Vertical Stand and insert two 20mm Accessory Pegs to hold it in place. Then slide the little clip (that's included with the Vertical Stand model) down the back of the Wall Mount (long side pointing down and farthest away from the Wall Mount) until it slides over the back side of the Vertical Stand. It's purpose is to prevent the Wall Mount from tilting forwards in the stand while it's holding a spool. If that clip is not very tight that's OK... It doesn't need a death grip on the Wall Mount to do its job :)</p>
With this file you will be able to print Parametric Hangable Any-Direction Continuous Slip Clutch with optional Auto-Rewind Universal Spool Holder with your 3D printer. Click on the button and save the file on your computer to work, edit or customize your design. You can also find more 3D designs for printers on Parametric Hangable Any-Direction Continuous Slip Clutch with optional Auto-Rewind Universal Spool Holder.