Parametric PIR sensor box
thingiverse
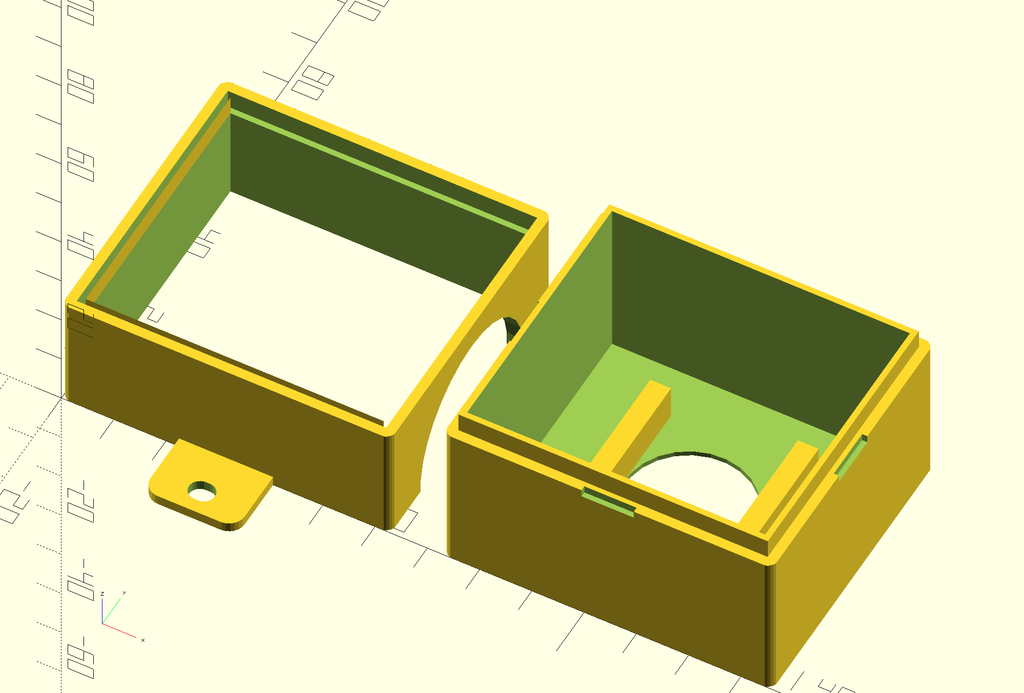
# Parametric PIR sensor box I started out re-mixing https://www.thingiverse.com/thing:266912, which I liked quite a bit. My immediate need was for something with different dimensions. However, I wanted to get familiar with OpenSCAD, so I made quite a few changes. The permanent home of this is at https://gitlab.com/wjcarpenter/3dprinting/-/tree/main/parametric-PIR-sensor-box This design is also published at https://www.thingiverse.com/thing:5414874 - First, there are a ridiculous number of optional features and customizations. - Second, I reorganized and refactored the code quite a bit. The original author might have a hard time recognizing it. I did that on my way to understanding how it all worked, and also to organize things to my liking as I added the ridiculous amount of extra stuff. Here are the features, almost all of which are optional and customizable. Dimensions are conventionally in millimeters. - You can choose to render just the top or bottom if you don't need both. - You can also render it with the top attached to the bottom to see how the finished case will look. - Give dimensions for the PIR sensor board. These are fairly standardized, but they come from many unnamed manufacturers. Slight variations are likely. - Give the dimensions of the PIR dome that will stick out through the top of the box. This is usually a dome on top of a thin rectangle. You can choose to make a hole for the dome or for the rectangle. - Give dimensions for total length and width inside the box. That's in case you need a box larger than the PIR sensor board. - Give the inside height of the top and bottom halves of the box. - Give the thicknesses of the ceiling (top half) and floor (bottom half) - Give the thickness of the vertical walls. - Set a value for the radius of the rounded corners on the outside vertical walls. - PIR board standoffs can be centered on the short sides or at the four corners of the board (or neither or both). The PIR boards have small holes centered on the short sides, so you could screw or hot-melt glue them to the standoffs. - There can be edge clamps for the short or long sides of the PIR board, or both. If you get the measurements right, the clamps should hold the PIR board in place with friction. If they don't, you could further secure the board in place with hot-melt glue. - There can be mounting ears outside the bottom or top half. (It only makes sense to have them on the top half if you are not using the bottom half.) Mounting ears can have a slot for screws. - The bottom half can have screw holes in the 4 corners of the floor. - The bottom half can have a centered rectangular cut-out of the floor. You can even remove all of the floor. - There can be a rectangular or semicirclular cut-out for cord entry into the box. - There can be a lip (protrudes from top, recessed into the bottom) for joining the halves together. You can make the top lip slightly smaller than the bottom lip. You can remove the corners of the top lip. (Those last two things were to make it easier to fit the halves together. In the end, I did not find them necessary.) - You can put coin notches on any of the sides of the top (for prying the halves apart). You certainly won't need the same options I needed for this box, but if you are curious you can find it in the JSON preset file included.
With this file you will be able to print Parametric PIR sensor box with your 3D printer. Click on the button and save the file on your computer to work, edit or customize your design. You can also find more 3D designs for printers on Parametric PIR sensor box.