Parametric Printed SilkScreen w/ optional frame and squeegee

Parametric Printed SilkScreen w/ optional frame and squeegee

thingiverse

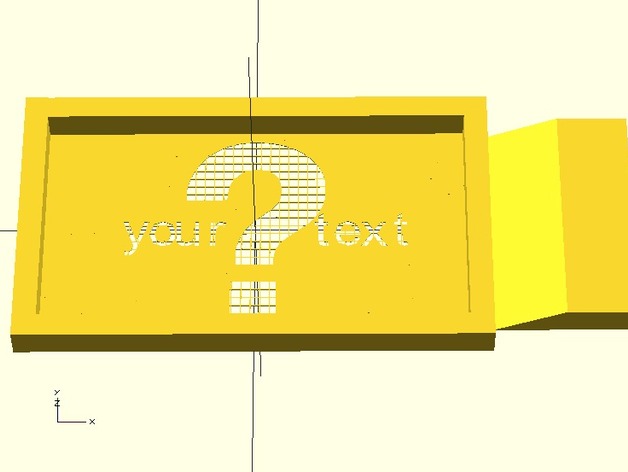
Converted the business card into a silkscreen stencil with optional frame and squeegee of the exact size. Also added optional text with, or in place of, image. Many thanks to Anoved for pointing out how to get write.scad to work in the customizer. For some reason I can't respond to his comment, but the help is much appreciated and text now works online. For offline use, you need Write.scad and Letters.dxf from HarlanDMii I've tested it now, but the size of text was really too small to print with my printer. The result is pictured above. It half worked. A larger pattern should be fine. Also, Cura is dropping out the grid lines at 0.2mm and 0.3mm line width. I've asked in their forum what is the minimum Cura will NOT drop out. Update: It's the " shell thickness" setting in Cura that makes all the difference, no matter the machine Nozzle diameter. That is, at least as far as what it /tries/ to print. I'm not saying I can actually print a finer line, but setting the shell thickness to anything less than the size of the lines causes them to show up. As suggested by a friend on Google+, it might be better to spray glue a screen to the print bed and then print PLA over it. That would provide a fine screen and allow you to 3D print rather than photographically expose silkscreen emulsion. Possible problems: Not sure how fine the silkscreen grid needs to be, or how thick, or how wide, or... Wish it were easier to provide multiple lines of text. (Any ideas?) The first layer is everything on this, so getting it to adhere is key. Update 20141204: Had a problem in customizer where it would preview fine and then throw multiple "WARNING: Imported file (write/Letters.dxf) found in document root..." and "ERROR: Object isn't a valid 2-manifold! Modify your design." messages and fail to create an .STL file. I spent hours messing about to figure out why and eventually figured out the problem was the squeegee; if you set the squeegee height to 0 it rendered just fine! I've changed the polygon for the squeegee and it appears to work correctly now. If it doesn't work for you, let me know and try with the squeegee height set to 0, or if you want that, install OpenSCAD and download files for offline use. I also added tabs to organize the options, and added support for the new format of poly data from Stencil-o-matic. Update 20141205: Rearranged the tabs and changed defaults to more reasonable settings. The main thing is the width of the screen grid lines can't really be smaller than the diameter of the print nozzle. So I defaulted it to 0.5 now since that's generally the largest one anyone has. Instructions STATUS: Seems to work fine in OpenSCAD offline, and appears to work now in Customizer Step 1: Download for OpenSCAD, or open in customizer, then change text and input image. If you just want text, delete the input, if you just want an image, paste in an array of pollygons (see http://chaaawa.com/stencil_factory/ for an easy way to copy a poly array from your logo). Mess about with the other settings to get it all in and how you want it. Step 2: Download and print. If the screen doesn't come out, adjust settings and try again. Step 3: With sharp scissors or knife, cut off the squeegee. Step 4: Place over material to be printed, Add paint to one side, then draw it over the surface with the squeegee. Lift and admire.

Download Model from thingiverse

With this file you will be able to print Parametric Printed SilkScreen w/ optional frame and squeegee with your 3D printer. Click on the button and save the file on your computer to work, edit or customize your design. You can also find more 3D designs for printers on Parametric Printed SilkScreen w/ optional frame and squeegee.