Parametric Proxxon MF70 CNC kit
thingiverse
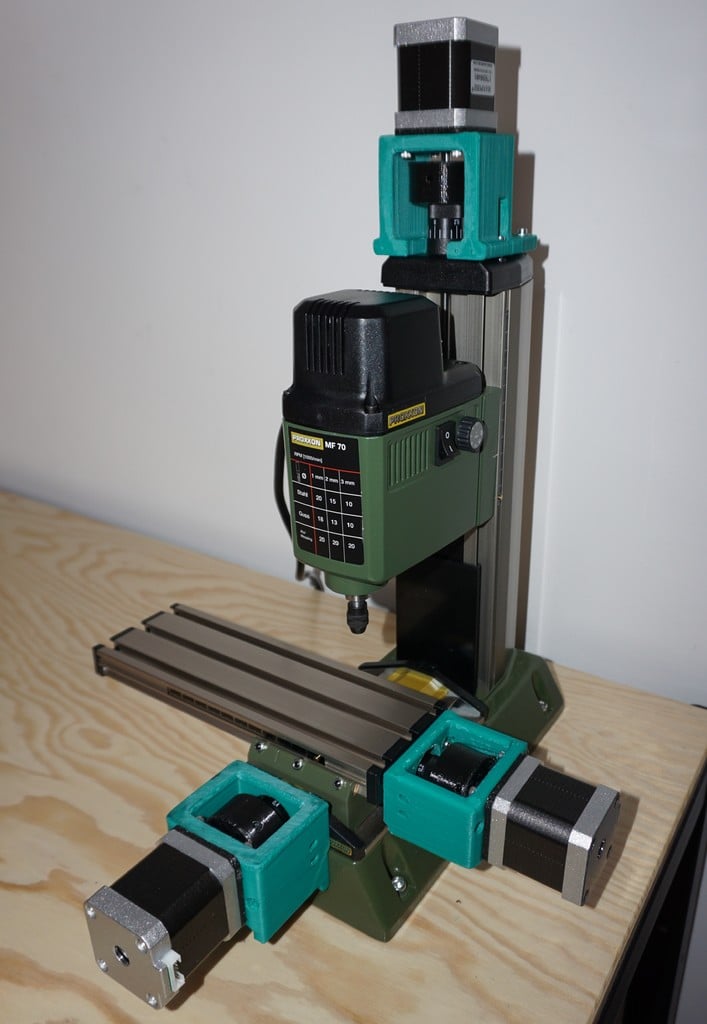
Parametric Proxxon MF70 CNC kit The Proxxon MF70 milling aluminum: https://www.youtube.com/watch?v=0W1iQ1PUNVY The Proxxon MF70 engraving aluminum: https://www.youtube.com/watch?v=y5sDax8FGDc Following improvements/changes have been made compared to the design of ttsalo: - Full x-axis table range is now available. Using the ttsalo design I lost 5 mm of the x-axis range; perhaps this issue was caused by changes Proxxon did make to the design of the MF70. - No bearings need to be removed/replaced; the x/y/z axis is simply driven by a coupler connecting the stepper directly to the handwheel. The coupler is slightly flexible since it is made out of NinjaTek. - Holes for end switches have been added for all axes Required 3D printed parts: - BracketX.stl (1x) - BracketY.stl (1x) - BracketZ.stl (1x) - CouplerXY.stl (2x) - CouplerZ.stl (1x) Optional 3D printed parts: - ShockAbsorber.stl (3x) - DirtCapBracketX (1x) - DirtCapBracketY (1x) Required other parts: - Nema17 (3x) - hex screw m3x16 (15x) - grubscrew m3 (6x) - nut m3 (6x) - hex screw m3x25 (4x) or diameter 3 mm screws that are 8 mm longer than the originals (4x) - hex screw m3x30 (4x) - washer m3 (4x) Optional other parts: - endswitch for x-axis and y-axis (2x) - screw m2.5x20 (4x) - nut m2.5 (4x) - endswitch for z-axis (1x) - screw diameter 2.5 mm, length 15 mm (2x) Suggested Materials: - ABS (95% infill): BracketX, BracketY, BracketZ - NinjaTek Cheetah (50% infill): CouplerXY, CouplerZ, DirtCapBracketX, DirtCapBracketY - NinjaFlex (20% infill, not important): ShockAbsorber - No supports are required Assembly instructions x and y-axis: - Attach steppermotor to bracketX(Y) and shockabsorber using hex screw m3x16 (4x) - Assemble couplerXY using 2 grubscrews and 2 m3 nuts - Attach couplerXY to handwheel using hex screw m3x16 (of course the handle from the handwheel needs to be removed first) - Attach bracketX(Y) to x/y table using hex screw m3x25 (2x), (or use the longer screws with diameter 3 mm if they can be sourced) Assembly instructions z-axis: - Attach steppermotor to bracketZ and shockabsorber using hex screw m3x16 (4x) - Assemble couplerZ using 2 grubscrews and 2 m3 nuts - Attach couplerZ to handwheel using hex screw m3x16 (of course the handle from the handwheel needs to be removed first) - Attach bracketZ to z-column using hex screw m3x30 (4x) Remark: - I did tap M3 thread in the table for the X/Y axis since I could not source screws with the same pitch that were originally holding the caps. This is not required if screws can be sourced that are about 8 mm longer than the original ones. Changes 21 May 2020: - Added optional dirt caps for BracketX and BracketY. Changes 01 Jan 2021: - Added optional gauge holder "GaugeHolder.stl"
With this file you will be able to print Parametric Proxxon MF70 CNC kit with your 3D printer. Click on the button and save the file on your computer to work, edit or customize your design. You can also find more 3D designs for printers on Parametric Proxxon MF70 CNC kit.