parkrun finishing token dispenser MK6
thingiverse
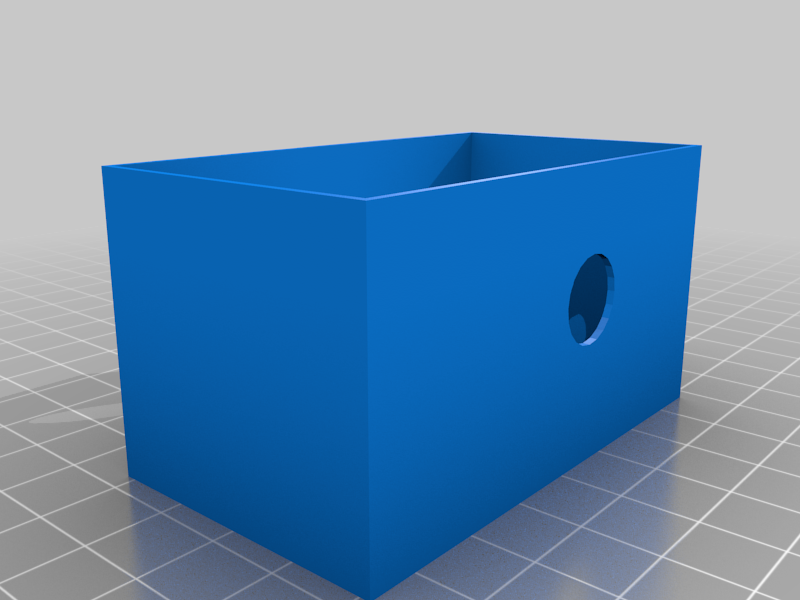
This is the Mark 6 parkrun finishing token dispenser. I have created a whole new Thingiverse entity for this because it’s a complete redesign. The previous designs relied upon an elastic or rubber band to drive the tokens to the end from where they are withdrawn. This limits the size of the dispenser to only about 140 tokens and so most parkruns need multiple dispensers. The departure in this version is that 1. It works on gravity and so no elastic band is needed 2. It can be extended by bolting together modules These two points combined, means that at over 600 tokens can be loaded and all dispensed with no changeover. Note that this design has been sized to take tokens up to 54mm x 28mm, 1mm thick. I know that there might be token sizes in circulation larger than this. If you have token sizes larger than this let me know and I will endeavour to cut a design for this token size. (see update at end of text) Another disclaimer is that due to the COVID-19 pandemic, this design has NOT been field-tested. So, if you are in a country where you are able to do parkrun, and you try this, you are very much a guineapig so let me know how you get along! The dispenser must be kept upright all the time while it is being used, and this can be achieved using a shoulder strap (see video and picture). It has also been suggested that someone with woodworking skills could make a stand to hold the dispenser during a parkrun. To make a dispenser you will need to print front, middle and rear sections. I guess that a small parkrun could omit the middle one and (untested) larger parkruns could use more than one middle section. In my designs, I try and avoid the need for supports as much as possible. All the components of the parkrun finishing token dispenser can be printed without adding supports. However, there are a few places with a bridge that goes all the way across the width of the device and I have found that a bit too long to avoid supports completely. I have therefore created custom support structures that will give necessary support to the bridged sections without impacting any other part of the print. These are suffixed “supported” in the file names. If you use the files without these supports, then you will need to add them using your slicer (mainstream slicers allow you to selectively apply supports). All the other components do not require supports. I have used the default print settings on my printer and PETG filament. I have chosen PETG simply for its resilience; previous versions I have printed using PLA and have had no problems, so you can use PLA if you prefer. To bolt together the sections, you will need 4 M6 Bolts (5CM long) and nuts. The lid is held in place using a couple of magnets and the design included the holes where they can be inserted and glued into place. The magnets should be circular, maximum 15mm in diameter and 4mm in width (powerful magnets to this dimension are available quite cheaply but remember to keep these away from children). Make sure the magnetic hold on the lid works before gluing the magnets in place (get one the wrong way round and it will have the opposite effect and make it impossible to close the lid). The file “MK6 mag hole lid print 2” contains two little lids to cover the hole containing the magnets. These lids should be glued over the magnet holes. With the magnets in place, the rear sliding lid snaps in place strongly. You will also need someone with sewing skills to craft a strap. How all this hangs together will be obvious from the pictures and video. When the dispenser is full, the end block should mean that the tokens cannot move around in the dispenser. However, once tokens have started to be issued then if the machine is not kept the right way up, tokens could move around and be muddled. This ought not to be a problem if the shoulder strap or a stand is used. The block that sits behind the tokens must be of an exact size such that the machine is completely full at the start (so tokens don’t move around in transit). I have included a block which is 8CM long. If this don’t fit exactly then you could add or take away a few tokens or produce a block to the exact size yourself. I suggest that you add weight to the block by putting some plasticine or resin inside. If you look at the photo and video, it should be obvious how the various components fit together. If any more clarity is required, then send me a message and I will see if I can help. UPDATE 24 April 2021 - I have now uploaded a set of STLs for larger finishing tokens. The new files all prefixed "63mm" are designed to take finishing tokens 63mm x 28mm. If you have tokens to this larger dimension, use the 63mm files. If there is no 63mm version, then the standard file for that part will work with the larger machine. Note that the 63mm designs are un tested so if you print these, let me know how you get on, please let me know.
With this file you will be able to print parkrun finishing token dispenser MK6 with your 3D printer. Click on the button and save the file on your computer to work, edit or customize your design. You can also find more 3D designs for printers on parkrun finishing token dispenser MK6.