Parkside X20V battery adapter - Mini Power Supply
thingiverse
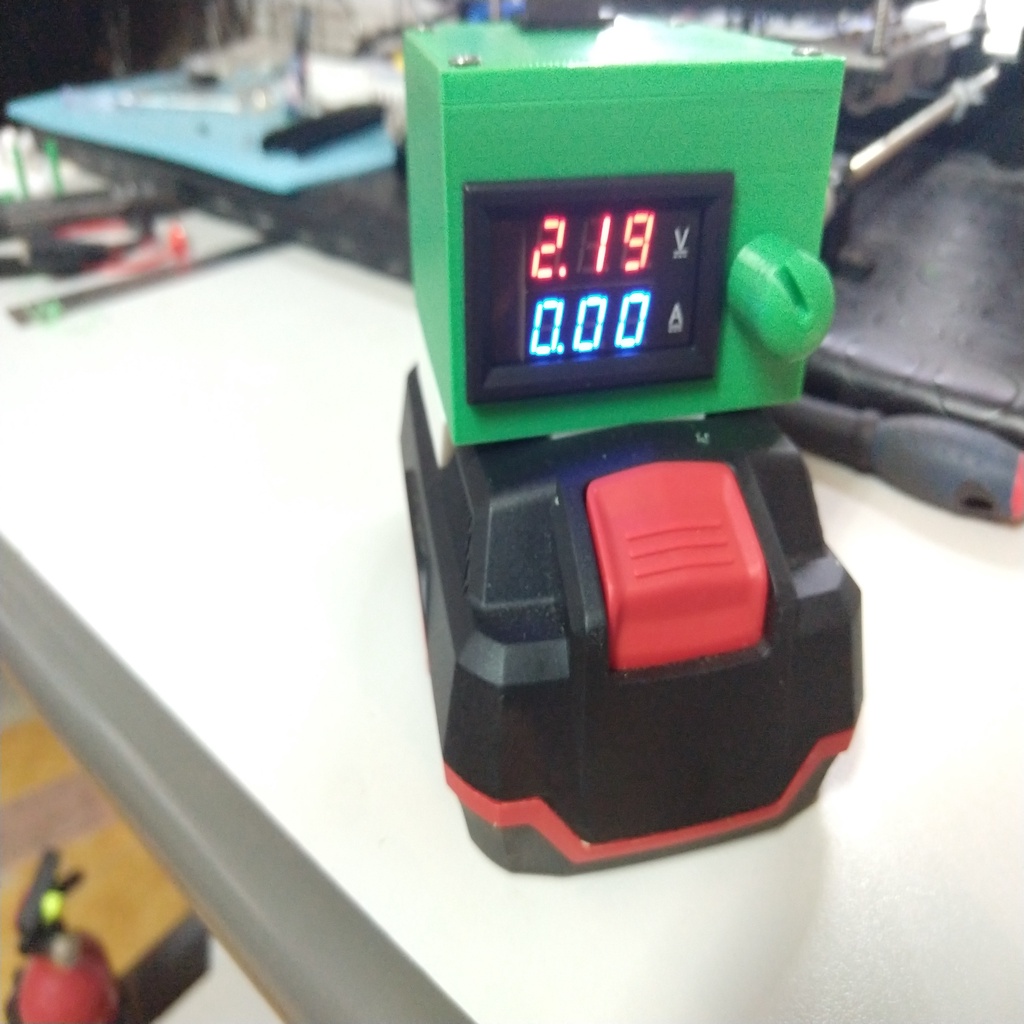
Starting from nullusr's design, I used the original battery rail piece, and created a mini power supply using a DC-DC buck converter (LM2596) and a Voltmeter-Ampmeter display (YB27VA ), fitting everything inside a relatively small box. The output comes from 2 banana plug sockets on the back, and it can be switched on/off with a pushbutton on the top. I also added a fitting potentiometer knob :) Connections: - +20V from battery to DC-DC IN+ and YB27VA supply+ (the thin red wire) - 0V from battery to DC-DC IN- and YB27VA supply- (the thin black wire) - DCDC OUT+ to YB27VA PW+ (thick red wire) and one leg of the pushbutton - DCDC OUT- to YB27VA COM (thick black wire) - YB27VA IN+ (Thick yellow wire) to black banana plug socket - The remaining leg of the pushbutton to the red banana plug socket I removed the original 10kOhms trimmer in the switching DC-DC converter, and put a sturdier potentiometer I had spare, which could fit in the power supply box. I had to also add spacers and a block to keep it in place, since it did not have a nut to block it. Depending on the potentiometer you have, you might just need a washer and a nut to keep it in place. with a 10kOhms potentiometer, output voltage range is 1.2-19.8V with a fully charged battery. Buck converter is rated up to 3Amps so it should be fine. The only downside is that, with these electronics, it is not possible to limit the output current. BOM: 4x M4x16 bolts + 4x M4 nuts to fix rail and box together (or 3x M4x16 + 1x M4x20 if the potentiometer block is mounted) 4x M3x10 bolts (to screw the lid to the box) 1x YB27VA display ( https://www.amazon.com/BenchTech-BT-YB27VA-2-color-Voltmeter-Red-Blue/dp/B00ML6VVUE ) 1x LM2596 DC-DC converter (https://www.amazon.com/LM2596-Converter-3-0-40V-1-5-35V-Supply/dp/B01GJ0SC2C ) 1x 10kOhms potentiometer (like this one: https://www.amazon.com/Uxcell-a15011600ux0235-Linear-Rotary-Potentiometer/dp/B01DKCUVMQ/ref=sr_1_4?keywords=10k+potentiometer&qid=1572095546&sr=8-4 ) 2x banana plugs (red and black) 2x banana plug sockets (e.g. like this: ( https://www.amazon.com/Hilitchi-Binding-Terminals-Banana-Arduino/dp/B07PFMD1N2 ) 1x self locking pushbutton switch to enable disable the output sockets some female fastons for the pushbutton some red and black awg14 (or similar) wires. I used about 30 cm each. some awg 22 wire for the 3 pins of the potentiometer (about 7-8 cm each) some soldering skills :) ** EDIT: added original adapter battery rail ** ### Print Settings --------------------------------------- **Printer:** Anet A8 **Supports:** Not required **Resolution:** 0.2 0.32 for the lid **Infill:** 20
With this file you will be able to print Parkside X20V battery adapter - Mini Power Supply with your 3D printer. Click on the button and save the file on your computer to work, edit or customize your design. You can also find more 3D designs for printers on Parkside X20V battery adapter - Mini Power Supply.