Parts for Adding Third Z Screw to D-Bot
prusaprinters
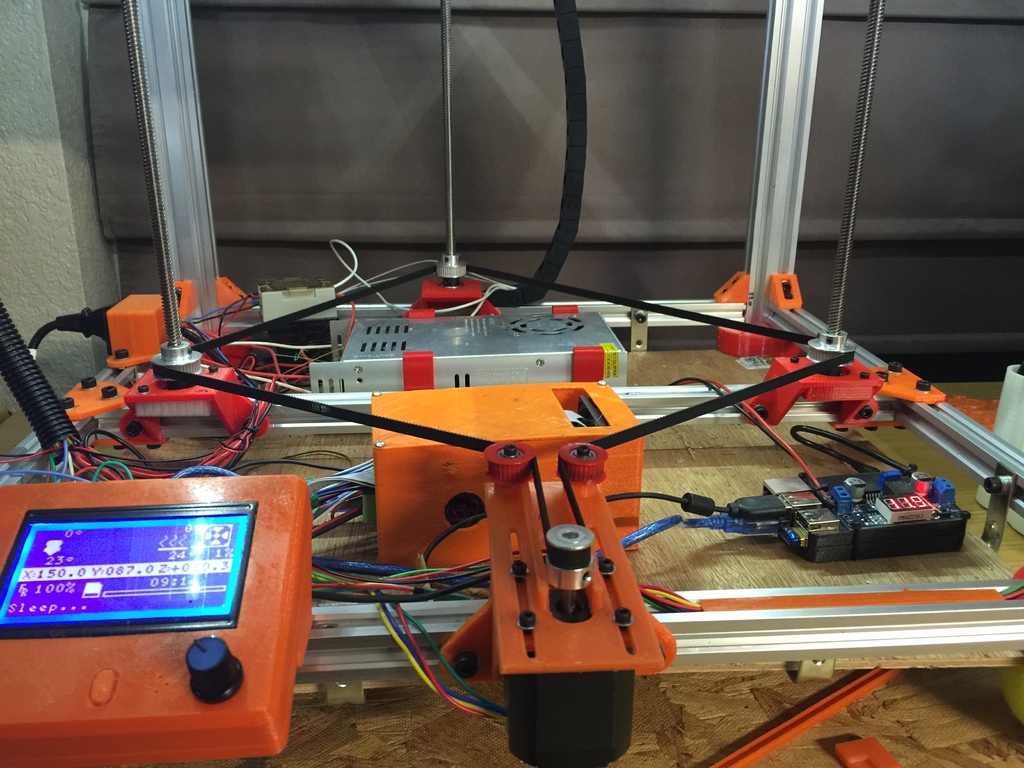
<p>NOTE: Please see the update and the end for description of the latest configuration.</p> <p>I wanted to add a third lead screw to my D-bot. I also wanted to drive all the z-screws with one stepper, with GT2 belts to keep everything in sync. I added another 2040 extrusion to the front of the D-bot bed and made adapters to hold a 608zz bearing in the motor mount. I also made a motor mount that holds a 608zz bearing at the right position to line up with the lead screw bracket on the bed. These parts can be used in a few different ways.</p> <p>Mount the z motor on the front of the D-bot, and use the extended_lead_screw_bracket on the bed. It is designed to line up with the motor.</p> <p>-or-</p> <p>Mount the 3rd_z_screw bracket on the front of the D-bot, and use a regular lead screw bracket (from the D-bot files).</p> <p>The 608_z_adapter can be used to replace a stepper motor with a 608zz bearing.</p> <p>The ramps_idler_cover is just something I used on my ramps box to let me mount some flanged bearings as idlers. The GT2 belts need to be tensioned somehow.</p> <p>I don't consider this a full-blown, print-and-install solution. You still have to find pulleys, belts, bearings, hardware, and do some experimentation, but if you're in the middle of all that, you might find some of these parts useful.</p> <p>Update: The first pictures I put up show a screw and bearing mounted at the front of the machine. The last picture I put up shows the motor mounted in front. This allowed me to make the standoffs for the idlers shorter and therefore more stable. I also added a model for a nut holder for the standoffs. It is designed so you can pause the print and insert a 3mm nut - you have to create the pause yourself, though. The nut holder has a tab that slides in the slot when the idler is mounted, so it's easier to tighten and adjust.</p> <p>Update 9/9/16: I have just finished upgrading my D-Bot to a 300x300 bed, and re-did the lead screw configuration. The third screw is now mounted at the back of the bed instead of the front, and all three screws are driven by a separate motor, instead of having one of the screws driven directly. This means the motor can have a GT2 20T gear while the screws have 40T, for more precision and torque. The separate motor is mounted in the same mounts as used on the original D-Bot and there is and adjustable plate with idlers to help tension the GT2 belt.</p> <p>The idler wheels used here were created using thing 16627 and then modified in tinkercad to hold 623 bearings, which are what I had handy. Again, I'm making these parts available in case someone is trying to put a setup like this together, but they'll probably still have to figure out and fabricate a few things for their specific machine.</p> <p>I tried to list this as a remix of the D-bot by spauda01, but no matter how I tried, the remix search function would not pick it up. For those interested, it is thing 1001065.</p> Category: 3D Printer Parts
With this file you will be able to print Parts for Adding Third Z Screw to D-Bot with your 3D printer. Click on the button and save the file on your computer to work, edit or customize your design. You can also find more 3D designs for printers on Parts for Adding Third Z Screw to D-Bot.