Passenger coach to the locomotive The Rocket 1:32
thingiverse
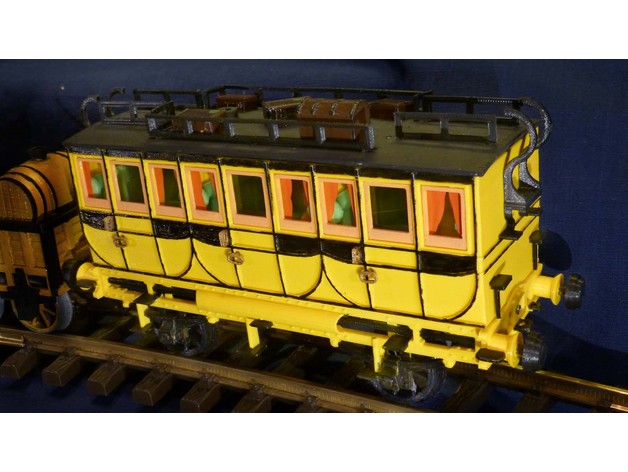
This fall we went to the UK and the first place we visit was Widescreen Weekend, in Bradford. After that we had a few days over so we went to York, Railway Museium. There they have a replica of The Rocket. (The original is in London) it was a special feeling to stand next to the famous locomotive. They also had a coach linked to the locomotive. The locomotive that I made a 3D model of in Nov 2014, and who has become very popular and has now been downloaded more than 11,000 times. It was then i realized that The Rocket is not complete untill there is a coach that belongs to this train set. When I got home I started to sketch and draw on this railway wagon.The result of this you see here, I myself am quite happy with how it turned out. locomotive The Rocket you will find herehttp://www.thingiverse.com/thing:564002 https://www.youtube.com/watch?v=zjc53jI2AKQ Print Settings Printer Brand: MakerBot Printer: MakerBot Replicator 2X Rafts: No Supports: No Resolution: 0,2mm Infill: 20 Notes: I have used 0,3mm nozel but a 0.4mm works well. Perhaps the small door handles can be a little trickier 0.4 nozel. except for No. 2 roofs and No. 4 short side, where I have used support on these. Post-Printing As usual, it will be necessary drilled and sanded. depending on the machine and settings. Window frames can be printed in a light brown color if you have one. Otherwise paint these in the appropriate color. Glue a clear plastic, such as OH transparencies. then if you want you can easily paint the curtains on them. When this is done, you just have to shoot down the windows frame in the car body, the frame will be secured by the built-in tensioning arms. After that you can glue the seats in place if you want them. The roof needs to be filled and sanded, because it has a slight bend as it becomes longer distance between the layers surfaces. This smoothed with a little filler. files 06, 07 screwed to underneath carbodies. files 19 are fastened with screws on the longer chassis sides first. then screwed this package to underneath carbodies. This should not be screwed down to the bottom, but only so far that the long sides are pressed in place. see this on the pictures This is the same for files 04 that sits on the short sides, these must not screwed in completely but only until the short end is firmly. The screws I used 2 x 10 mm I have also added a fixture to get the wheels at the right distance and easier to get it in 90 degrees to the shaft. See the picture with the green fixture. Please add up pictures of your finished wagons
With this file you will be able to print Passenger coach to the locomotive The Rocket 1:32 with your 3D printer. Click on the button and save the file on your computer to work, edit or customize your design. You can also find more 3D designs for printers on Passenger coach to the locomotive The Rocket 1:32.