Patch Panel Cable Support
thingiverse
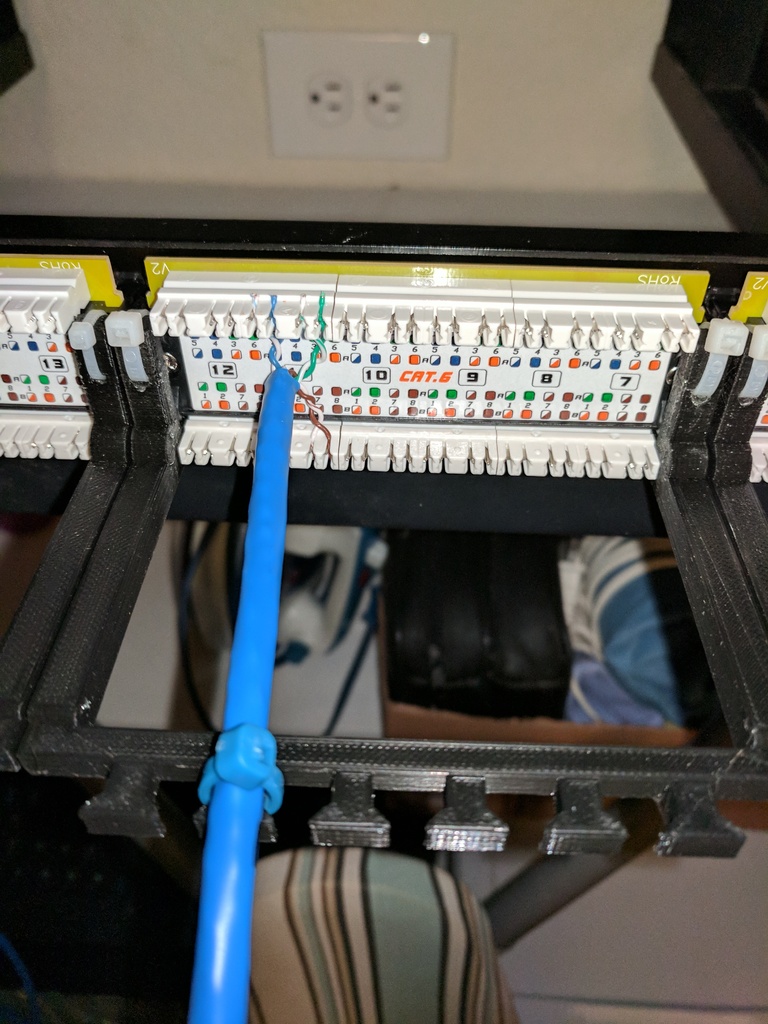
Very narrow thing here, but maybe someday, someone will dig it! I recently wired my house with Ethernet and have all wires terminate centrally at a patch panel. I thought of a 'better way' to manage and support the cables for my patch panel. The patch panel manufacturer's design implies the cables will waterfall over each other and then be zip-tied. Problem with this is you have to undue most wire management [when adding or replacing wire] and terminate wires in a cascading order. This design was inspired by youtuber Fiberninja's video "Working with Keystone Patch Panel" https://www.youtube.com/watch?v=YgBSpYiJQHM . He is awesome. The design is specific for the patch panel "Cable Matters Rackmount or Wallmount 24-Port Cat6 RJ45 Patch Panel" found on Amazon: https://www.amazon.com/Cable-Matters-Rackmount-Wallmount-24-Port/dp/B0072K1OWY/ref=sr_1_1_sspa?ie=UTF8&qid=1507480276&sr=8-1-spons&keywords=cable+matters+cat6+patch+panel&psc=1 . It might work on other panels, but I am not sure. Please post in the comments if you find that this thing can be applied to other types of patch panels. Installation - Requires two small zip ties. Insert zip ties through wholes in cable support arms and through the back of the patch panel's top zip tie anchors. Don't over tighten zip ties as you want the cable support arms to be able to be pushed up so that you have access for your punch down tool. After punching down cable to patch panel, zip tie Ethernet cable to the extended portion of the cable support arm. Do not over tighten as you will want the cables to be able to move when you push the cable support arm up.
With this file you will be able to print Patch Panel Cable Support with your 3D printer. Click on the button and save the file on your computer to work, edit or customize your design. You can also find more 3D designs for printers on Patch Panel Cable Support.