PC front panel wire housing
prusaprinters
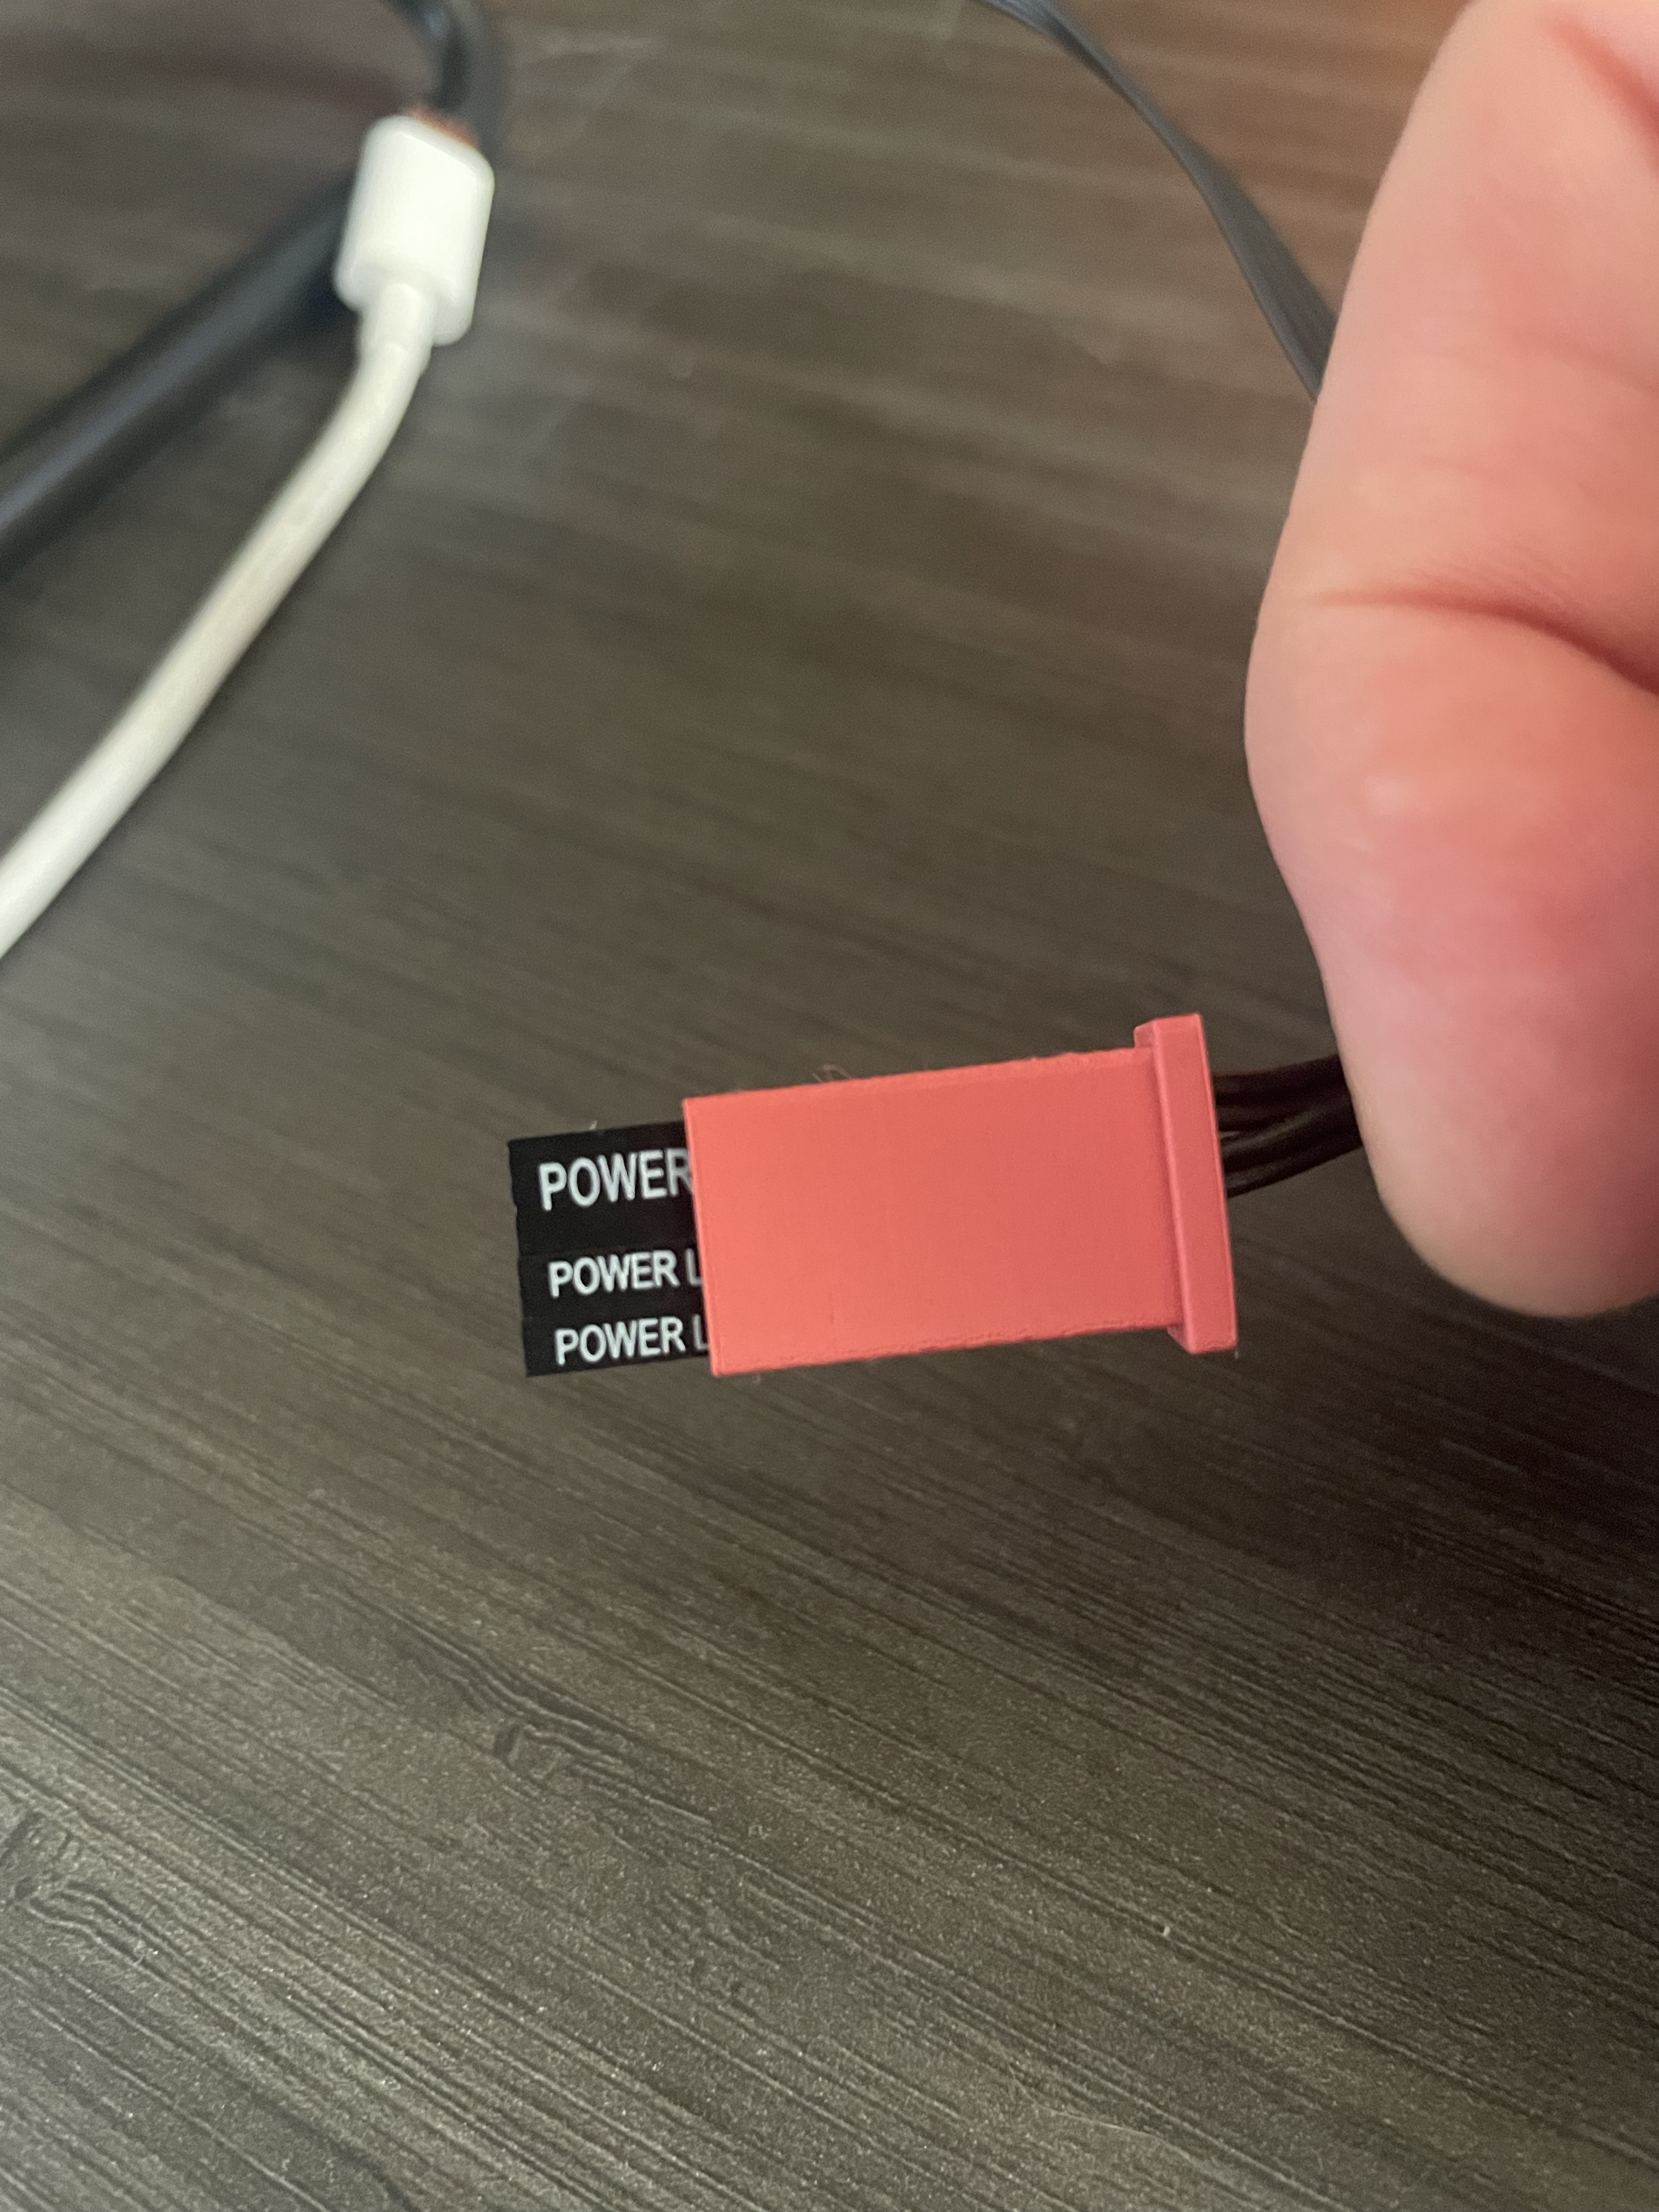
<p>For years, I dreaded the process of plugging the power LED and power switch wires from my PC front panels into a motherboard. I usually used long needle-nose pliers to do the job. It's dark and hard to see, and it's tough to tell if you have the wires in the right place, since your fingers are in the way.</p><p>This housing makes the job easy and fast. And, you can make one yourself if you have a 3D printer.</p><p>This housing is only for the power LED and power switch. </p><p><strong>Printing the housing</strong></p><p>I have printed this housing numerous times with PLA. I prefer to use a 0.25mm nozzle, so your tolerances may vary with other nozzle sizes. If you find that the tolerances don't work with other nozzle sizes, drop a comment below, and I'll see if I can make another version with different tolerances.</p><p><strong>Using the housing</strong></p><ul><li>Slide the housing around the wires by inserting the wires through the small slit in the side. The end with the ridge on it should be facing away from the end of the wires.</li><li>Ensure that the polarity of the power LED wires is correct. The power switch wires, which typically are attached with one rectangular connector, has no polarity.</li><li>Slide the ends of the wires into the receiving end of the housing.</li><li>Finally, hold the housing and push all 4 wires on to the motherboard pins in the correct location.</li></ul>
With this file you will be able to print PC front panel wire housing with your 3D printer. Click on the button and save the file on your computer to work, edit or customize your design. You can also find more 3D designs for printers on PC front panel wire housing.