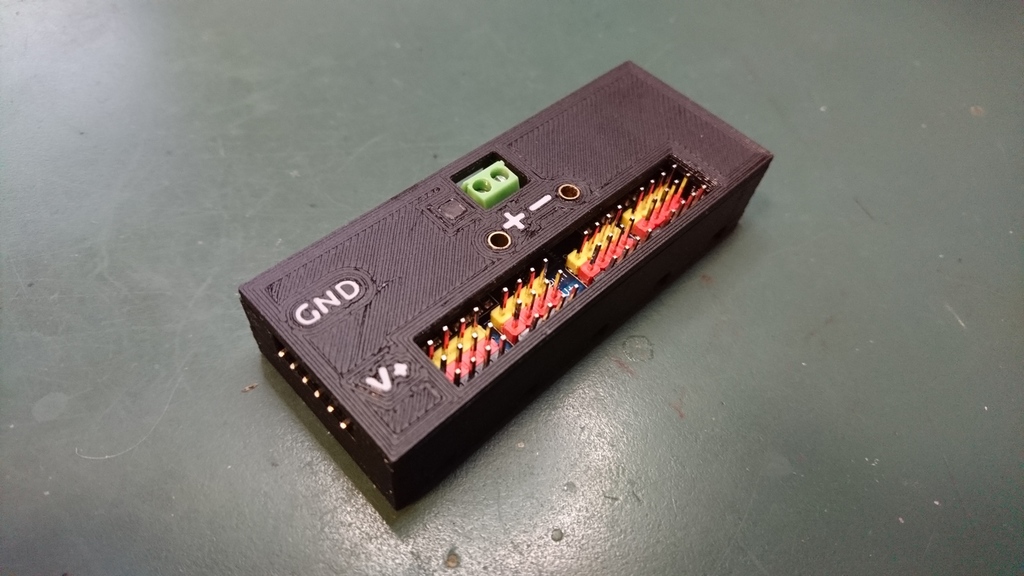
PCA9685 servo driver case (Fischertechnik or standalone)
prusaprinters
<p>A case for the PCA9685 16-Channel Servo Driver board from <a href="https://learn.adafruit.com/16-channel-pwm-servo-driver/overview">adafruit</a> and its cheap <a href="https://www.ebay.com/sch/i.html?_from=R40&_nkw=PCA9685&_sacat=0&_sop=15&rt=nc&LH_BIN=1">chinese clones</a> (see note below).</p> <p>The<em>bottom part</em> comes in two versions: a plain standalone version and one with connectors for the <a href="https://www.fischertechnik.de/en">fischertechnik</a> construction toy system.</p> <p>The<em>top part</em> fits both versions and comes with several options, implemented as punch-through holes:</p> <ol> <li>A circular hole (r=5 mm) for the big capacitator preinstalled in the chinese versions, and missing by default from the adafruit version. The <a href="https://learn.adafruit.com/16-channel-pwm-servo-driver/hooking-it-up#adding-a-capacitor-to-the-thru-hole-capacitor-slot-4-7">adafruit tutorial</a> explains why and when you can leave out the capacitator. In my chinese board, I replaced the default 1000µF with a smaller 220µF.</li> <li>Two small circular holes (r=1,6 mm) for fischertechnik female jacks (flush sleeves, Bundhüsen) as alternatives to the power terminals. Solder them to the power terminals on the backside of the board with two short pieces of wire.</li> <li>Two small square holes (3,2x3,2 mm) for a power LED light guide. Left position is for the current chinese or old adafruit version, right position for the current adafruit version. Print the light guide with transparent filament in a lying position for best results.</li> <li><p>I forgot: the bottom part also has a punch-through option for chaining multiple boards (16,0x4,0 mm). On demand, simply punch the according hole out at post-print stage, using a small knife, a screw driver, or a drill of suitable size. Alternatively, you can use TinkerCAD or some other 3D-tool to punch them out digitally at pre-print stage.</p> <p>Note and warning: I learned that the original PCA9685 board is an <a href="https://learn.adafruit.com/16-channel-pwm-servo-driver/overview">adafruit design</a> only after having ordered a couple of boards from chinese ebay sellers. Although the chinese version is much cheaper, be warned that some models lack the reverse polarity protection feature from the original, even if they claim otherwise on the backside. Also, some clones have a different layout with non-centered power terminals. So I strongly recommend buying from and supporting the great folks from adafruit, even if my pictures show the cheap chinese version.</p> <p>Please consider leaving a "like" or posting your make as a token of appreciation for my work.</p> <p>Find my other fischertechnik designs <a href="/juh/designs">here</a>.</p> <p> <figure class="media"> <oembed url="https://youtu.be/V6fRo4xP1OA"></oembed> </figure> </p> <h3>Print Settings</h3> </li> </ol> <p><strong>Printer Brand:</strong></p> <p>Anet</p> <p><p class="detail-setting printer"><strong>Printer: </strong> <div><p>A8</p></div><strong>Rafts:</strong></p> <p>No</p> <p><p class="detail-setting supports"><strong>Supports: </strong> <div><p>No</p></div><strong>Resolution:</strong></p> <p>.2 mm</p> <p><p class="detail-setting infill"><strong>Infill: </strong> <div><p>20%</p></div><br/> <strong>Filament:</strong><br/> any PLA <br/> <p class="detail-setting notes"><strong>Notes: </strong> </p><div><p>I copied the idea for the two colored labeling from <a href="/thing:2053218" rel="nofollow">this design</a> by <a href="/Alex\_Sashka/about" rel="nofollow">Alex\_Sashka</a>. Instructions for a black/white print:</p> 1. Print Labeling.stl at a defined x/y-Position on your build plate (e.g. x=0 and y=0) with white filament. This will only work well with perfect first layer adhesion and no stringing, increasing print temperature and decreasing print speed might help you with that.</div></p> <ol> <li>Remove skirts (if you used them) and the outer frame, leaving<strong>only</strong> the labels on the build plate (see pictures).</li> <li>Change to black filament.</li> <li>Load Top.stl and turn it topside down (180°) around the y-axis. Place it in exactly the same position as in step 1.</li> <li>Print and pray. If everything works alright, the first layer will elegantly fit around the already printed parts and weld them with the top part. Nice!</li> </ol> </p></p></p> Category: Electronics
With this file you will be able to print PCA9685 servo driver case (Fischertechnik or standalone) with your 3D printer. Click on the button and save the file on your computer to work, edit or customize your design. You can also find more 3D designs for printers on PCA9685 servo driver case (Fischertechnik or standalone).