PCB Heatbead for Home Etching
thingiverse
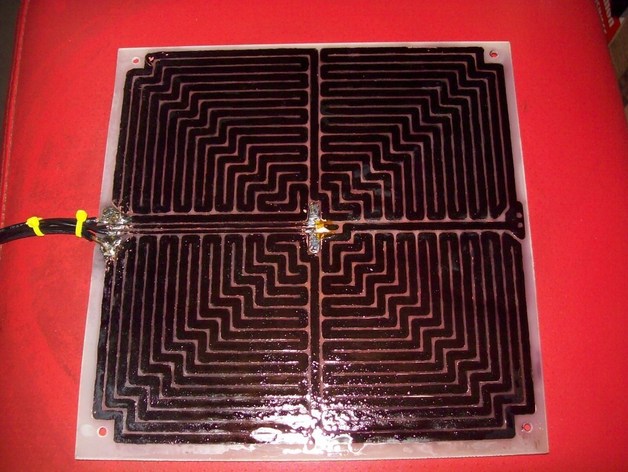
I saw prusa's excellent heated bed, but the dimension was too large for the blank stock I had available, and there were too many narrow traces for an easy home etch, so I designed a different one. Dimensions are 200x200mm, hole centers are 190mm apart. Design resistance is 0.95 ohms. Etch from 1oz (36um) copper to get this resistance. Gives 150w from a 12v source, and consumes 12.5A. I've had my bed up to 140°C before, and didn't want to take it higher for fear of cracking my glass or damaging the FR4 PCB material. Instructions If you have double sided board, keep the top as a solid layer of copper to help spread the heat. If not, add a few layers of aluminium foil or aluminium sheet to help spread the heat. If you get this made professionally, do NOT reproduce the top layer pattern! I couldn't work out how to move text and stuff to a mere information layer in eagle. Solder your thermistor to the pads in the center. The third pad is for the thermistor itself to sit on, to give good thermal contact. Stick it on with kapton tape. Solder two thin wires, or a pair from a ribbon cable or something to the two thin pads near the edge of the board. You may need to cut a hollow in your platform for the thermistor to sit in. You could also ignore the thermistor stuff completely, and stick it on top of the bed like the standard prusa setup. Solder two heavy gauge wires (15A rated) to the two large pads near the edge. I used a two-wire automotive cable from a dead 150w inverter.
With this file you will be able to print PCB Heatbead for Home Etching with your 3D printer. Click on the button and save the file on your computer to work, edit or customize your design. You can also find more 3D designs for printers on PCB Heatbead for Home Etching.