Peg Perego Reduction Gear replacement
thingiverse
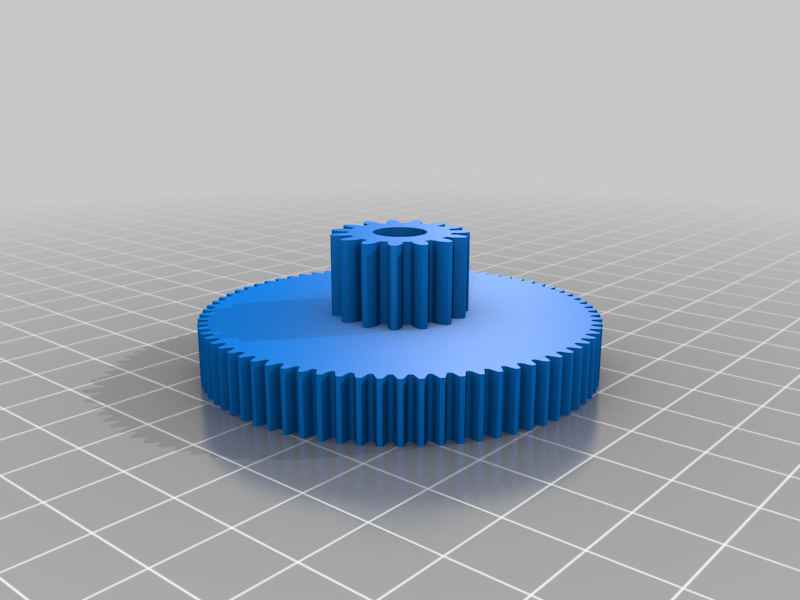
Hi, PLEASE - before you print a gear, pull the gearbox and count the teeth. There are a few peg perego gears on thingiverse, for different applications. Mine is tested and verified on the Peg Perego RZR 900. I believe this gear may also work on the john deere, but always check before you print. This is a metric profile involute spur gear at: 15 Teeth : 1.25 pitch 75 Teeth : 0.8 pitch !! I highly recommend drilling out the bore to 21/64" or ~8.3mm for appropriate shaft clearance !! (Also consider clearancing the other gears, since you're there) There are technically 5 gears in this particular gearbox. 1: The spur gear directly on the driving motor. 2: The first reduction gear (THIS ONE!!!) 3: The second Reduction Gear 4: The third Reduction Gear 5: The drive gear (I'm only talking about #2, as It appears to be the first weak link. Will make and link more if needed.) It was created in fusion 360 using the built-in scripts. Here's my story: I hot-rodded my kid's Blue Peg Perego RZR 900 from the standard 12v battery to a 18v lithium drill battery (Milwaukee M18 12ah), most of the internet indicated that 18v is the maximum safe voltage with stock gears, and I would normally agree. The stock gear (pom/acetyl) lasted for several hours worth of driving time in this configuration. The failure mode experienced in the stock gear (as witnessed in the pictures) is the gear melted due to the overspeed and increased heating and load (this was on clay soil in a baseball diamond during failure). In this failure mode, it also heated reduction gear (#4 above,) (on the same shaft as #2). When my child stopped driving, the two gears fused together and the gearbox was locked. It takes ~10minutes to get into the machine to remove the gearbox. Remove both seats, and then the under-frame supports which are screwed under the seats, and then the 4 screws holding the rear half closed. Remove one of the nuts on the axle shaft, slide off the wheels and axles entirely. Remove the small lid (may require a little prying) once the axle shaft is out. You may need to minorly pry to get the drive flange past its opening to pull out. 12 screws, 1 nut, 1 axleshaft removed. I as of this writing, am onto my 3rd filament material: 1 stock: Pom/Acetyl: Works great, unavailable as a replacement part 2 PLA (white): Worked for ~3minutes, failure mode shattered gear (too brittle) 3 PLA+(grey): Worked for ~6minutes (I think this might be passable for 12v applications), failure mode gears rounded over. 4 NYLON (Alloy 910)(black): No breakages as of this point. Nylon is a sure thing, PLA+ is a likely candidate if you're not modified. I hope this helps. :)
With this file you will be able to print Peg Perego Reduction Gear replacement with your 3D printer. Click on the button and save the file on your computer to work, edit or customize your design. You can also find more 3D designs for printers on Peg Perego Reduction Gear replacement.