Pencil Launcher
thingiverse
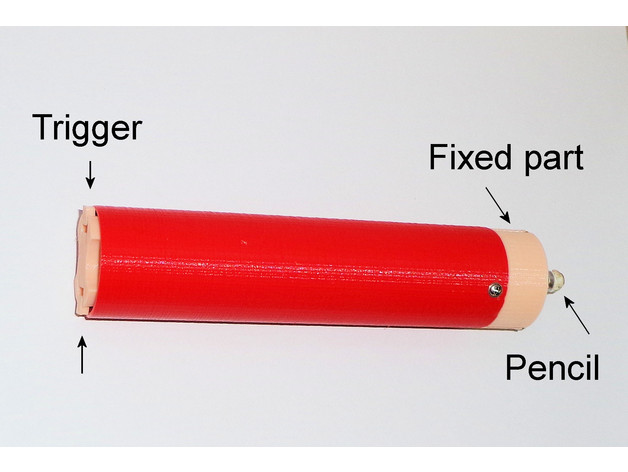
Pencil Launcherhttps://youtu.be/NQ93R2Apu_g For safety reasons, only pencils with a soft eraser in front should be used. The sharp point goes into the launcher. Like in the rocket launcher http://www.thingiverse.com/thing:1948686 two rubber bands take care of a powerful launch. The launcher has three parts, the tube, a moving cylinder and a fixed part which is attached to the tube with three small screws. Push the pencil, point forward, into the hole of the fixed part, stretching the rubber bands and push until the lock clicks in at the end of the tube. This might not work if the tube is not flat. Some sanding will eliminate that problem. Look for a safe landing place, point the launcher in that direction and push both lock pins simultaneously to the inside of the tube: You have ignition! Tip: Print the moving part with 100% infill to get strong and flexible springs. For the other parts, 20% infill is O.K. For a shorter range or shorter pencils, just cut off a piece of the tube.
With this file you will be able to print Pencil Launcher with your 3D printer. Click on the button and save the file on your computer to work, edit or customize your design. You can also find more 3D designs for printers on Pencil Launcher.