Pentahedron - triangular prism twisty puzzle
thingiverse
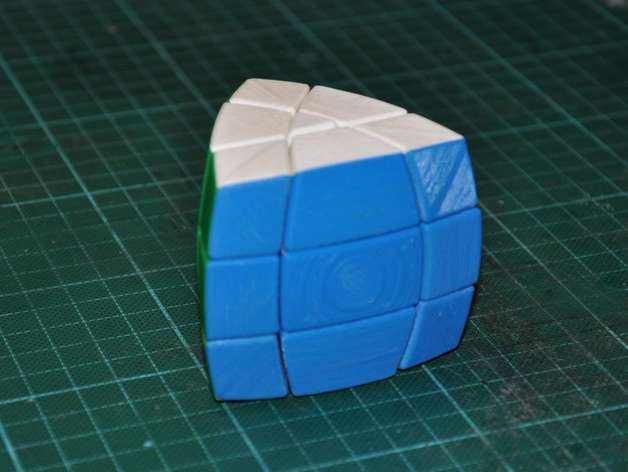
I was greatly inspired by 4x4x6 cuboid puzzle. There was a Solidworks file attached that clearly showed how to design this kind of puzzles. So I decided to design something myself, but something simpler first. Once I saw a pentahedron somewhere on the internet. It looked simple enough to try. Designing such puzzles appears not to be as impossible as I thought before. It took me just 3 or 4 hours to design the mechanics of the puzzle. I spent much more time polishing my Solidworks project and preparing parts for printing. My first design (what you see on photos) was pretty okay, but there were a few obvious mistakes. I fixed those issues in STL files, but decided not to reprint the puzzle. So I rely on your feedback if something needs to be improved. I am uploading 2 versions of parts. One is parts as is, without proper rotation, no supports. You can use your favorite techniques and tools to prepare parts for printing. Most of the parts are bulging and cannot be printed as is. I usually split such models on 2 or 3 parts that are easier for printing. Then these parts can be glued as a one piece (with acetone for ABS, or dichloroethane for PLA). So other version of parts I am uploading is prepared in this way. My black filament is almost over, so I decided to try a stickerless design. I split parts in the way so that I could print subparts with different colors. Edge pieces were pretty simple to split. Corner pieces were a little trickier. Corner split by 3 pieces caused inclined faces and it would be hard to print pieces. So I had to split each of these 3 pieces again. So I had 6 pieces for a single corner (see STL files named as 'corner - 3 colors'). If you are printing in one color - you are lucky. You can use corner split just by 2 pieces (see STLs named as 'corner - 1 color'). I am attaching Solidworks file so that you can see how I made it. UPDATE: I finally got springs so I can say the puzzle is completed. Here is the video that demonstrates turning quality - https://youtu.be/3exeJeNLgdw Print Settings Printer Brand: RepRap Printer: Graber i3 Rafts: No Supports: No Resolution: 0.3mm nozzle, 0.2mm layer Infill: 15% Notes: I used ABS plastic for most of the parts, but PLA should work as well. However I strongly recommend printing core in PLA as it has much better layer adhesion (which is critical for core part) I am using 'front face' to refer to 9-piece rectangular face, 'top face' for 7-piece triangle face. Number in the file name reflects how many times you should print the part. Please plan which part should be printed which color. For Top edge 'F' in the file name means front face, T - Top. For corner 'L' and 'R' mean left and right faces, 'T' for top face. Post-Printing Sand parts Sand all corners and edges so that they are smooth. Inner parts should not have any roughness as it may catch other parts. Pay special attention at top centers. Assembly Center parts have a thin membrane at the hole - this makes printing easier. just drill the hole with 3mm drill. Center pieces are screwed with M3 screws to core. Do not tighten it very much - parts should rotate freely. It is recommended to use special screws for twisty cubes - they have smooth part without a thread at screw head. This will allow smoother rotation and screw will not unscrew. I recommend using springs. Without a spring puzzle will be too loose. Springs should be quite strong. I tried using springs from a pen - my puzzle tend to explode on every turn. Rubick's cube springs should work fine. You may look for springs and screws as spare parts for twisty puzzles (for example these http://www.championscubestore.com/index.php?main_page=product_info&cPath=75&products_id=612) Center caps Once puzzle is assembled it is time to attach caps. Caps are mounted using hooks. Just glue appropriate hooks into caps. Let glue to set before mounting cap on its place. To mount top center caps you may want too loosen front centers a little bit, otherwise you cant fit the top cap.
With this file you will be able to print Pentahedron - triangular prism twisty puzzle with your 3D printer. Click on the button and save the file on your computer to work, edit or customize your design. You can also find more 3D designs for printers on Pentahedron - triangular prism twisty puzzle.