Pergo 9 Volt Adapter Block
thingiverse
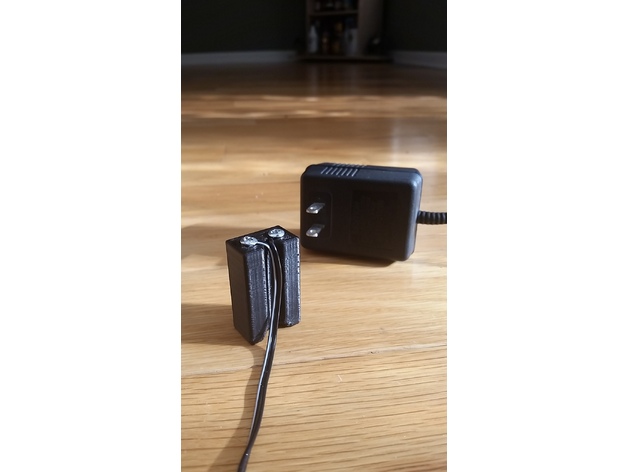
Print your design, then drill holes to create a precise pilot hole for screws. Next, cut off the end of a 9-volt plug-in adapter and secure the stripped leads to these holes before reinstalling the screws. It's essential to run the screws in and out a few times to prevent cutting the wires with the screw threads. Verify that your polarity is correct: the positive sign (+) corresponds to the smaller male connector on the battery, while the negative sign (-) represents the female snap. Typically, you'll need to create an exit path for the cable through the battery door. If additional space is necessary at the bottom of the "battery," reduce your z-axis by 92-95% to shorten the block. Remember that you require the width of the squashed wire plus the block height to ensure the screws remain pressed against the contacts of your device. If your print is too short, consider not screwing the screws in as far to compensate. Print with a layer thickness of .2 - .3 and 4 shells (this provides sufficient support for the screws). Use an infill percentage of 8-20%. I experienced some issues with the print starting at the bottom, but this is concealed within a battery door, so I didn't halt the print, which resulted in a subpar print image.
With this file you will be able to print Pergo 9 Volt Adapter Block with your 3D printer. Click on the button and save the file on your computer to work, edit or customize your design. You can also find more 3D designs for printers on Pergo 9 Volt Adapter Block.