Pergo Yellow Mailbox Flag Mail Arrived
thingiverse
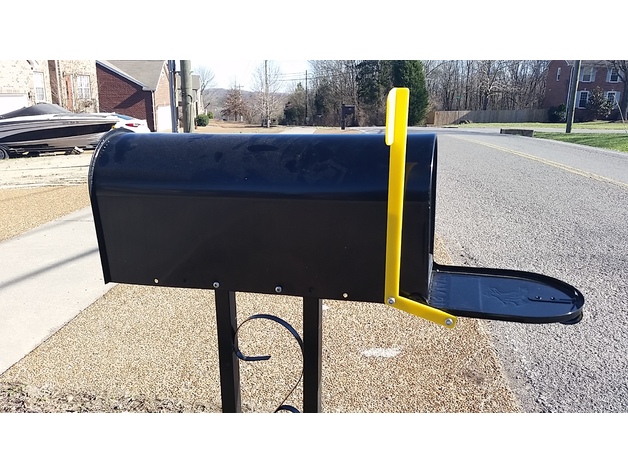
When you get your mail put the flag down. (reset the flag) When the letter carrier opens the door, the flag goes up. The flag stays up until you reset it. meaning only the opening of the door and you manually putting it down makes it move. YOU MUST USE ABS. PLA will not last long on an outdoor project. PLA is designed to decompose away. That is what makes it better for the environment. The screws used are the two hex screws found in every roll of eSun Filament. Yeah your saying now, right? Because If you use eSun filaments, you may have about 20/30 of these screws and never had anything to use them for! Remove the two screws and nuts from the roll. Drill a 3/16" hole. Yes it' too small and when you put the screws in you are cutting new threads. This is the idea. If you use a larger hole, you will need more nuts to tighten things up. Print SOLID (100% infill). On the flag I used 2 shells, on the roller I used 6, this made sure the entire roller was made of round circles of print with no infill lines at all. Let me know if you need any more info. The mailbox I have is a cheap "Gibraltar Decorative Medium Capacity Galvanized Steel Black, Mailbox & Post Combo, T11KIT0B" found on eBay and Amazon? Resizing this to .916 will make it print on a printer that has a max Length of 250mm, Because the Position of the hole on the mail box can be moved if you resize, Even smaller printers can still print this item and make it work.
With this file you will be able to print Pergo Yellow Mailbox Flag Mail Arrived with your 3D printer. Click on the button and save the file on your computer to work, edit or customize your design. You can also find more 3D designs for printers on Pergo Yellow Mailbox Flag Mail Arrived.