Peristaltic pump
myminifactory
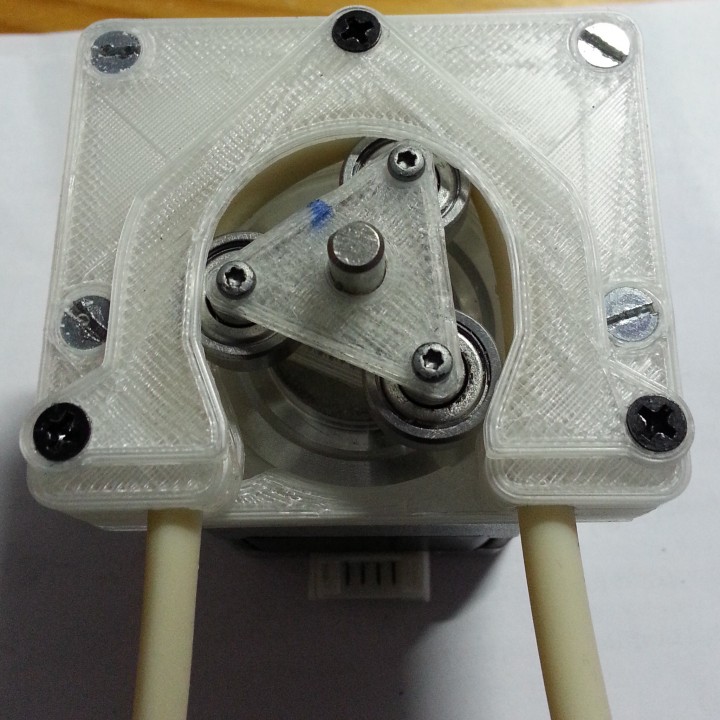
Edit 22 Sep 2020:Added a schematic to github and here. I'm not responsible for any damage caused by this schematic, please let me know if there is any mistake. Edit 02 Sep 2019:code for Arduino driverhttps://github.com/KarimLakra/OSP2_Open-Source-Peristaltic-Pump_3D-printed-peristaltic-pump-Arduino-program-controller I needed for many things a water pump(liquid pump), I found the peristaltic pump the best for a precision dosing, can be used also for continuous pumping, the liquid is separated by the tubing from other parts, it can be used for food and many applications safely, offers easy maintenance. After I watched many designs, as always, I like to design my own to see how far I can make it, so feel free to suggest any useful tips! The capacity of this pump as you can see in the video is about 160ml per minute, you can push this value a little bit it upper, but I didn't want to destroy the tubing. The pump is easy to assemble, but I attached pictures step by step. I started last year the project from a user interface using arduinoMega2560 with a TFT screen, the code get complicated when I added many options to control the pump(maybe I continue writing that code when I have time), but I will soon add the schematics to test this pump, with just some basic electronics( no arduino). Parts needed: 4 * M3 nuts3 * M1,85x10 screw3 * M3x3 screw4 * M3x8 screw4 * M3x11 screw3 * Bearings 624ZZ ball 4x13x5 mm(I attached also a printable bearing if you want to try it)Tubing PharMed BPT (information in the picture)Questions also are welcome. The files for 3D printing also here:https://grabcad.com/library/peristaltic-pump-13 more information and updates are posted on my web pages:http://karim.lakras.eu/ Note: I made holes for the M3 nut that are not used all of them, but they can be useful if you need to lock the parts very well. I made also deep holes for the M3 screws, so if you want to use a longer screws, they have place already. There is attached file for the rollers if you decide to print them, make sure you make their edges smooth, so you will not cut the tubing. Also the triangles that holds the bearings, are marked by a line as in the pictures, that sides must be in the same vertical line, that sides are locking the triangle to prevent it from turning. Edit: I posted a second video to show more information about the pump see bellow. Visit my pages to see a simple schematic on how to drive the stepper and more information: http://karim.lakras.eu/index.php?page=hobbies&lang=en&cat_hob=peristaltic Printer: ANYCUBIC I3 MEGARafts: Doesn't MatterSupports: YesResolution: 0,4Infill: 100% Notes: I changed the M3 nut holes after printing this parts, so if anyone notice something that needs to be changed, please let me know.
With this file you will be able to print Peristaltic pump with your 3D printer. Click on the button and save the file on your computer to work, edit or customize your design. You can also find more 3D designs for printers on Peristaltic pump.