Permanent-On Switch for Insekten Schröter / Executioner / Röhrich
prusaprinters
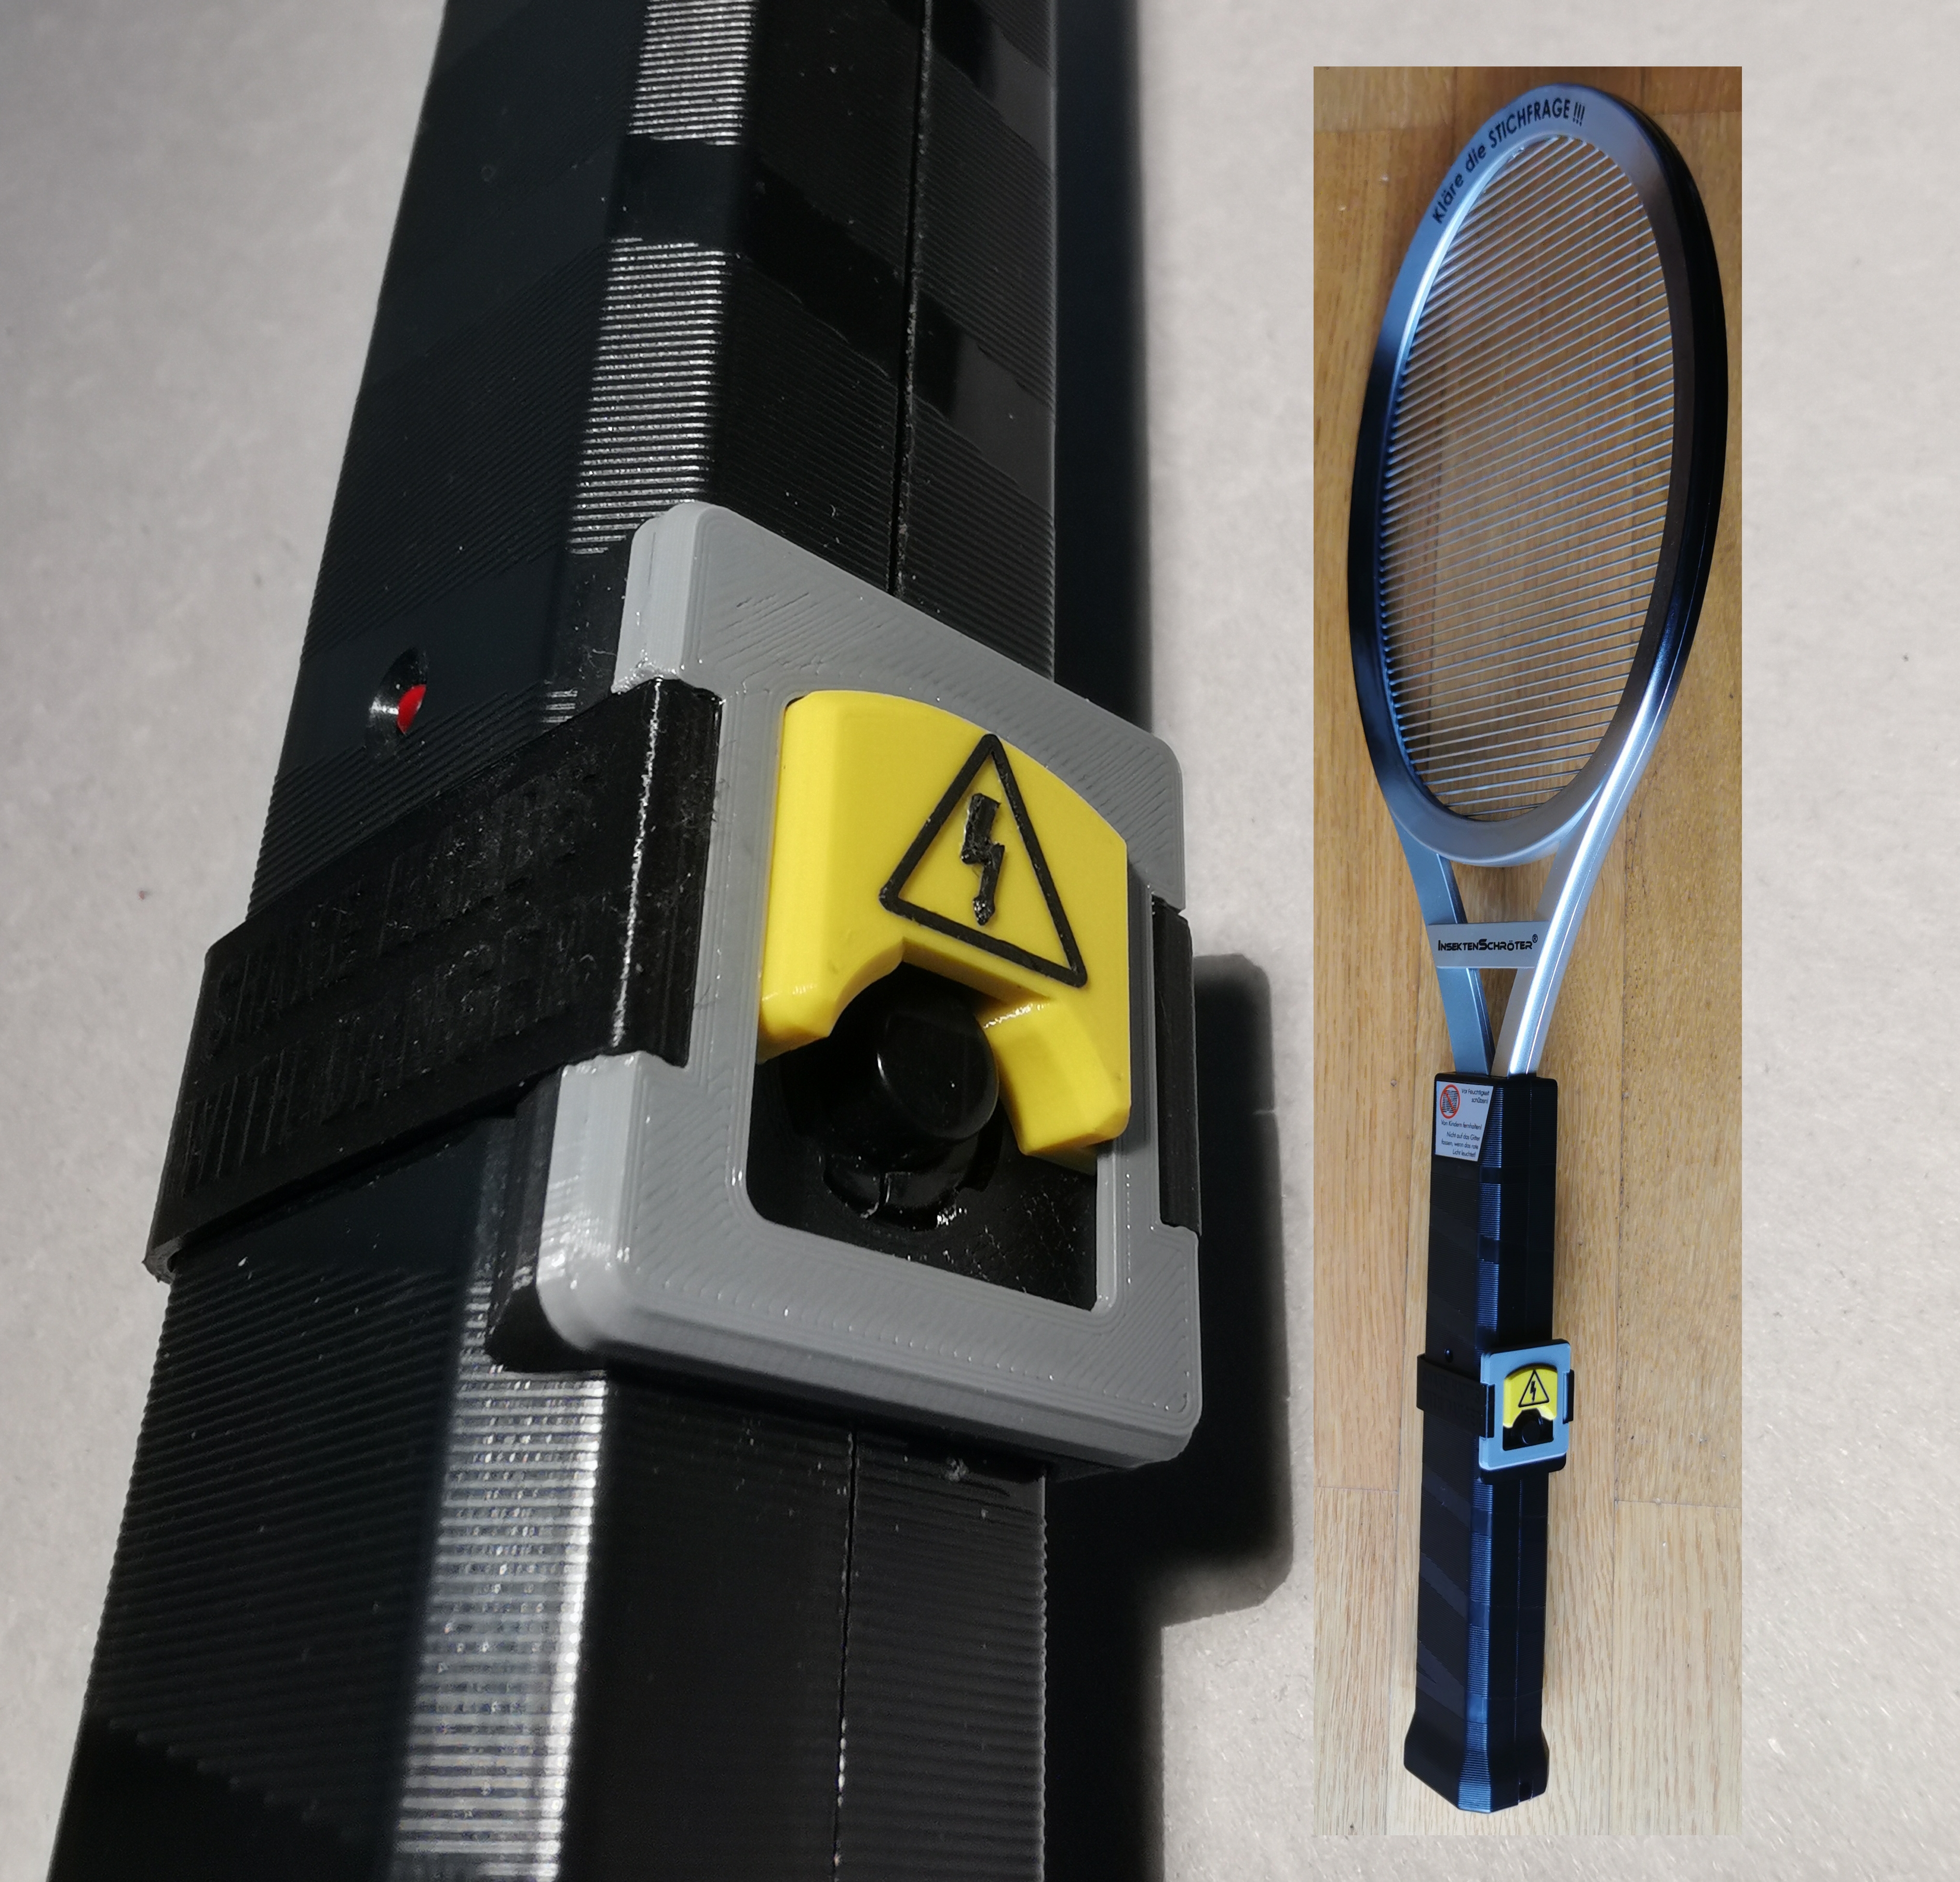
<h3>Description:</h3><p>Sometimes the chase for a mosquito or a fly takes longer as expected. Constantly keeping the finger on the button is exhausting, so there had a solution to be found.</p><p>This gadget allows you to keep your Insekten Schröter or Executioner Racket always activated as long as you need without your finger on the button.</p><p> </p><h3>Printing Instruction:</h3><p>PETG is recommended due to its flexibility (especially for the clamp) and durability of the material.</p><p>I have printed it with a 0,25mm nozzle, but it will work with a 0,4mm, too. Only the warning sign on the slider really requires the thinner nozzle, wherefore I added two variants of gcodes / mf3 files. The files for the 0,4mm nozzle have the non-sign slider version included.</p><p>Please make sure to have your printer well calibrated and consider shrinkage compensation depending on your material. Otherwise the slider may jam in the top-plate.</p><h3>Assembly Instruction:</h3><figure class="image image-style-align-center image_resized" style="width:50%;"><img src="https://media.printables.com/media/prints/265703/rich_content/a5de7cda-9112-418b-93a7-359b71e49411/explo.jpg#%7B%22uuid%22%3A%2202638fa1-5974-4ab7-b62b-cbe191d9c067%22%2C%22w%22%3A575%2C%22h%22%3A673%7D"></figure><p> </p><h4>Step 1:</h4><figure class="image image-style-align-center image_resized" style="width:50%;"><img src="https://media.printables.com/media/prints/265703/rich_content/1330bb9d-888d-40be-a253-480f4db93346/step-1.jpg#%7B%22uuid%22%3A%2272d858cf-152d-4851-8392-415983c40827%22%2C%22w%22%3A724%2C%22h%22%3A616%7D"></figure><p>Lay the bottom-plate over the knob of the racket handle.</p><p>Make sure that the flat surface is on top, and the opening for the knob points to the lower end of the handle.</p><p>Caution, it is not fixed yet.</p><p> </p><h4>Step 2:</h4><p>Lay the slider from behind into the top-plate.</p><figure class="table"><table><tbody><tr><td><figure class="image"><img src="https://media.printables.com/media/prints/265703/rich_content/f3ea9b41-7ab1-4348-a5cd-6efc59bac188/step-2a.jpg#%7B%22uuid%22%3A%2287235dae-55fb-4442-81b8-3e3cf927065c%22%2C%22w%22%3A675%2C%22h%22%3A481%7D"></figure></td><td><figure class="image"><img src="https://media.printables.com/media/prints/265703/rich_content/37e1fadf-0f1f-4533-a334-9d3a9808cc1f/step-2b.jpg#%7B%22uuid%22%3A%2213590fc8-a808-4ace-ab57-8cec28b00f85%22%2C%22w%22%3A602%2C%22h%22%3A472%7D"></figure></td></tr></tbody></table></figure><p> </p><h4>Step 3:</h4><p>Lay the top-plate with the slider on the bottom-plate, and align everything well.</p><p>Caution, it is still not fixed yet.</p><figure class="image image_resized image-style-align-center" style="width:50%;"><img src="https://media.printables.com/media/prints/265703/rich_content/5ee5bb2f-3cc2-4387-8ab9-3ef6b05004b5/step-3.jpg#%7B%22uuid%22%3A%223a23abba-600c-402e-a68b-4c4177e0bf4c%22%2C%22w%22%3A610%2C%22h%22%3A546%7D"></figure><p> </p><h4>Step 4:</h4><p>Mount the clamp from the backside of the Racket handle, and hock it on one side in the slot of the top-plate.</p><p>Than gently press from the backside on the clamp until you are able to move the second hook of the clamp over the second slot of the Top-Plate and let it slip in.</p><figure class="image image_resized" style="width:75%;"><img src="https://media.printables.com/media/prints/265703/rich_content/6cde2299-8dbe-47eb-af28-a51f52fd4991/img_20220825_134323.jpg#%7B%22uuid%22%3A%22c4966a02-0ceb-4ebe-b197-3775ef74a8e3%22%2C%22w%22%3A2098%2C%22h%22%3A1858%7D"></figure><p>Only now, everything is fixed.</p><figure class="image image_resized" style="width:50%;"><img src="https://media.printables.com/media/prints/265703/rich_content/70a3bc58-ed18-4bb6-9398-2e23d9eb3d47/finish.jpg#%7B%22uuid%22%3A%22026fe153-c2f1-4a43-9687-265d47eee83c%22%2C%22w%22%3A652%2C%22h%22%3A563%7D"></figure><p>Now you are done, and your Mosquito Racket is ready for the next chase.</p><p> </p><h3>Change Log:</h3><figure class="table"><table><tbody><tr><td><strong>Version</strong></td><td><strong>Date</strong></td><td><strong>Change Descripton</strong></td></tr><tr><td>V1 & V2</td><td>-</td><td>first drafts (not released)</td></tr><tr><td>V3</td><td>25 AUG 2022</td><td>initial public release</td></tr></tbody></table></figure><p> </p><p>Many Thanks to <a href="https://www.printables.com/social/32437-bodo/about">Bodo</a> who has supported with many ideas and improvements between the first-draft-print and the final released version.</p>
With this file you will be able to print Permanent-On Switch for Insekten Schröter / Executioner / Röhrich with your 3D printer. Click on the button and save the file on your computer to work, edit or customize your design. You can also find more 3D designs for printers on Permanent-On Switch for Insekten Schröter / Executioner / Röhrich.