Personalised Christmas Bauble Decoration
thingiverse
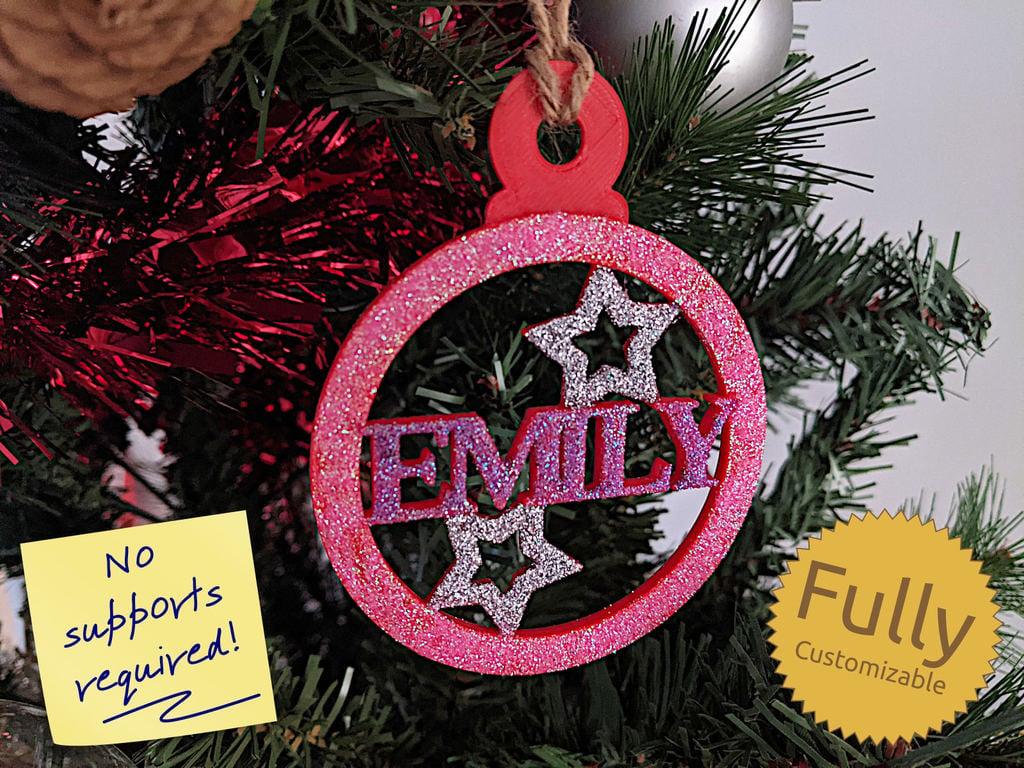
Personalise your Christmas tree with these wonderful customizable bauble decorations! Use your slicer's 'pause at height' or 'filament change' feature to create multicolored decorations on a single extruder 3D printer, or why not add a bit of sparkle? This one comes with a bucket load of customizable options! This design is **_completely free_** and shared under a permissive license. Your [support](https://codeandmake.com/support) is hugely appreciated. Did you know? ------------------- Some of our designs cannot be found on Thingiverse. If you are looking for more, check out our premium projects: https://codeandmake.com/premium OpenSCAD Customizer Options --------------------------- This design has the following Customizer options: ### Text * `Text` - The text * `Font` - The font * `Other_Font` - Enter a font name and select 'Other' (above) to use this font. * `Font_Size` - Font size * `Letter_Spacing` - Letter spacing * `Text_H_Offset` - Horizontal text offset * `Text_V_Offset` - Vertical text offset * `Text_Rotation` - Text Rotation * `Text_Underline` - Add text underline? * `Text_Underline_Thickness` - Thickness of underline * `Text_Underline_Offset` - Underline offset * `Text_Overline` - Add text overline? * `Text_Overline_Thickness` - Thickness of overline * `Text_Overline_Offset` - Overline offset ### Stars * `Stars` - Number of stars * `Star_Offset` - Star offset * `Star_Outer_Rotation` - Outer rotation of stars * `Star_Inner_Rotation` - Inner rotation of stars * `Star_Points` - Number of star points * `Star_Outer_Point_Diameter` - Outer diameter of star points * `Star_Inner_Point_Diameter_Percent` - Inner diameter of star points as percentage of outer diameter * `Star_Cutout_Percent` - Percentage of star to cut out ### Bauble * `Bauble_Diameter` - Diameter of bauble * `Bauble_Thickness` - Thickness of bauble material * `Bauble_Rotation` - Rotation of bauble ### Hanger * `Hanger_Hole_Diameter` - Diameter of the hole ### Material * `Material_Thickness` - Base material thickness * `Bauble_Material_Thickness_Offset` - Material thickness of bauble relative to Material_Thickness * `Text_Material_Thickness_Offset` - Material thickness of text relative to Material_Thickness * `Text_Underline_Material_Thickness_Offset` - Material thickness of text underline relative to Material_Thickness * `Text_Overline_Material_Thickness_Offset` - Material thickness of text overline relative to Material_Thickness * `Star_Material_Thickness_Offset` - Material thickness of stars relative to Material_Thickness * `Hanger_Material_Thickness_Offset` - Material thickness of hanger relative to Material_Thickness ### Other * `Priming_Block` - Add a priming block (for multi-filament prints) * `Priming_Block_Diameter` - Diameter of priming block * `Priming_Block_Offset_Percent` - Priming block offset as percentage of distance from center * `Priming_Block_Rotation` - Rotation of priming block Custom Font --------------------- Version 1.1 includes an `Other Font` option, which allows you to use another font from your system. To use a system font: 1. Open the v1.1 (or later) .scad file in [OpenSCAD](https://www.openscad.org/) 2. Click Help > Font List, to find the name of the font you'd like to use 3. You can use the 'Copy to Clipboard' button to copy it to the clipboard 4. Paste it into the `Other Font` text box 5. If you used the 'Copy to Clipboard' button, you'll need to remove the double quotes that surround the name 6. Select the `Other - Enter font name below` option from the `Font` dropdown Design Considerations --------------------- * Ensure your letters overlap enough. Use the `Font_Size` and `Letter_Spacing` options to ensure that none of the letters print without being attached. * Add stars to support the text, especially if there are gaps between some of the letters. Multicolor baubles with a single extruder 3D printer ---------------------------------------------------- 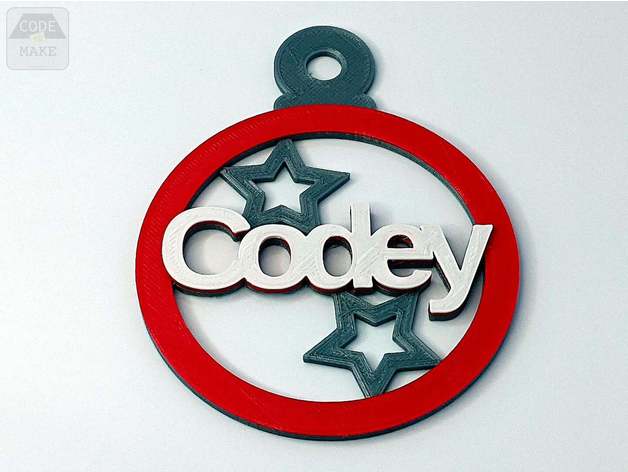 If you'd like to print with multiple filaments: 1) Use the `Material_Thickness_Offset` settings to stagger heights. 2) Consider adding a `Priming_Block`. The idea is that, at the start of each layer, your printer should print this first. This will help to ensure the filament is flowing nicely after a filament change, before starting to print the bauble in the new filament. 3) You can adjust the size and position of the Priming Block to suit your needs. Don't make it too large though, as you'll be wasting filament. 4) Print using your slicer's 'pause at height'/'filament change' feature, ensuring to switch the filament somewhere between the desired heights. In Cura this can be found under: Extensions > Post Processing > Modify G-Code > Add a script Finishing with glitter ---------------------- 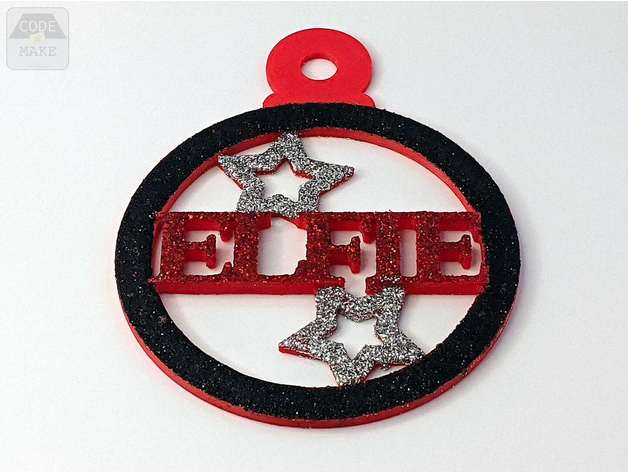 You will need: * Water-based découpage glue - clear gloss works best * A fine brush - one you are happy to use to apply the glue * Glitter - fine crafting glitter works best * Sheet(s) of paper - to recover any excess glitter (you may need several sheets if you'd like to avoid mixing colors) * A container with a small amount of fresh water (for soaking the brush between coats) When customizing your bauble, we recommend using the `Material_Thickness_Offset` settings to stagger heights as this can help when applying the glue. 1) Place your bauble on a sheet of paper 2) Apply glue to the area you'd like to glitter - if working with multiple colors, glue one color at a time 3) Sprinkle a generous amount of glitter on the glued area 4) Collect up any excess glitter by folding the paper and pouring it back into the glitter container 5) If working with multiple colors, repeat steps 1 - 4 until you've applied glitter in all the areas you'd like 6) Leave the brush to soak and wait for the glue to dry 7) Repeat steps 1 - 6 a second or third time until covered to your satisfaction 8) Add a final layer of glue over all the glitter to seal it 9) Wait for the glue to dry and wash the brush well Versions -------- * 1.2 (15 Dec 2020) - Fixed typo (Hangar > Hanger) * 1.1 (10 Dec 2020) - Added `Other Font` option * 1.0 (9 Dec 2020) - Initial version Printing -------- Recommended slicer settings: * Resolution: 0.1mm - 0.2mm * Infill: 20% - 100% depending how durable you'd like it to be. * Supports: No * Rafts: No. You may require a brim if you experience adhesion issues. If you also use an inside brim, care will be required to remove it without damaging the stars or letters. License ------- The "Personalised Christmas Bauble Decoration" code (.scad) is licensed under [The MIT License](https://opensource.org/licenses/MIT) by [Code and Make](https://codeandmake.com/). We are proud to offer content to you absolutely free. ------- We love to create free content for you. As you might imagine, it takes a lot of time. Supporters help us fund materials and equipment to create future projects and tutorials. To show your appreciation, please use the link below: [https://codeandmake.com/support](https://codeandmake.com/support) We thank you so much for your support!
With this file you will be able to print Personalised Christmas Bauble Decoration with your 3D printer. Click on the button and save the file on your computer to work, edit or customize your design. You can also find more 3D designs for printers on Personalised Christmas Bauble Decoration.