Perspective frame
thingiverse
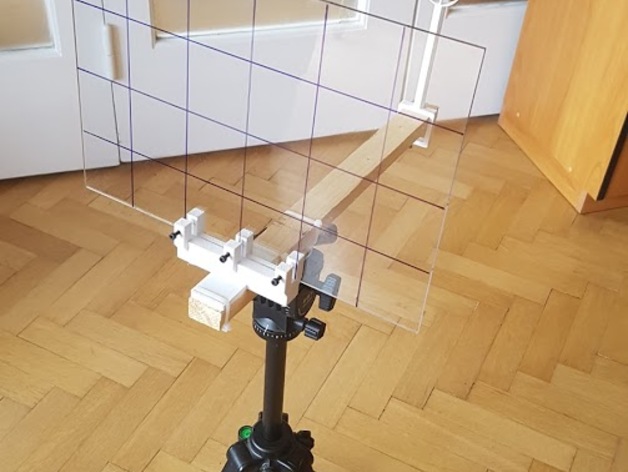
Want to learn to draw? Got no talent? Then this is for you. Converting 3D objects to a 2D plane can be complicated. However, I assure you that the device really works and can help anyone achieve their artistic goals. It's not my invention, actually - it was used over 600 years ago: The Drawing Machine was first developed in the Middle Ages. This ancient tool has been used by some of history's greatest artists, including Vincent van Gogh. Even geniuses like Van Gogh used an adaptation of this device to create their masterpieces. The modern version I designed is a simplified and improved approach to this ancient technology. Some parts are not printable, so you'll need: A Plexiglas sheet (Perspex) measuring A4 size (approximately 21x30cm) A wooden lathe measuring 2x3cm x approximately 45cm Four M3x25 screws with nuts Four cable binders measuring 15cm each A tripod (I used a Velbon CX 480) You'll also need the printed parts. The construction is easy and straightforward. First, draw a grid onto the Plexiglas according to your needs (I use squares approximately 5x5cm). Next, mount the Plexiglas holder on the front end of the lathe, making sure the screw holes face forward. Then, attach the bracket behind the Plexiglas holder - my design is specifically for the Velbon CX 480 tripod. Mount the viewer on the lathe, and ensure that the leg piece is attached to the viewer's screw. The needle should face forward, away from your eye. Carefully fix the Plexiglas into the holder without overtightening the screws. I learned this the hard way - my first prototype was damaged due to excessive force. If necessary, you may need to print another holder. Moving the viewer back and forth allows you to adjust the viewing angle. On your canvas, use the same grid as on the Plexiglas. Look through the viewer (adjusting your eye by looking over the tip of the needle to the center cross of the grid), and the picture will be projected onto the Plexiglas. The grid helps maintain the correct perspective. All you need to do is copy the projection onto the canvas. Be warned: use common sense when handling the device, as it's essential not to damage your eye with the viewer needle. I disclaim any responsibility for any injury that may occur due to misuse. Print Settings: Printer Brand: RepRap Printer: Prusa i3 plus Rafts: No Supports: No Resolution: 0.25 mm Infill: 15% hexagonal Notes: Use ABS plastic, as the frame will be used outside in direct sunlight. ABS is a preferable choice due to its durability. I designed this device using Autodesk Fusion 360.
With this file you will be able to print Perspective frame with your 3D printer. Click on the button and save the file on your computer to work, edit or customize your design. You can also find more 3D designs for printers on Perspective frame.