Perspex Clear Acrylic WS2812 LED Audio Interactive Light Bar
thingiverse
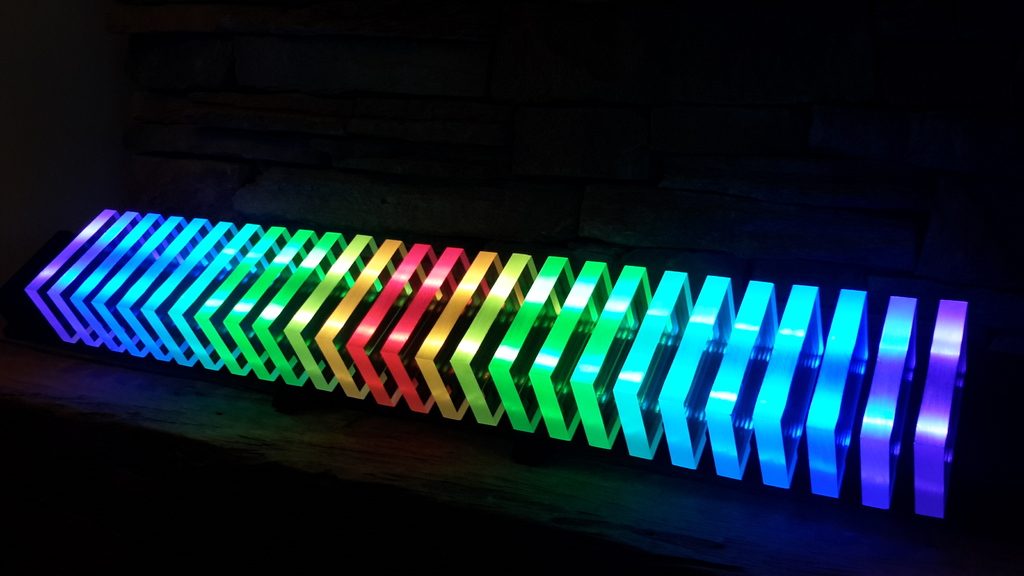
Perspex LED light and sound activated bar Completed Assembly in operation: https://youtu.be/d8P9hhyOXbk and another sample https://youtu.be/7bf3BYers34 I apologize for the low quality video.It looks and the sound was much better than my tablet cam gives justice. Material: 1 IKEA Moslanda 115cm picture shelf (black) 1 Arduino Uno 1 Transformer 2 1M 30 Pixel/M WS2812 LED strips (total of 52 LEDs required) 26 3/4" Thick Perspex Cast Acrylic Blocks 5" x 3" 1 MAX9814 Microphone Amplifier Module AGC Auto Gain Control for Arduino 1 470 ohm resistor 1 100 uf capaitor 1 0.1 uf capacitor 1 Rocker Switch Package (L x W x H) 5.0 x 2.8 x 0.8 in. (see picture) 1 Pushbutton Switch Package (L x W x H) 2.4 x 1.4 x 1.2 in. (see picture) 1 48 in. x 3/4 in. x 1/16 in. Aluminum Square Tube 10 #8 Pan Head Sheet Metal Screws Printables: 26 Perspex Mount* 8 Led Strip Retainer 2 Center Support 1 Left Angular End 1 Right Angular End 1 Center Connection Junction 1 Arduino Screwless Hobby Top 1 Arduino Uno Mountable Bottom Attention was paid to ensuring all pieces will print without support. There are fine design details to enhance FDM bridging abilities. *Perspex is cast clear acrylic and as such will vary slightly in thickness. 3 Mount widths are provided to match to the width of your pieces for a snug fit. Before printing you must measure the thickness of each block and print the appropriate width to fit. Constructing this is undeniably an undertaking but I never underestimate the maker community's willingness to create astoundingly complex and wonderful things. I posted the entire circuit diagram and sketch to Autodesk Circuit but in my attempt to link it, it appears to have vanished in the move to Tinkercad. If there is enough interest I will recreate it on Tinkercad as well as discuss the assembly process. You will need an accurate means to saw finely cut slots in the IKEA shelf as this forms the basis for mounting and aligning the block retainers. There's a few skills involved but nothing insurmountable. Other than the cuts and soldering, everything else snaps,slides or screws together. Update: With a little bit of searching Autodesk Circuits I found my design post with a very early version of the sketch. For whatever reason Autodesk assigned it to a fictitious author in a failed attempt to migrate me over to Tinkercad. None the less it provides the general circuit layout. The signal generator shown is only to provide an input for running the simulation and is not required as input comes from the audio input of the MAX9418 in the real world. Since posting this circuit the bar additionally has 4 modes that are selected by the momentary push button wired to pin 2 not shown in the circuit diagram. Note the revised sketch and light bar design uses 13 WS2812 per strip versus the 12 shown in the circuit diagram. https://circuits.io/circuits/4038568-arduino-neopixels Attribution to Robert Robert on Youtube who provided the design inspiration and original sketch which resulted in this 3d printed version of it and the modified sketch. Sketch file added to Thingiverse.
With this file you will be able to print Perspex Clear Acrylic WS2812 LED Audio Interactive Light Bar with your 3D printer. Click on the button and save the file on your computer to work, edit or customize your design. You can also find more 3D designs for printers on Perspex Clear Acrylic WS2812 LED Audio Interactive Light Bar.