Pewter trinket cast in ABS
thingiverse
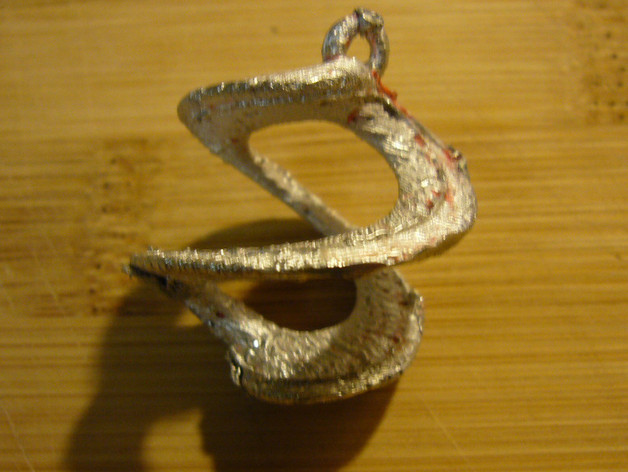
A continuation of my attempts to create ABS molds, this project began with designing a torus in Blender, which was twisted using the Simple Deform modifier. However, creating a mold for this design seemed challenging. Luckily, a basic sphere shape fit the requirements as a core. After printing the parts, all cavity areas in the core and box sides are accessible, allowing support structures to be removed before assembly. Accessible-support or no-support is crucial in molds like this to prevent plastic from embedding in the casting and to ensure smooth metal flow with proper gas escape. The core and box sides need to be cleaned up for a tight mold fit, while the cavity can also be refined if needed. Assembly involves aligning the ball-core through an off-center hole and pin, which can be substituted with alternative materials. The print took 150 minutes and used 35 grams of ABS. Pewter was poured at a slightly higher temperature due to concerns about thin sections and venting. An additional vent was created, and after the pour, ABS was removed using acetone for casting extraction. This project serves as an exercise in mold design with lessons learned along the way.
With this file you will be able to print Pewter trinket cast in ABS with your 3D printer. Click on the button and save the file on your computer to work, edit or customize your design. You can also find more 3D designs for printers on Pewter trinket cast in ABS.