Philips Norelco DP70 Film Projector
prusaprinters
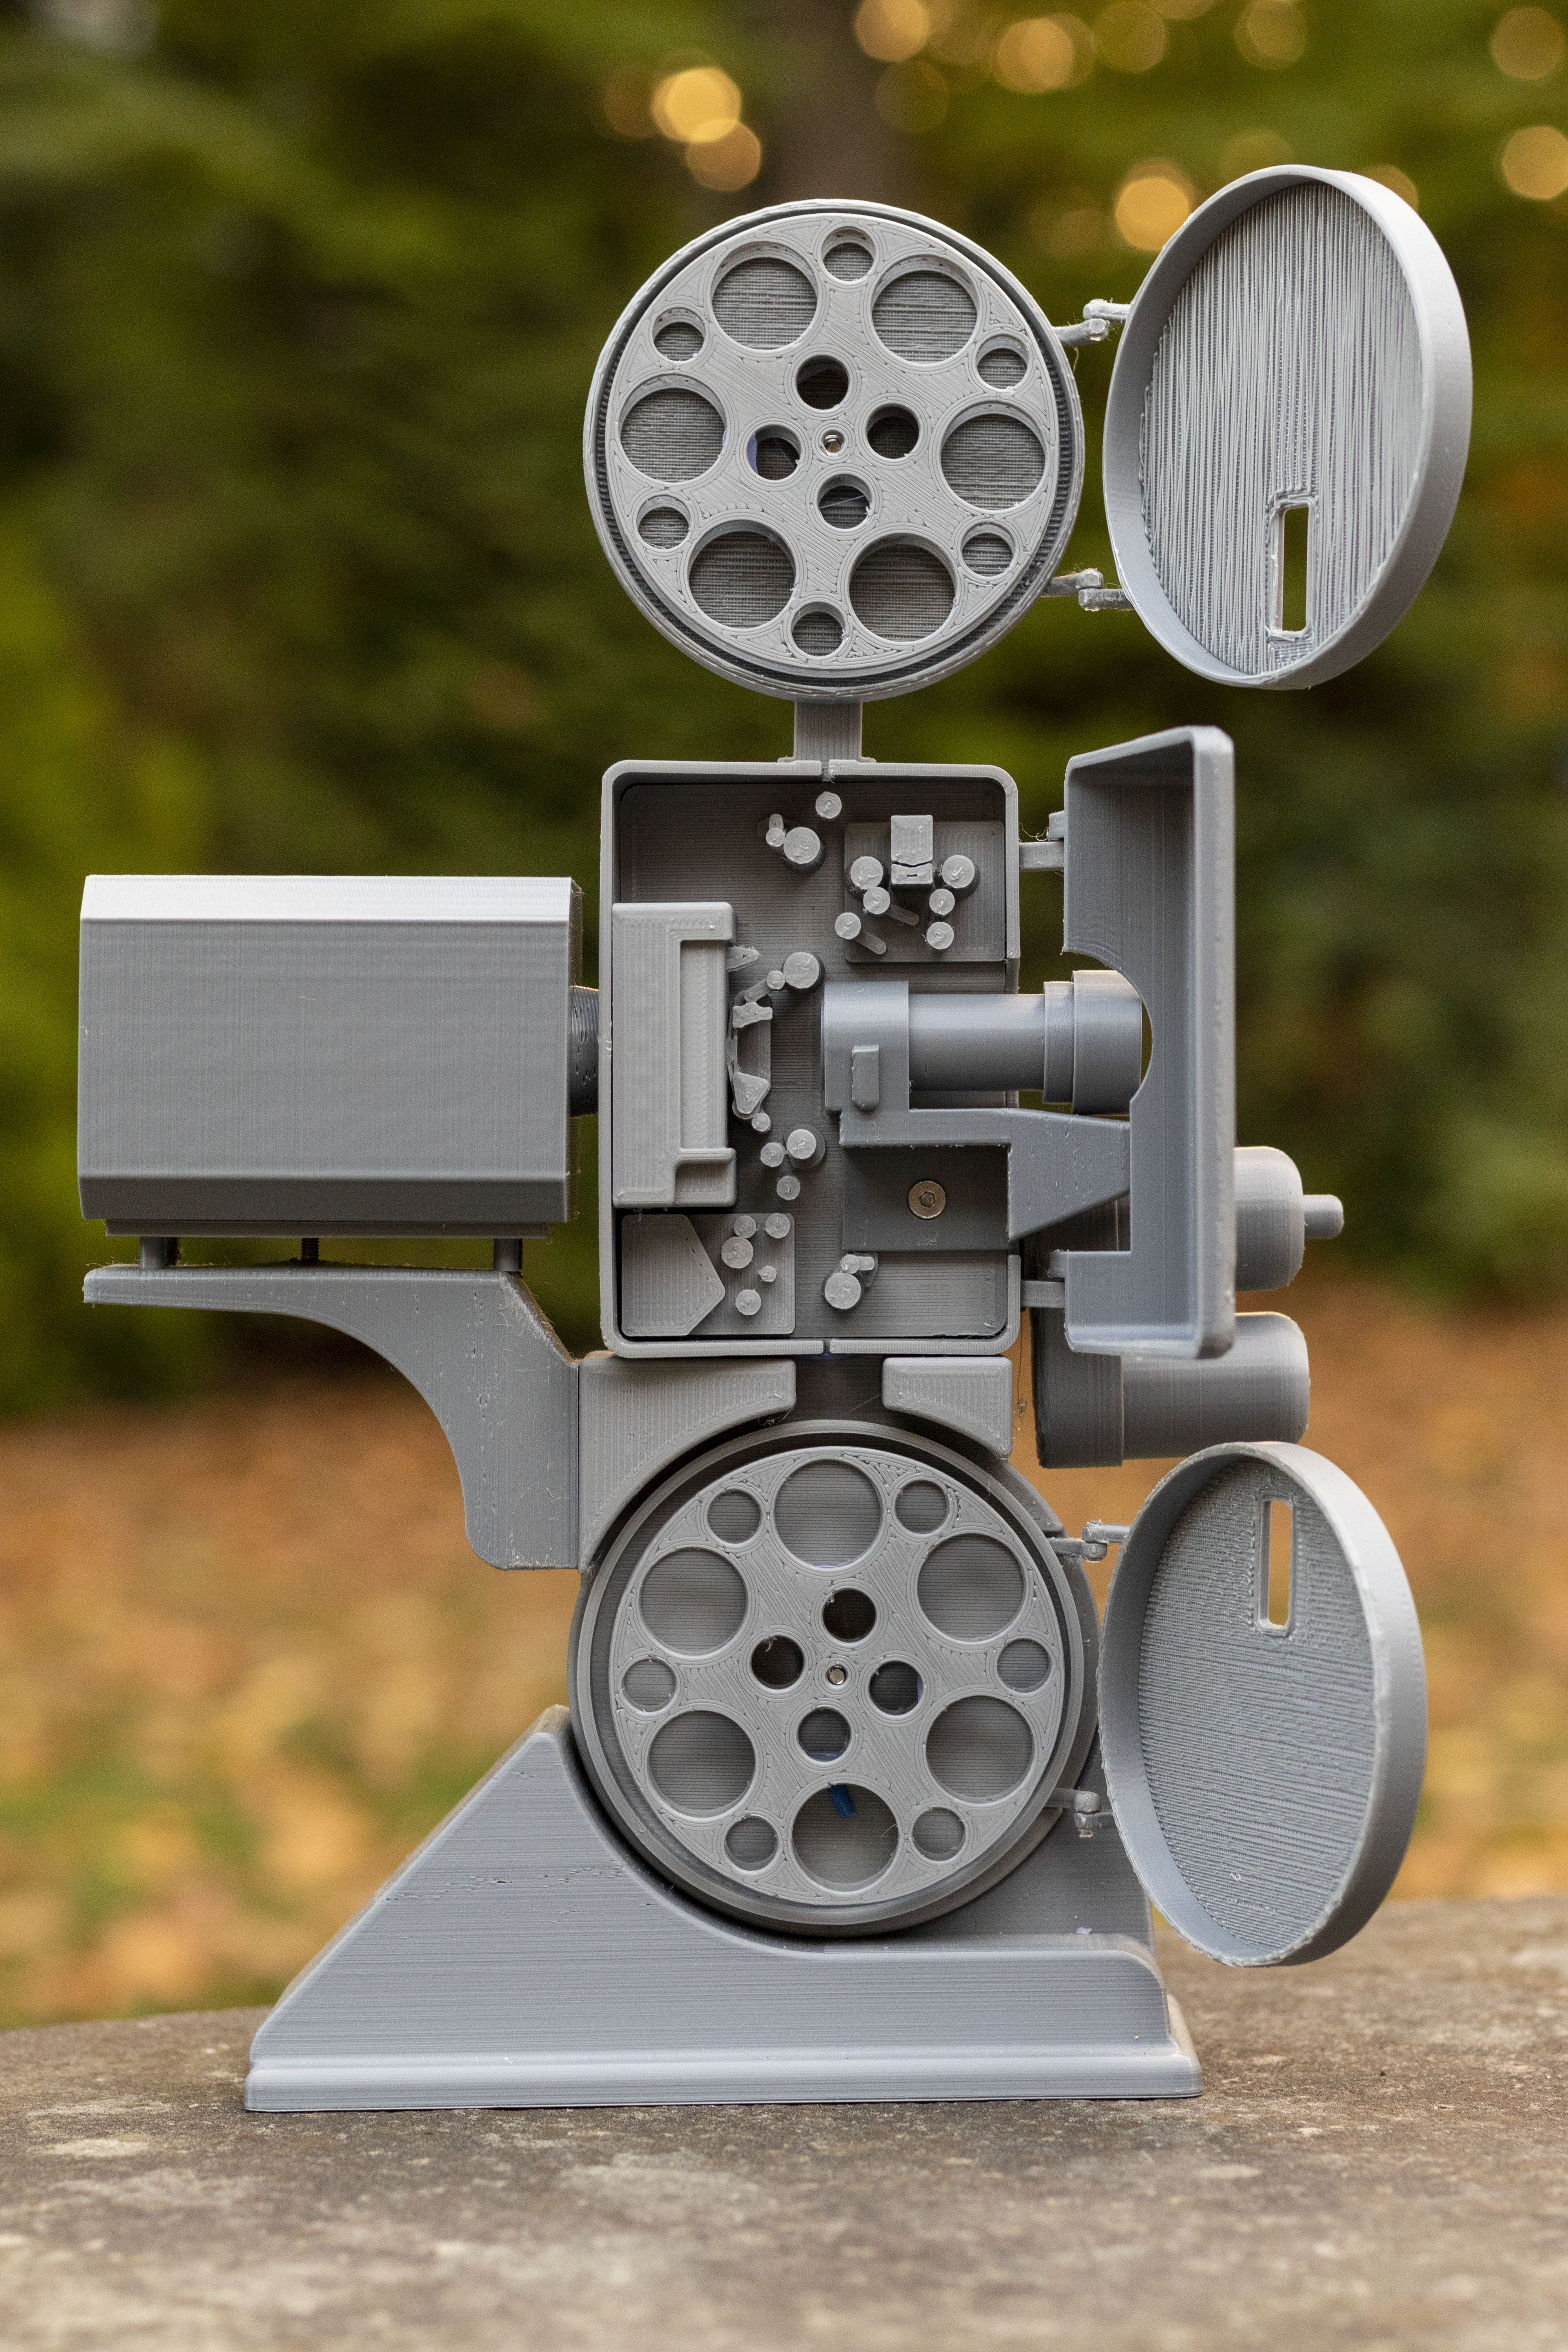
<p><strong>Background:</strong><br><br>This projector has gone by many names over its long career. These include:<br>“EL4000/01”<br>“DP70”<br>“Todd-AO Projector”<br>“Universal 70/35”<br>“Norelco AAII”<br><br>They all refer to the same, legendary machines. With roughly 1500 produced from 1955 - 1968, the DP70 was the first film projector able to run both 35mm and 70mm films. Still considered one of the best projectors ever made, these machines even won an Oscar for their design. Robust and reliable, several of these machines are still running today, nearly 60 years later.<br><br>This 1:8 scale model is optimized for maximum detail while still being printable, so a few small parts are missing. These parts would have simply been too small or completely unsupported and unreasonable to print. The major outline is accurate though, featuring a removable lens, functional doors, and it can even tilt up or down, just like the real thing.<br><br><strong>Printing Instructions</strong><br><br>Most parts do not require support material and have a large flat surface to sit on the bed while printing. All parts should be pre-oriented. Some require special attention:<br><br>Upper Base: Supports (from bed only), orient with big circular cavity facing down. The slot in the bottom has built in supports that need to be removed after printing.<br><br>Upper Magazine & Door: Inside facing down, supports on<br>Lower Magazine: Inside facing UP, supports on<br>Lower Magazine Door: Inside facing down, supports on<br><br>Motors: Motor bodies facing up, supports on<br><br>Lens Holder: Pointy end up, supports on<br><br>Inner Head: Absolutely no supports, you'll never be able to get them out. Requires maximum cooling. Lots of small parts that will easily deform if they don't cool fast enough</p><p>Reel Front & Reel Back: Print 2 of each<br><br>Tower No Magazine: This part is optional, and is a replacement for the Upper Magazine Tower should you prefer to not have the magazines installed.</p><p><strong>Assembly</strong><br> </p><p>The model assembles with an assortment of M3 screws and a small amount of the glue of your choice. Screws were used in most places, but some spots were simply too small to fit a fastener.<br><br>Exact order of assembly is non critical, though the head shell should be attached to the upper base before you insert the inner head. Depending on the printer this may be a tight or very tight press fit, and good luck getting to screws after they're trapped behind it. Hardware needed:<br><br>(All fasteners are countersunk)<br>2x M3x16mm screws with hex nuts (head shell to upper base)<br>2x M3x10mm screws (lower lamp table to upper base)<br>1x M3x20mm screw with hex nut (upper to lower base)<br>1x M3x20mm screw (lower to upper lamp table and lamphouse)<br>1x M3x20mm screw with hex nut (upper magazine tower to upper magazine)<br>1x M3x40mm screw with hex nut (lower cover to lower base and lower magazine)<br>1x M3x10mm screw (lens holder to inner head)<br><br>Several parts of this model use 1.75mm filament as a functional element. These include:<br><br>Lamphouse/lamp table: 2 opposing corners have holes sized for 1.75mm filament. This is an optional but recommended alignment tool. 1 short piece of filament in each corner added during assembly and trimmed to length will keep the lamphouse from spinning.<br><br>Door hinges: I suggest using nylon filament for this if you have it. The holes at the ends of the arms on each door are intended to be a semi-loose fit with 1.75mm filament, though you will likely need to enlarge them with a drill. Align the doors and insert a piece of filament to form each hinge and trim the excess.<br><br>Gluing: <br><br>The upper magazine tower and motors must be glued to the head shell. I would recommend superglue (CA glue), though hot glue certainly works.<br><br>The reel haves fit together snugly, but I would also recommend gluing these. Try to avoid hot glue here as the parts are very thin and squeeze-out will also be very hard to control.</p>
With this file you will be able to print Philips Norelco DP70 Film Projector with your 3D printer. Click on the button and save the file on your computer to work, edit or customize your design. You can also find more 3D designs for printers on Philips Norelco DP70 Film Projector.