Phone, Tablet Document Camera
thingiverse
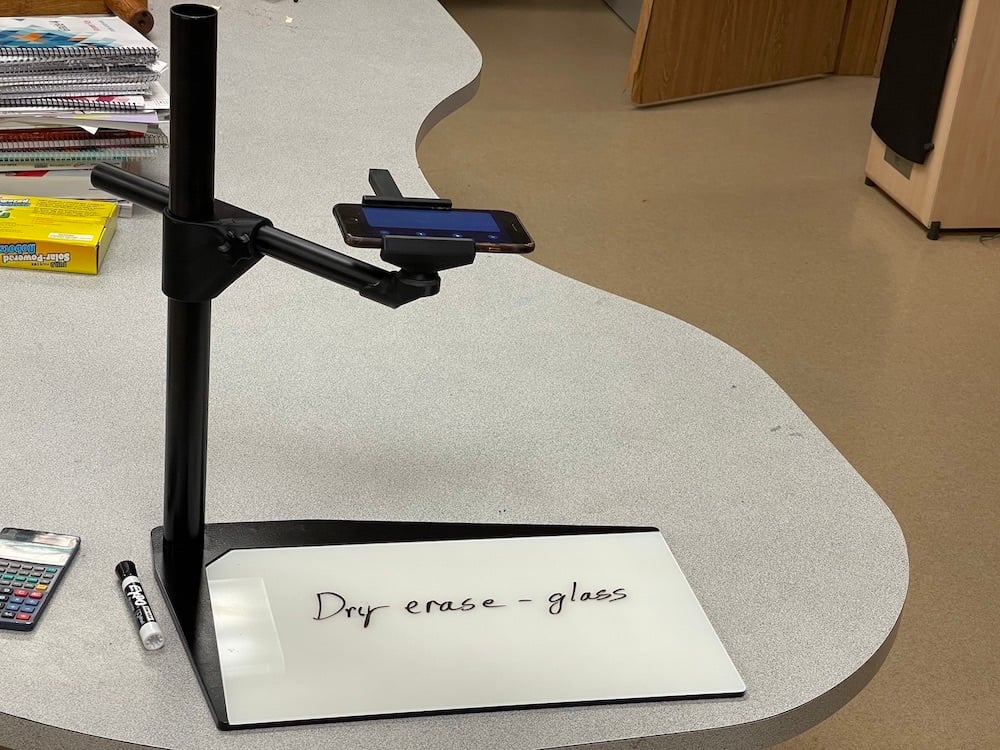
This thing is a sturdy stand that, together with a suitable tablet or phone, creates a document camera. Why make your own document camera? For one, a 4-year-old phone has a better camera in terms of image quality than most, if not all, document cameras. Also, smartphones and iPads usually have excellent color rendition, a feature which I have found lack-luster in purpose-built document cameras. High-end document cameras are much more expensive than cheap old phones, not to mention more scarce. Using an iPad as a document camera allows you to easily switch between digital, on-screen content and physical content as viewed by the camera, simply by switching apps. A key design goal in this thing is stiffness. Stiffness is important because any stand wobble from a moving table will translate to a blurry image. When you use this as a tablet stand, it should hold steady. *Features* The sliding clamp that holds your device expands to accommodate up to an iPad Pro 12.9". It uses a rubber band as a spring, which is concealed inside of the sliding bar. To lower the stretch ratio of the rubber band, it leads from the sliding clamp, loops around a pulley, and hooks to the outer end of the sliding beam. The height, position, and angle of the camera is adjustable and locks in place with a thumbscrew. The base is a heavy steel plate with a glass inset, for use as a dry erase marker surface. *Tubing* In addition to the 3D printed parts, this thing also uses steel tubing * Beam: 1" OD x 11" long * Column: 1.5" OD x 20" long The material I used was 18 gage. Any thickness will probably work but lighter is better. Maybe. *Steel Plate* It also requires two steel laser-cut plates. DXF files are provided. The Base is made from 3/16" steel. 1/4" might be better for added stiffness. Don't go light on this, as this is the weakest link in the system, even thought it is the heaviest. The "frame" piece is 10 gage steel. it serves as filler plate against the glass surface. If you use thicker glass, make this thicker as well. *Platen Glass* * 11 x 20 x 1/8" I used glass because it creates an excellent dry-erase surface and it gives the entire thing a good look. It does have some downsides, though. For one, it is somewhat difficult to cut and grind. It is also quite fragile. The worst, though is that it is shiny and reflects the overhead lights into your picture. If you have no use for a dry-erase surface, do NOT use glass. Instead, use a sheet of metal or plastic, and paint it a flat, neutral gray. Neutral gray will give you a good camera exposure and white balance most of the time. The size is as tall as a letter sheet of paper and the aspect ratio is about 16:9; the same as pretty much every modern SmartBoard. It's also the same aspect ratio as is used by all of the document camera apps that I tried. The back of the glass is painted white, with a light magenta tint to balance the green tint of standard silica glass. You can actually buy a special optically clear glass if you'd like to but I priced it out and it came to about $115 and only in 1/4" thickness, versus about $15 for regular 1/8" glass. *Hardware* * 1x 1.5 x 1/4" bolt * 1x 1.75 x 1/4" countersunk bolt (as measured from end-to-end) * 2x 1/4" nuts * 1x 1/4" locknut * 2x 7" x 1/8" rubber bands (a single, heavier rubber band will be fine) *Printed Plastic Parts* You can print most of the parts without supports because they were either easy to print to begin with or, as in the case with the clamp pieces, I split the parts for easier printing and they need to be glued up afterwards. Do use the alignment pins for this, as it will make it much easier and give you a nicer finish. Two parts cannot be printed without supports and I did not split them because doing so would have forced me to print them in an orientation that applies more force between laminar layers, the weakest part of FDM prints. These parts are the Transition and the Rotator. Please see pictures for how I oriented them on the print bed to achieve excellent surface finish, good strength, and to minimize supports. *Assembly* Printed Parts Dry-fit all parts before attempting to glue them. Use sandpaper to smooth sliding surfaces and mating glue surfaces. Glue up the clamp-halves. Glue the tower into the stationary clamp. Glue the ball joint end into the 1" pipe using CA glue. Allow the glue to dry before installing the tapered bolt and roller. Make sure the roller spins freely on the tapered bolt. Use a 1/4" drill to ream the axle hole if necessary. Tighten the 1/4" bolt down firmly and make sure the roller is still free. Apply a small amount of silicon paste lubricant to the rubber band and the plastic sliding surfaces before assembly. This will improve the longevity of the rubber band by reducing binding and wear. Thread the rubber band by inserting one into the front of the clam and poking it through each side fo the roller. Hook one of the rubber band into the end of the tower and the other into the sliding clamp. Install the clamp on the sliding tower as the last step. Finally, wipe down any excess lubricant. Metal Parts. The steel post should be a tight fit into its hole on the base pieces. install this first by pounding it into place with a rubber mallet. Square and tack weld the post from the bottom. I did not weld the top at all for aesthetics reason. Align, clamp, and plug-weld the plates next. *Software* Speaking of apps, I've tried two; they both work fine. One of them is Overviewer https://apps.apple.com/us/app/overviewer/id1528900395 This one was developed by a guy whose wife is a teacher in the USA and has to teach from home via zoom during the 2020-2021 COVID-19 season. The other one is called AirCamera https://apps.apple.com/us/app/air-camera/id1085319994 This one is not free and doesn't support switching between multiple front cameras. (it does let you use the facetime camera) It does let you lock the focus and exposure, which is sometimes helpful. Technically, the built-in camera works too but it does not allow you to display a clean image--the camera controls show up on the screen.
With this file you will be able to print Phone, Tablet Document Camera with your 3D printer. Click on the button and save the file on your computer to work, edit or customize your design. You can also find more 3D designs for printers on Phone, Tablet Document Camera.