Pi Zero Case with Swivel Camera mount
thingiverse
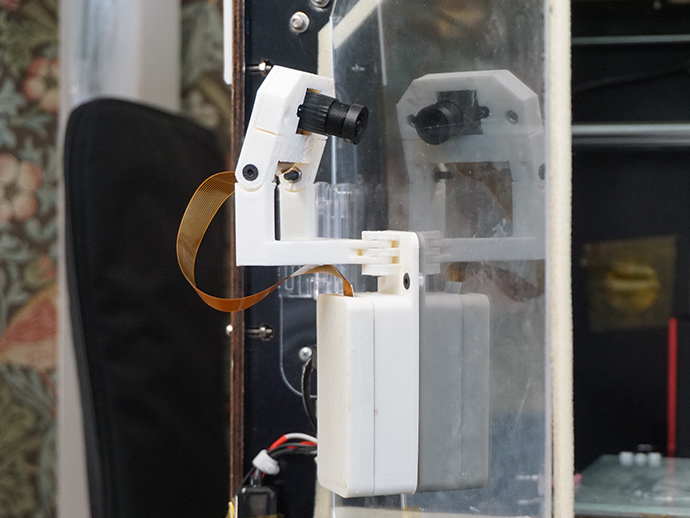
After setting up Octoprint on one of my 3D printers, I wanted to mount a camera to view print progress remotely. I experimented with some Pi camera modules but found the lack of manual focus control frustrating. After purchasing cameras with adjustable lenses, I discovered that there weren't many suitable mounts available on Thingiverse. So I decided to create my own mount that not only allowed me to attach such a camera but also swivel it and mount it to the door of the 3D printer for a better front-on view and protection from the heat inside. I always installed them in the corner, which gave a poor view of the print. Now that the Pi Zero W is supported by Octoprint, I could integrate everything into a small, lightweight package on the plexiglass door with minimal wiring. What I've also done is powered it via the GPIO pins and linked up a relay to switch the 3D printer on and off remotely. The usb cable is just for the printer interface. There's a gap left for the GPIO pins to be neatly tucked inside. Due to the direction of the camera cable, I had to mount the Pi Zero with its camera pointing backwards, so the camera cable doesn't experience any twisting. If you're looking for the same camera, they are sold as 'night-vision' Pi cameras, but mine didn't include infrared LEDs. I also needed a camera cable adapter because the Pi Zero uses a smaller port. This design utilizes push-in nuts. I use this method in most of my mechanical designs, so you'll need a relatively well-calibrated printer and I'd recommend printing in ABS due to its slight flexibility. To insert the nuts, I use a slightly larger screw and tighten it enough that it gets 'pulled' into the socket permanently. You will need: 1 x Raspberry Pi Zero (I used v1.3 Pi Zero W) 1 x Pi Module camera (I designed this for the night vision version, but others may work) 1 x Camera cable adapter (If your not using the Pi Camera V2) 8 x M3 Nuts 8 x Counter Sunk M3 Screws (Length needs to be around 15mm for 4, and 10mm for 4, but you can use longer ones, but not shorter) Attach the cable to the camera module then screw the camera parts together. When attaching the swivel mounts, don't over-tighten so you can still adjust it manually as per its purpose. The Pi can be mounted onto the back panel and placed straight on when finished. I used I_am_me's design for the Pi specific parts. The back panel is purely his design, and the 'lid' was remixed into the main part of the frame of this design (So it's kind of backwards to his original design). Enjoy!
With this file you will be able to print Pi Zero Case with Swivel Camera mount with your 3D printer. Click on the button and save the file on your computer to work, edit or customize your design. You can also find more 3D designs for printers on Pi Zero Case with Swivel Camera mount.