Pi Zero TV Case
prusaprinters
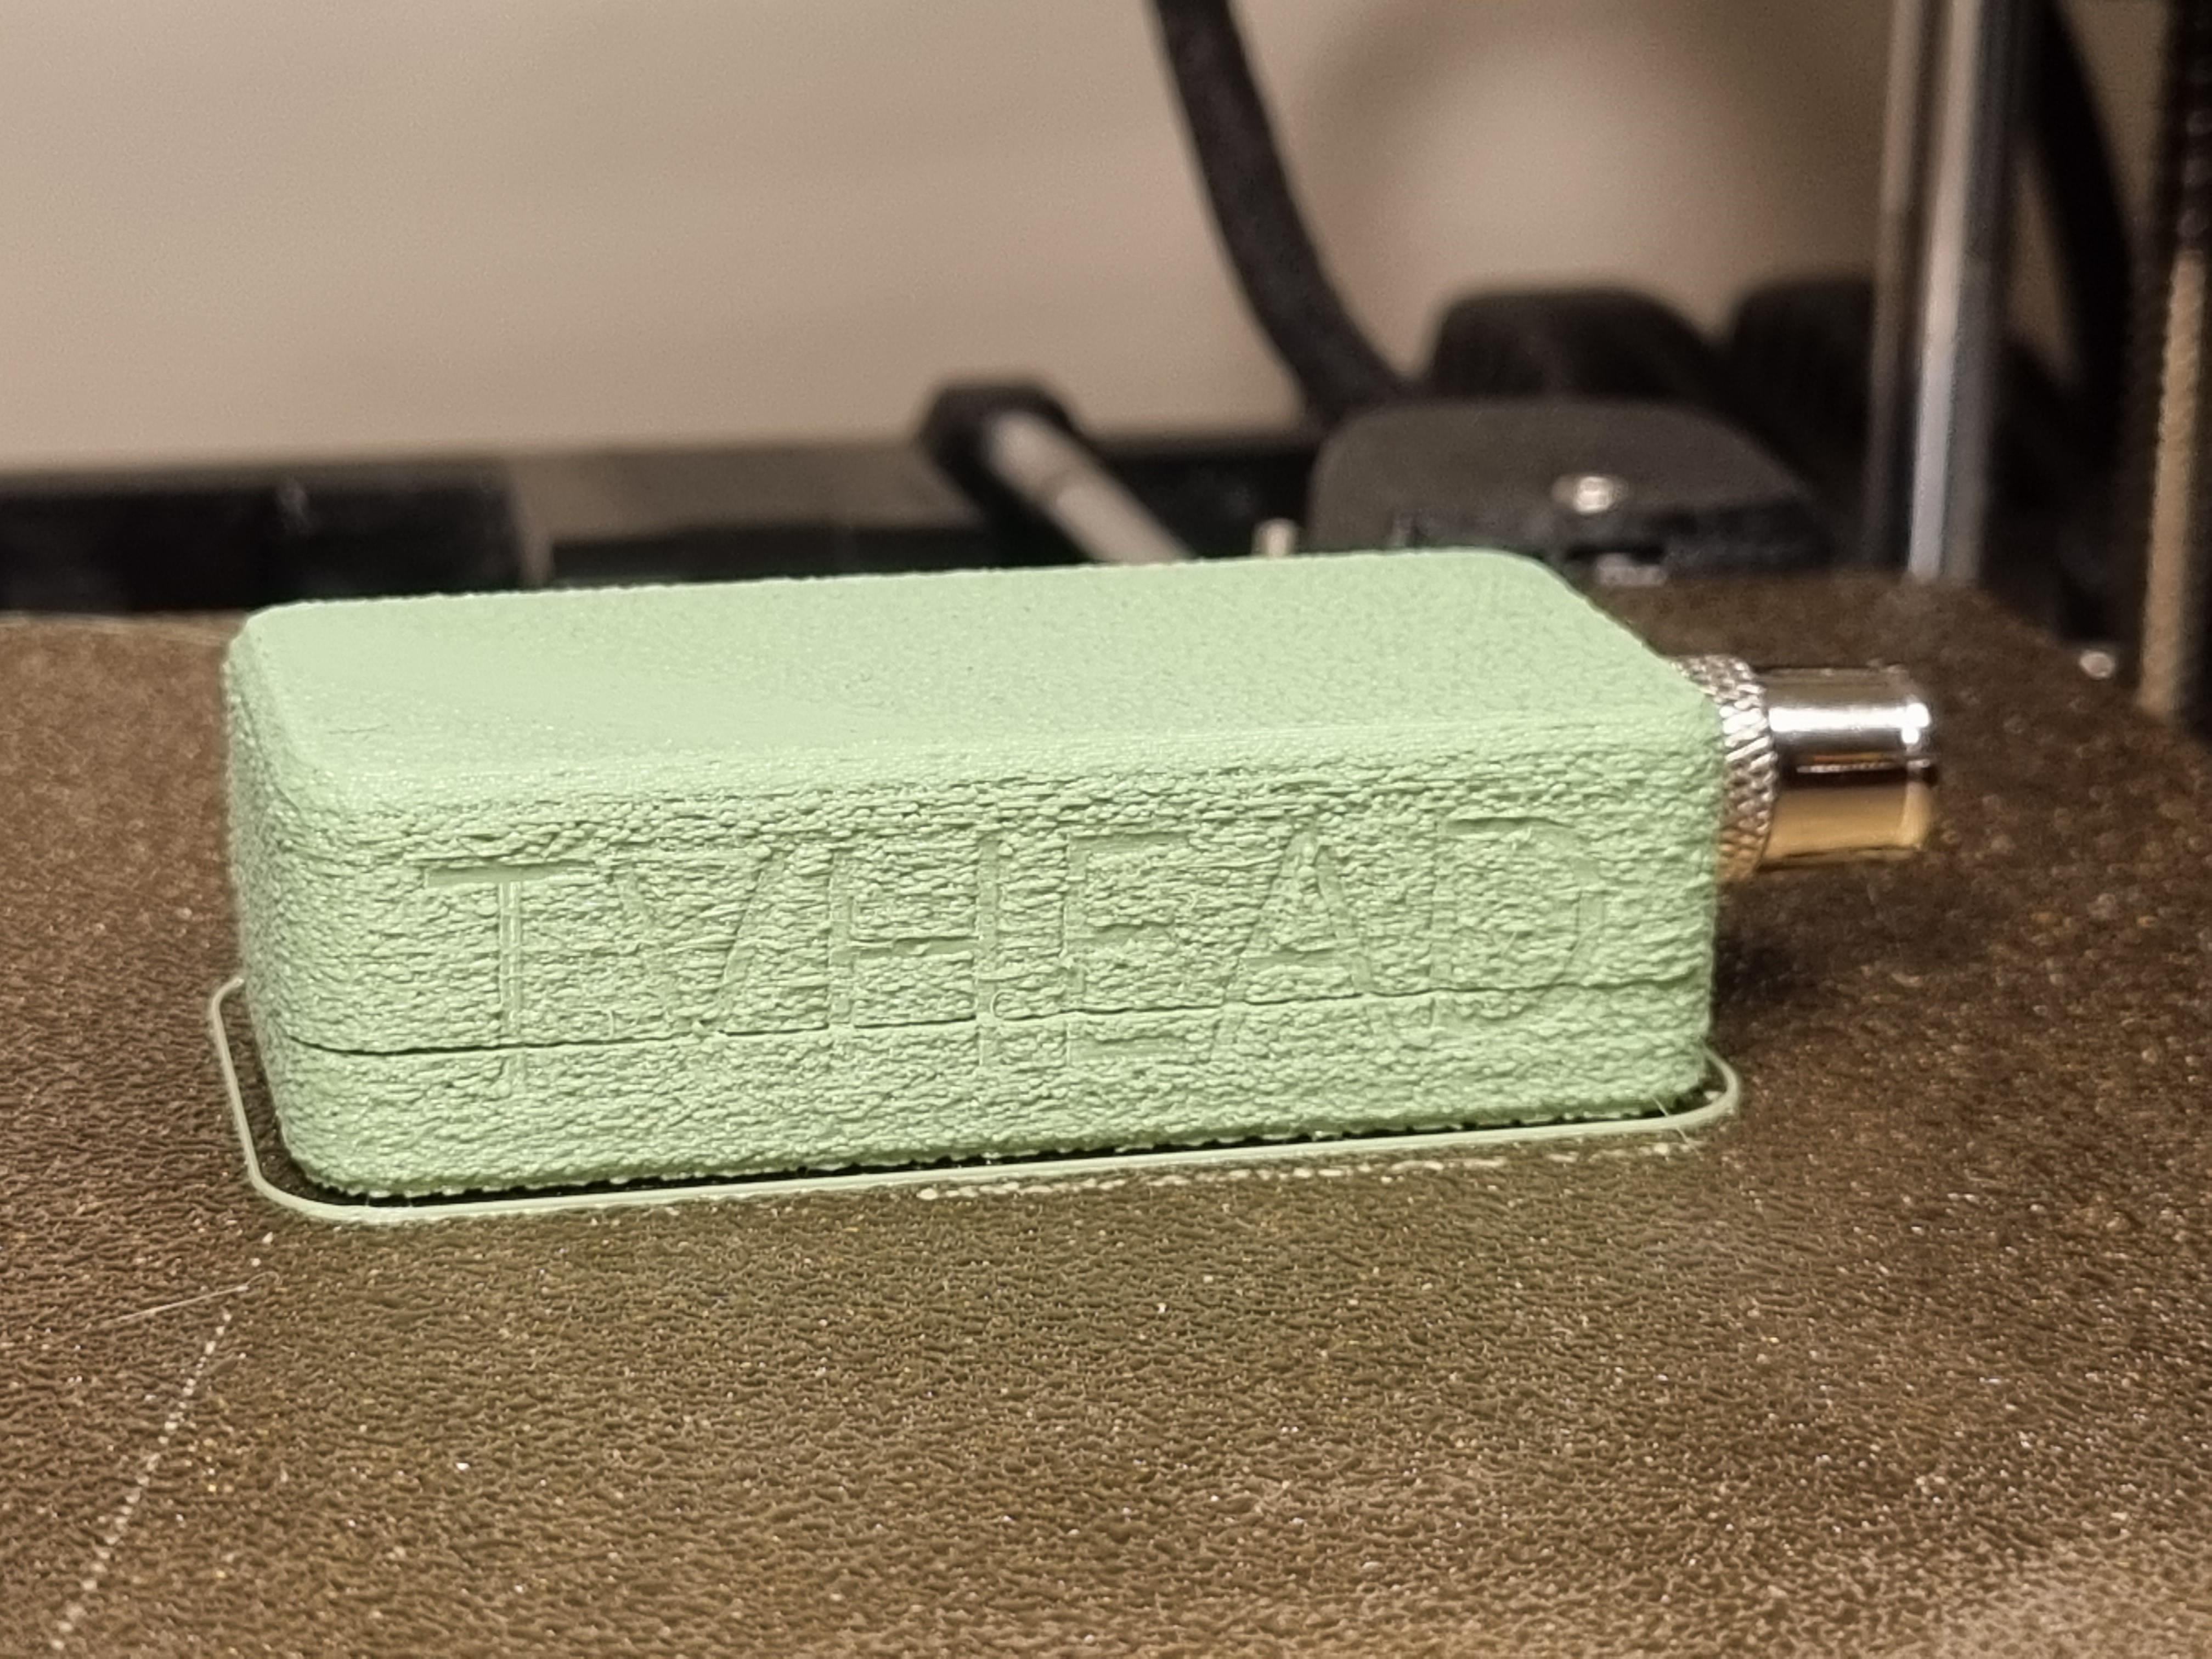
<p>A clip together case for my raspberry pi + TV tuner hat. I wanted to try out some of the new PrusaSlicer 2.4 features and so decided upon trying to use fuzzy walls to ‘match’ the very rough texture on one of the print beds I have.</p><p>Since the print is a two parts that are printed separately, the fuzzy print modifier applied to the whole model directly did not work well – I have some faces that I want to exclude from the ‘fuzzy’ to ensure that the line up. I’ve also a couple of ports (antenna and micro USB) that I also wanted to exclude the fuzzy effect from around.</p><p>Since PrusaSlicer allows for any shape of modifier to be used, in CAD I selected the area I wanted to be fuzzy and extruded them two nozzle-diameters into the thickness of the material, then connected them together outside of the model volume and made sure that they shared the same bottom plane as the actual parts. Then it was a case of adding this ‘mask’ as a modifier and then enabling the Fuzzy Skin modifier on Outside Walls.</p><p><img src="https://media.prusaprinters.org/media/prints/115317/rich_content/a29470ac-c17d-49b9-821f-21f8064d0152/image.png#%7B%22uuid%22%3A%22dd9b26e1-6e3a-49fa-bbdb-07ca69c022d6%22%2C%22w%22%3A687%2C%22h%22%3A487%7D" alt="Graphical user interface, text, application Description automatically generated"><img src="https://media.prusaprinters.org/media/prints/115317/rich_content/f301e1e3-d13e-4f4c-95ac-e44007f5a843/image.png#%7B%22uuid%22%3A%226c734676-0da9-43fd-a703-79e83076d47f%22%2C%22w%22%3A510%2C%22h%22%3A175%7D" alt="Graphical user interface, application, table Description automatically generated"></p><p>Loading of custom geometry modifier regions to add fuzz just to the desired wall areas.</p><p><img src="https://media.prusaprinters.org/media/prints/115317/rich_content/188b38aa-0386-48c3-82f5-5f1faa2edb61/image.png#%7B%22uuid%22%3A%22d4a9cedf-cc7c-497e-92d3-f460bd0c1658%22%2C%22w%22%3A2418%2C%22h%22%3A1882%7D" alt="A picture containing arrow Description automatically generated"></p><p>The modifier (yellow) has been created in CAD by adding thickness to the surface faces</p><p><img src="https://media.prusaprinters.org/media/prints/115317/rich_content/bda20a50-f9fa-4b00-a2bc-cc0571950dd7/image.png#%7B%22uuid%22%3A%221867d7f9-efbb-4364-95f1-bf3651d80d7e%22%2C%22w%22%3A2272%2C%22h%22%3A1760%7D"></p><p>Here the result is shown – note the angled face lies up with another one on the other half and so needs to be kept smooth. A ring around the split antenna hole is also left smooth.</p><p>You can see the wall perimeters get ‘doubled’ at the fuzzy region as a consequence of Prusaslicer adding walls around each modifier region. In this case it just needs to be understood that with this style of printing it will always print two passes, and as “Detect Thin Walls” currently removes the fuzz it explains why I thickened the geometry into the model at twice the nozzle diameter. </p><p><img src="https://media.prusaprinters.org/media/prints/115317/rich_content/651b4e42-5aef-4364-8b5a-e0dd0adee777/image.png#%7B%22uuid%22%3A%22722eeb03-4a08-4f3a-934d-d12b624f1e29%22%2C%22w%22%3A2587%2C%22h%22%3A1639%7D" alt="A picture containing text Description automatically generated"><img src="https://media.prusaprinters.org/media/prints/115317/rich_content/519073f7-f1aa-432b-a95a-5e29e8577631/image.png#%7B%22uuid%22%3A%22846ece74-ad53-4f1f-930f-2b09bbff1af7%22%2C%22w%22%3A2652%2C%22h%22%3A1538%7D" alt="A picture containing text Description automatically generated"></p><p>Liking the effect, I also used it to add some text to the side of the case – in this case TVHEAD since it’s running tvheadend. Overall the print case out well, once cleaned of stringiness the text is subtle but distinct. The places where the wall was _only_ two layers of fuzz are not see through, though I did find that the texture variations can vary depending on the wall thickness behind so I’d recommend enabling ‘Detect Thin Walls’ to minimise the extra squish.</p><p><img src="https://media.prusaprinters.org/media/prints/115317/rich_content/54138516-3e3e-49f7-8bf2-e0c77d05234c/image.png#%7B%22uuid%22%3A%22ae9515b1-c255-4b28-8171-4cda5753e020%22%2C%22w%22%3A2376%2C%22h%22%3A1132%7D" alt="A picture containing indoor Description automatically generated"></p><p>There is still no escaping the creating of separate walls though, until PrusaSlicer enables ‘soft’ region boundaries that don’t create a hard split in the model (obviously only compatible with a few modifiers).</p><p><img src="https://media.prusaprinters.org/media/prints/115317/rich_content/f347069a-b40b-4e4a-9831-e6fa005daad9/image.png#%7B%22uuid%22%3A%22be7b6225-fa3d-46c6-8486-c0ca7616d0e0%22%2C%22w%22%3A1526%2C%22h%22%3A824%7D"></p><p>To see the effect I’ve attached the ‘mask’ files for the upper and lower case, to use as the modifier</p><h4>Making a TVheadend raspberry pi zero 2</h4><p>To make you own you’ll also need:</p><ul><li>Raspberry Pi Zero 2 W</li><li>Raspberry Pi TV hat kit</li><li>An extra long 20x2 0.1” Header</li><li>3x 6mm M2.5 brass spacers</li><li>1x M2.5 washer (for the 4th corner post, optional)</li><li>1x M2.5x14mm bolt and nut (optional)</li></ul><p>Print the parts (if using the fuzzy setup I recommend a textured print bed).</p><p><img src="https://media.prusaprinters.org/media/prints/115317/rich_content/aef4736f-28cc-46fd-825a-6baea2ed47a8/image.png#%7B%22uuid%22%3A%2236aad683-eaf7-4f8c-9cf3-839505d33c28%22%2C%22w%22%3A2511%2C%22h%22%3A1154%7D"><img src="https://media.prusaprinters.org/media/prints/115317/rich_content/e274a94d-db39-44db-aab8-2c2209af430d/image.png#%7B%22uuid%22%3A%22a5998636-5802-4701-9f7b-f063f4fa1b2b%22%2C%22w%22%3A1304%2C%22h%22%3A1021%7D" alt="A picture containing furniture, seat Description automatically generated"></p><p>The extra long header can pass directly through the TV hat – you won’t need the female header provided in the kit. For the 4th unsupported corner I made a special space that, along with a washer, can secure this corner (thread the bolt through from the bottom so the nut and extra thread stick up out the way). I used the screws from the kit into brass spacers, so just needed to use 1 bolt. Purely optional though and works fine without.</p><p><img src="https://media.prusaprinters.org/media/prints/115317/rich_content/f5877279-f044-455f-8b33-3a01d15eab3b/image.png#%7B%22uuid%22%3A%22fe064e2f-11f3-459f-b6c8-49fe5f5b1900%22%2C%22w%22%3A2055%2C%22h%22%3A1128%7D" alt="Diagram Description automatically generated"></p><p>The two halves fit and clip together (I didn’t want any visible screw heads). First slide the top half micro usb protrusions and then ‘roll’ over the header pins. Then slide up the bottom and press into place. My printed tolerances were sufficient to hold it together by friction, but you could modify it to accept recessed socket head screws in the top and thread into some bosses in the bottom.</p><p>Software wise I follow this guide: <a href="https://thepihut.com/blogs/raspberry-pi-tutorials/how-to-stream-digital-tv-with-the-raspberry-pi-tv-hat">https://thepihut.com/blogs/raspberry-pi-tutorials/how-to-stream-digital-tv-with-the-raspberry-pi-tv-hat</a></p><p>Occasional stutters streaming to my phone by wifi, but good enough - YMMV! If you want better streaming performance use ethernet via a USB ethernet OTG adaptor, though you may decide at this point to use a Pi 3 or 4, which have ethernet built in.</p><p><img src="https://media.prusaprinters.org/media/prints/115317/rich_content/3bd3cde6-bb0f-4dae-adce-6383dc95fa78/image.png#%7B%22uuid%22%3A%2245a933fb-496c-4c5f-8e42-8cde4ce741d2%22%2C%22w%22%3A2685%2C%22h%22%3A1993%7D" alt="A picture containing indoor, wall, table Description automatically generated"></p>
With this file you will be able to print Pi Zero TV Case with your 3D printer. Click on the button and save the file on your computer to work, edit or customize your design. You can also find more 3D designs for printers on Pi Zero TV Case.