Pikon personal portable photobooth
thingiverse
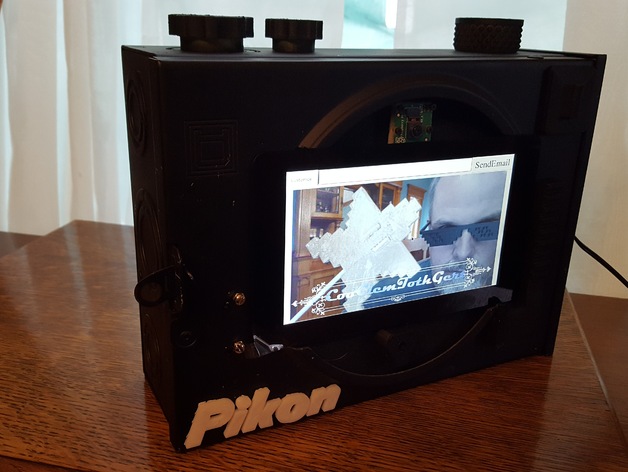
Update! I had to improve on the original version -- The Pikon logo is an authentic creation - everything else with this thing came from modifying other people's designs. I built a portable photobooth following the Make instructions here: http://makezine.com/projects/raspberry-pi-photo-booth/ I used an electrical enclosure from Home depot, a jigsaw and some black spray paint: http://www.homedepot.com/p/Square-D-125-Amp-Overhead-Underground-Ringless-Horn-Meter-Socket-UGHTRS101B/100152068 Most of the knobs and accessories on this are directly from schlem's terrapin pinhole camera (I took the combined meshes and broke them into smaller files to make the knobs bigger): http://www.thingiverse.com/thing:728157 I found some old hotel air conditioning switches and mounted them on the enclosure. The one on the right controls the power, the one on the left controls nothing -- maybe I'll hook this to the GPIO and have it launch the selfie script. I grabbed Jesse's pegboard AC plug mount http://www.thingiverse.com/thing:902305 and chopped off the pegs - this is glued on the inside of the enclosure to keep the adapter in place when you are on the road. I modified Cheewee2000's flip top lens cap http://www.thingiverse.com/thing:656038 (a lot) to make the hinged cap for the side to allow to close it up when you are a'travelin'. Finally I modified tilden's CPAP hose clamp http://www.thingiverse.com/thing:220972 (also a lot) to hold a Rii X1 in the enclosure: http://www.riitek.com/product/mini/4.html I decided that configuring Wifi everywhere I go can be maddening trying to use the touchscreen keyboard, and this little bluetooth unit works great. The end result is a sturdy, comically over-sized camera that is actually a touchscreen photobooth and big chunky satisfying knobs to control it on top. The kids love it, and the family gets to see all the selfies in real time through Google. Print Settings Printer: Custom Rig Rafts: Doesn't Matter Supports: Doesn't Matter Resolution: 0.3 or better Infill: yes - 20% should be fine Notes: You may want to print the logo with a raft to keep the letter spacing accurate. If you have a 2-nozzle printer you could print the raft in black and the letters in white so you just glue the logo on as a single piece. How I Designed This 1) Grab a copy of the Nikon logo 2) Use GIMP to replace the N with a P 3) Use custom software to turn the 2D logo into a 3D mesh (you could also use Inkscape or OpenSCAD to do this if you wanted to - plenty of web tutorials on how to do this) 4) Glue the letters on your awesome photobooth 5) Post to Thingiverse and hope Nikon's lawyers don't send you nasty letters.
With this file you will be able to print Pikon personal portable photobooth with your 3D printer. Click on the button and save the file on your computer to work, edit or customize your design. You can also find more 3D designs for printers on Pikon personal portable photobooth.