PIN-header connector housing
thingiverse
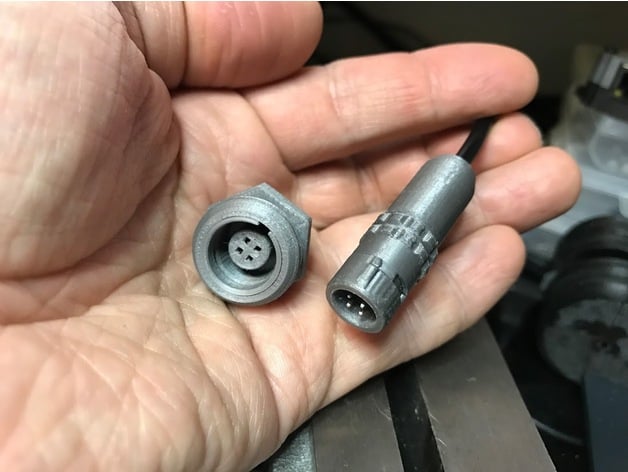
WARNING! this is a very complicated print, it requires sanding and cutting and gluing when mounting (how much obviously depends on the quality of your printer). Be prepared to do a couple of tries with different settings and put some work to the printed parts before you get it working. This is an experiment to see if it is possible to print a working connector using 2.54mm pitch pin-header 2x2 female and male. I've been using pin headers in a lot of experiments so I figures it would be fun to make them look a bit nicer. I will use this connector for a project where an Arduino controls temperature, ventilation and light in my 3D printer cabinet. I've printed most tests using 0.05mm layer height and the threads work very well, at first they usually snag a bit so you have to work it back and forth gently until they run smooth. I tried several different methods for locking, like flexing pieces on the side that you push in order to release, but the material wasn't up for the job and I wanted the project to be fully 3D-printed except only the pin headers, so I changed to a locking ring system where the locker ring is turned to lock the connector in place. It's not a super-strong lock as it's only a very tiny bulge on the locker ring that actually locks the connector, but it will prevent it from falling out too easily. I will probably release a couple of iterations to this one whenever I have a need for a new version. The design was inspired by Lemo and made using Fusion 360. Cheers and happy printing! :) Print Settings Printer: Prusa i3 mk2 Rafts: No Supports: Yes Resolution: 0.05 Infill: 100% Notes: Works very well with Prusa PLA. Haven't tested with other materials, please report in the comments if you try with other materials, would be nice to see the result! Post-Printing What do do when you've printed the parts The print layers leave tiny threads on the surface and if the connector is printed with rough surfaces those threads can make the connector snag extremely hard, so hard in fact that I had trouble getting it out at all at first. So make sure you try to push it in gently and sand the pieces until the male and female fits together nice and smooth. The pins will add extra friction later so don't be worried that the fit is too floppy, it's much worse if you can't get the connector out. Important tip! When assembling the male connector, you obviously first put the cable through the male outer shell, the clamp, the locker ring and the male housing, and solder the 2x2 pin header. Than when you have pushed the pin header into the male insert, it's very important that you get the male insert in the right orientation when you push it into the male housing. The easiest way to do this is to use the female housing by sliding in the pins into the female connector and than using that to push the insert into the male housing and you'll automatically get it in in at the right angle and distance. The fit needs to be really snug, you can use glue to keep the insert in place.
With this file you will be able to print PIN-header connector housing with your 3D printer. Click on the button and save the file on your computer to work, edit or customize your design. You can also find more 3D designs for printers on PIN-header connector housing.