Pinning Block with Instructions
thingiverse
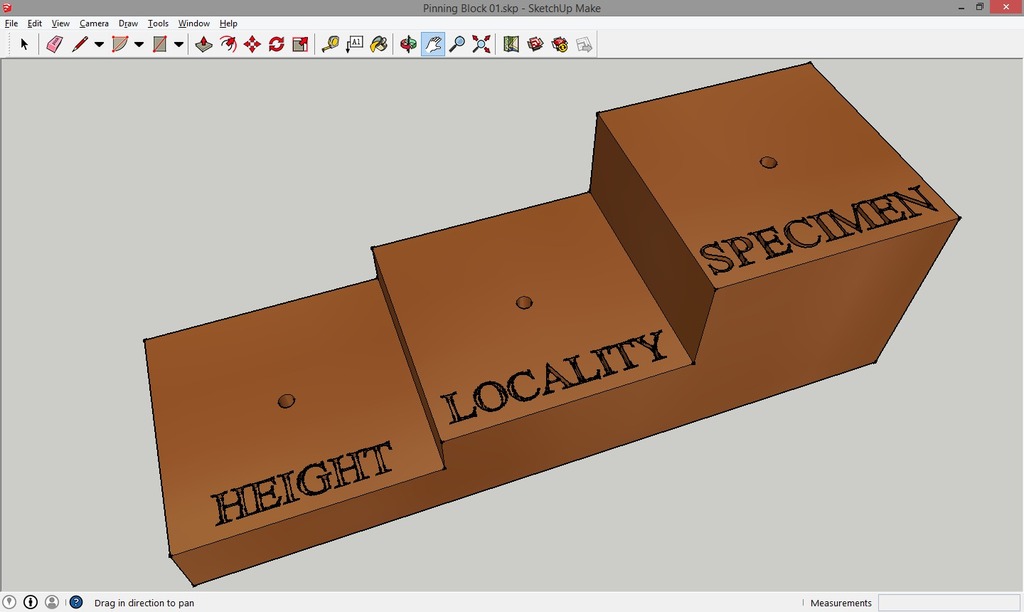
This is a basic pinning block for correct spacing of insect specimens and labels on pins. I added text (extra-sciency Times New Roman) because pinning blocks rarely have any instructions whatsoever. They always seemed rather esoteric to me! This pinning block uses "traditional" heights for the steps. The highest step (SPECIMEN, 23mm, ~7/8" high) is for putting the insect at the correct height. Place the block on a table and push the pin through the specimen until it stops. The lowest step (HEIGHT, 7mm, ~1/4" high) is for lowering the insect if it is particularly large, such as a scarab beetle, or to position point mounts, if it is particularly small. Put the pin upside-down through the hole. The lowest step can also be used to add a second label such as identification. The middle step (LOCALITY, 12mm, ~ 7/16") is for adding the collection label, with locality, date, and collector info. I have not printed this yet (will do so very soon!), so it is marked a work in progress. I am concerned that the text will not print nicely, and the holes won't be big enough.
With this file you will be able to print Pinning Block with Instructions with your 3D printer. Click on the button and save the file on your computer to work, edit or customize your design. You can also find more 3D designs for printers on Pinning Block with Instructions.