PiSec Cam MkV
thingiverse
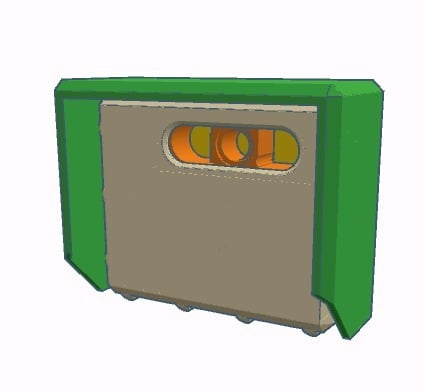
MkV released! I redesigned this to make it all smaller and more compact. Also fixes other problems. First off my other designs didn't cope well with differing glass thickness. For this one the CamBlock simply slides in further or less, depending on the thickness. I plan on using a cheap picture frame for thinner glass. Or see if a glass shop will give you a scrap, or cut it for you. This one could be much slimmer (40mm not counting mounts!) due to getting rid of the internal framework to hold the Pi and the camera, I planned this one originally to use a USB drive to store pictures locally, accessible via WiFi to view them. I've found out that the Pi3 B+ can use POE with a low profile hat, so that opens this camera up to POE as well without that big bulky adapter box that the MKI-IV use. There is a groove provided around the edge of the front where the two pieces meet, you can fill this with silicone and level it off, then after letting the silicone cure, the keyway on the back half of the case will press into it and create a seal. I still wouldn't recommend using any of them in the rain except for the horizontal ball mount when using its rain hood. I may create rain hoods for the others too, but it will require changes to those back plates. This camera case is still designed to use this camera module: http://a.co/5qq4F5M I believe the Waveshare camera is the same. Make sure the light sensors are oriented the same, I have seen them opposite from these. I still may add a heatsink to this, either in the area originally left for MicroUSB power that won't be needed with a Pi 3B+ and POE, or I could add another backplate with provisions for them. I think a heatsink inside and another outside with a thin wall between would cool the interior enough without exposing it to the outside. Part Details: Front-Direct mounts Pi to the case with 4x 2.5mm screws, fewer parts to print but more difficult to remove Pi to access SD card. - No supports needed. Use a small amount of silicone to seal glass to front. The groove on the inside is to help keep silicone from squishing out, don't use too much. Front-Plate uses my PiPlate slimmed down, with the normal clips from the bottom to secure the Pi. Pi can be removed with one 3mm screw. No supports needed. Use a small amount of silicone to seal glass to front. The groove on the inside is to help keep silicone from squishing out, don't use too much. PiPlate is the slimmed down version of my Piplate with three round pegs added to the edge to lock into the Front-Plate part. Needs supports under the ledge and under the clip slots, keep them 0.5mm away from the Y and X axes so they don't fuse to the part too hard. Not needed if direct mounting Pi. PiClips are the clips used to attach the Pi to the PiPlate, 2 needed, print laying down or the layer lines will make them snap too easily. Print 2. Not needed if direct mounting Pi. Camblock is the block that the camera mounts to. Recess in the bottom is for an o-ring to block IR glare from LEDs.This piece also helps to secure the front glass. Needs supports for the round recess in the front and under the screw ears. Print with the camera mounting holes facing up, supports would be difficult to remove inside these. Back-Plain is just a blank back, no holes, no means for attachment, no holes. Can upload STL into Tinkercad to add holes or mounting point. Print inside surface down, will need support inside the recess. Back-1-5Strap is a back designed to use a 1.5" nylon strap to attach camera. No holes, can drill your own after printing or upload STL into Tinkercad to add what you need. Print inside surface down, will need support inside the recess. A narrow support will be needed under the strap slots, but they are rounded underneath, so only a few degrees off of horizontal for support setting should work. Back-2-0Strap is identical to Back-1-5Strap, just with larger slots for up to a 2" strap. Slot lugs are also a bit beefier. As with 1-5, upload STL into Tinkercad to add your cable hole. Back-KeyholeSlots is a back with slots so the camera can be hung flush on a wall. Provides no angular adjustment. Should be printed inside surface up with supports under perimeter screw lugs. No cable hole here either, upload STL into Tinkercad to add one to your liking. Back-Vertball attaches to the same 30mm ball mount used in the MKIII and MKIV, aligns camera standing vertically so case is taller than it is wide. Print with inside surface down, supports in the recess. No supports needed under ball. Cable passes through the middle of the mount and ball. Back-Horizball is similar to Vertball, but orients the camera horizontally so the case is wider than it is tall. Also includes a dovetail for the rain hood. Print inside surface down, supports in recess, no supports under ball or in dovetail. Hood-Horizball is the rain hood intended for use with the Horizball back plate. Slides into the dovetail on the back of the case and clips around the ball stem. Provides two slots to secure with a zip tie. Print laying on its back with the hole laying down, dovetail should be horizontal facing up. No supports needed. Back-Horizball-25x100x10Heatsink is a rear cover designed to use 4x 25mmx100mmx10mm heatsinks, two inside, two outside. Should help with heat buildup. Works with Hood-Heatsinks. Print inside surface down, with supports to buildplate. Check in your slicer and make sure the two thin walls separating the heatsinks are solid. They're 0.8mm thick, so with 0.2mm layers and 2 top/2bottom layers it should be a solid 4 layers. You don't want air pockets here as they will act as insulation between the heatsinks. The plastic should conduct well enough. Heatsinks are sold on Amazon as "Uxcell a14111400ux0242 5 Pcs Silver Tone Aluminium Radiator Heatsink Heat Sink 100x25x10mm (Pack of 5)" ► 12/19 I've printed out the PiPlate and the Front-Plate. These fit together fine. Mine were a bit snug due to some elephant's foot on the Piplate, but it wasn't difficult to put together. Use a raft under the PiPlate and there should be zero issue. Or just clean up the elephant's foot a bit. I didn't, still went together with very little force to squeeze the pieces together. ► 12/19 Edited CamBlock, added 3mm bevels to the bottom to help clear any elephant's foot and allow for a little silicone fillet around the glass. ► 12/19 Found issue with sealant groove around front pieces. Tinkercad had an issue and didn't like it when I added the sealant groove around the glass. For some reason it made the sealant groove "hole" 1.99mm deep instead of 2.0mm, so it had a 0.01mm roof over it. Fixed now. ► 12/19 Added my 30mm ball mount files here too. Print as oriented, choose either blank mounting ring for adding your own holes, or the 4" ring for mounting to a standard 4" round electrical box normally used for lighting. Mounting rings need support to build plate for recesses, nothing else should need them, do not put supports in threads. ► 12/19 Added HorizBall rear cover with heatsinks. Uses 4x 25mm x 100mm x 10mm heatsinks, two inside, two outside. Will be in the way of the top two USB ports on the Pi but shouldn't interfere with anything else. Rain hood will not work with this cover even without external heatsinks. Will need to design a hood to accommodate. ► 12/19 Added Hood-Heatsinks. Fits the Rear cover above. I'm going to recommend using the rear cover with heatsinks, this, and the ball mount. I can add heatsinks to some other rear plates if someone wants them. ►12/19 Changes after first prints - Added a small chamfer to PiPlate to clear the HDMI port a little better. Made CamBlock 2.5mm taller. Camera lens protruded from original about 2mm. My dimensions for the camera were off somewhere along the way. Front-Plate model printed out fine and looks good.
With this file you will be able to print PiSec Cam MkV with your 3D printer. Click on the button and save the file on your computer to work, edit or customize your design. You can also find more 3D designs for printers on PiSec Cam MkV.