Pix-G Cam
thingiverse
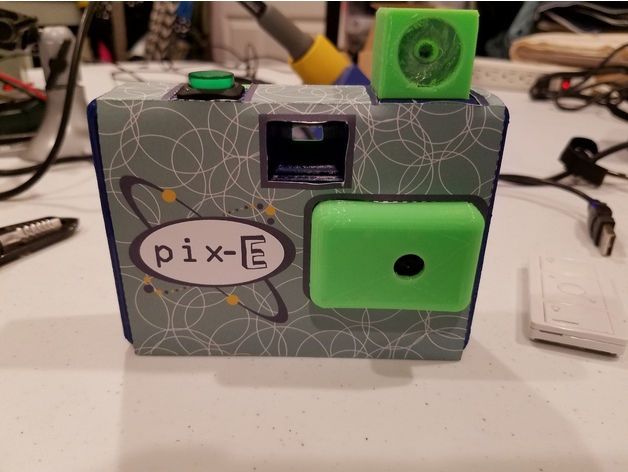
I modified the awesome Pix-E camera by altering the body to accept a "flash" housing. I modeled the housing in 123D Design to accept a 20mm Transparent LED Lens Reflector Collimator (8 Degree). I glued an IR LED into the back of the reflector using E6000, and used a PI NoIR camera module instead of the regular PI Camera module. There wasn't a lot of space in the flash corner for screws, so the flash housing snaps into holes I made in my remixed body, and the LED goes through a central hole between the clip holes. I'm infatuated with all things spooky, so I made this with an IR camera, but you could easily use the regular PI Camera and a bright (or colored!) LED and use it as an actual light for regular photos. Just make sure whatever LED you use, you put the proper resistor inline! I also had to use an N-Channel Power MOSFET to power the LED while controlling the gate with a pin on the RPi. (Unfortunately, I found that the software PWM wasn't stable enough to use as control for variable brightness on the LED, so I just used more resistors!) I only altered the code to initialize the new LED pin, and turn it on before the pictures begin, and turn it off after they're done. I also modified the back to more tightly fit a Breadboard-friendly SPDT Slide Switch (I bought mine on Adafruit). Here are some sample .gifs: Print Settings Printer: Monoprice Maker Ultimate Rafts: No Supports: Yes Resolution: .1mm Infill: .23 Notes: I was messing with new PLA's and various settings, so my prints didn't come out the best, and some parts are better than others... still usable, if not the prettiest!
With this file you will be able to print Pix-G Cam with your 3D printer. Click on the button and save the file on your computer to work, edit or customize your design. You can also find more 3D designs for printers on Pix-G Cam.