Planer Board
thingiverse
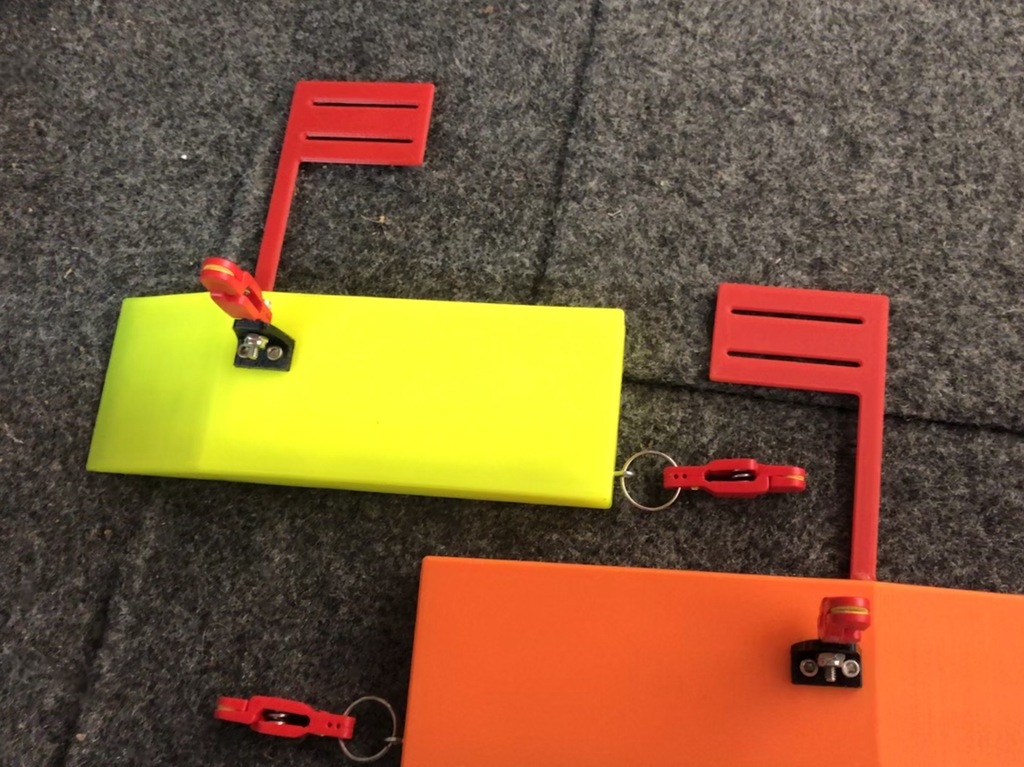
With this planer board you can make both port and starboard side versions by mirroring the board and the flag STL files in your slicer. The release bracket is the same for both sides. If printing the original file size, you need at least a 200x300 build plate. Reduce to 80% in all axis if using a 200x200 build plate. I believe that just making it shorter to fit the build plate and keeping the other 2 axis at 100% might be as good, if not better, because you'll have more surface area in the water to cut away from the boat. I didn't put any mounting holes in for the release bracket to be fastened to the board because I've been experimenting with hole placement for custom tuning purposes. Please pre drill all holes if you plan to use screws so you don't split the plastic. Also, adding the correct amount of lead weight in the bottom side groove for the board to sit correctly in the water needs to be tuned per board. Due to the different buoyancy properties of the plastic, the flotation foam insert used and scale of model, I cannot say exactly how much weight is needed in your situation. Additional items: 1. Planer board release clips. (2 per board) 2. Styrofoam. 3. Mounting hardware of your choosing. I suggest using stainless steel. 4. Lead sinkers or old wheel weights. 5. Hot glue for securing weights and flotation. 6. Small eye bolt for rear release clip. 7. Key chain ring if not included with purchase of release clips. I used PETG for flag and board for its water resistant properties. Also, if you leave it out in the sun accidentally it shouldn't melt like PLA. For the release clip mount I used Taulman 910 nylon.
With this file you will be able to print Planer Board with your 3D printer. Click on the button and save the file on your computer to work, edit or customize your design. You can also find more 3D designs for printers on Planer Board.