Plastic Rivet for Car Remix
prusaprinters
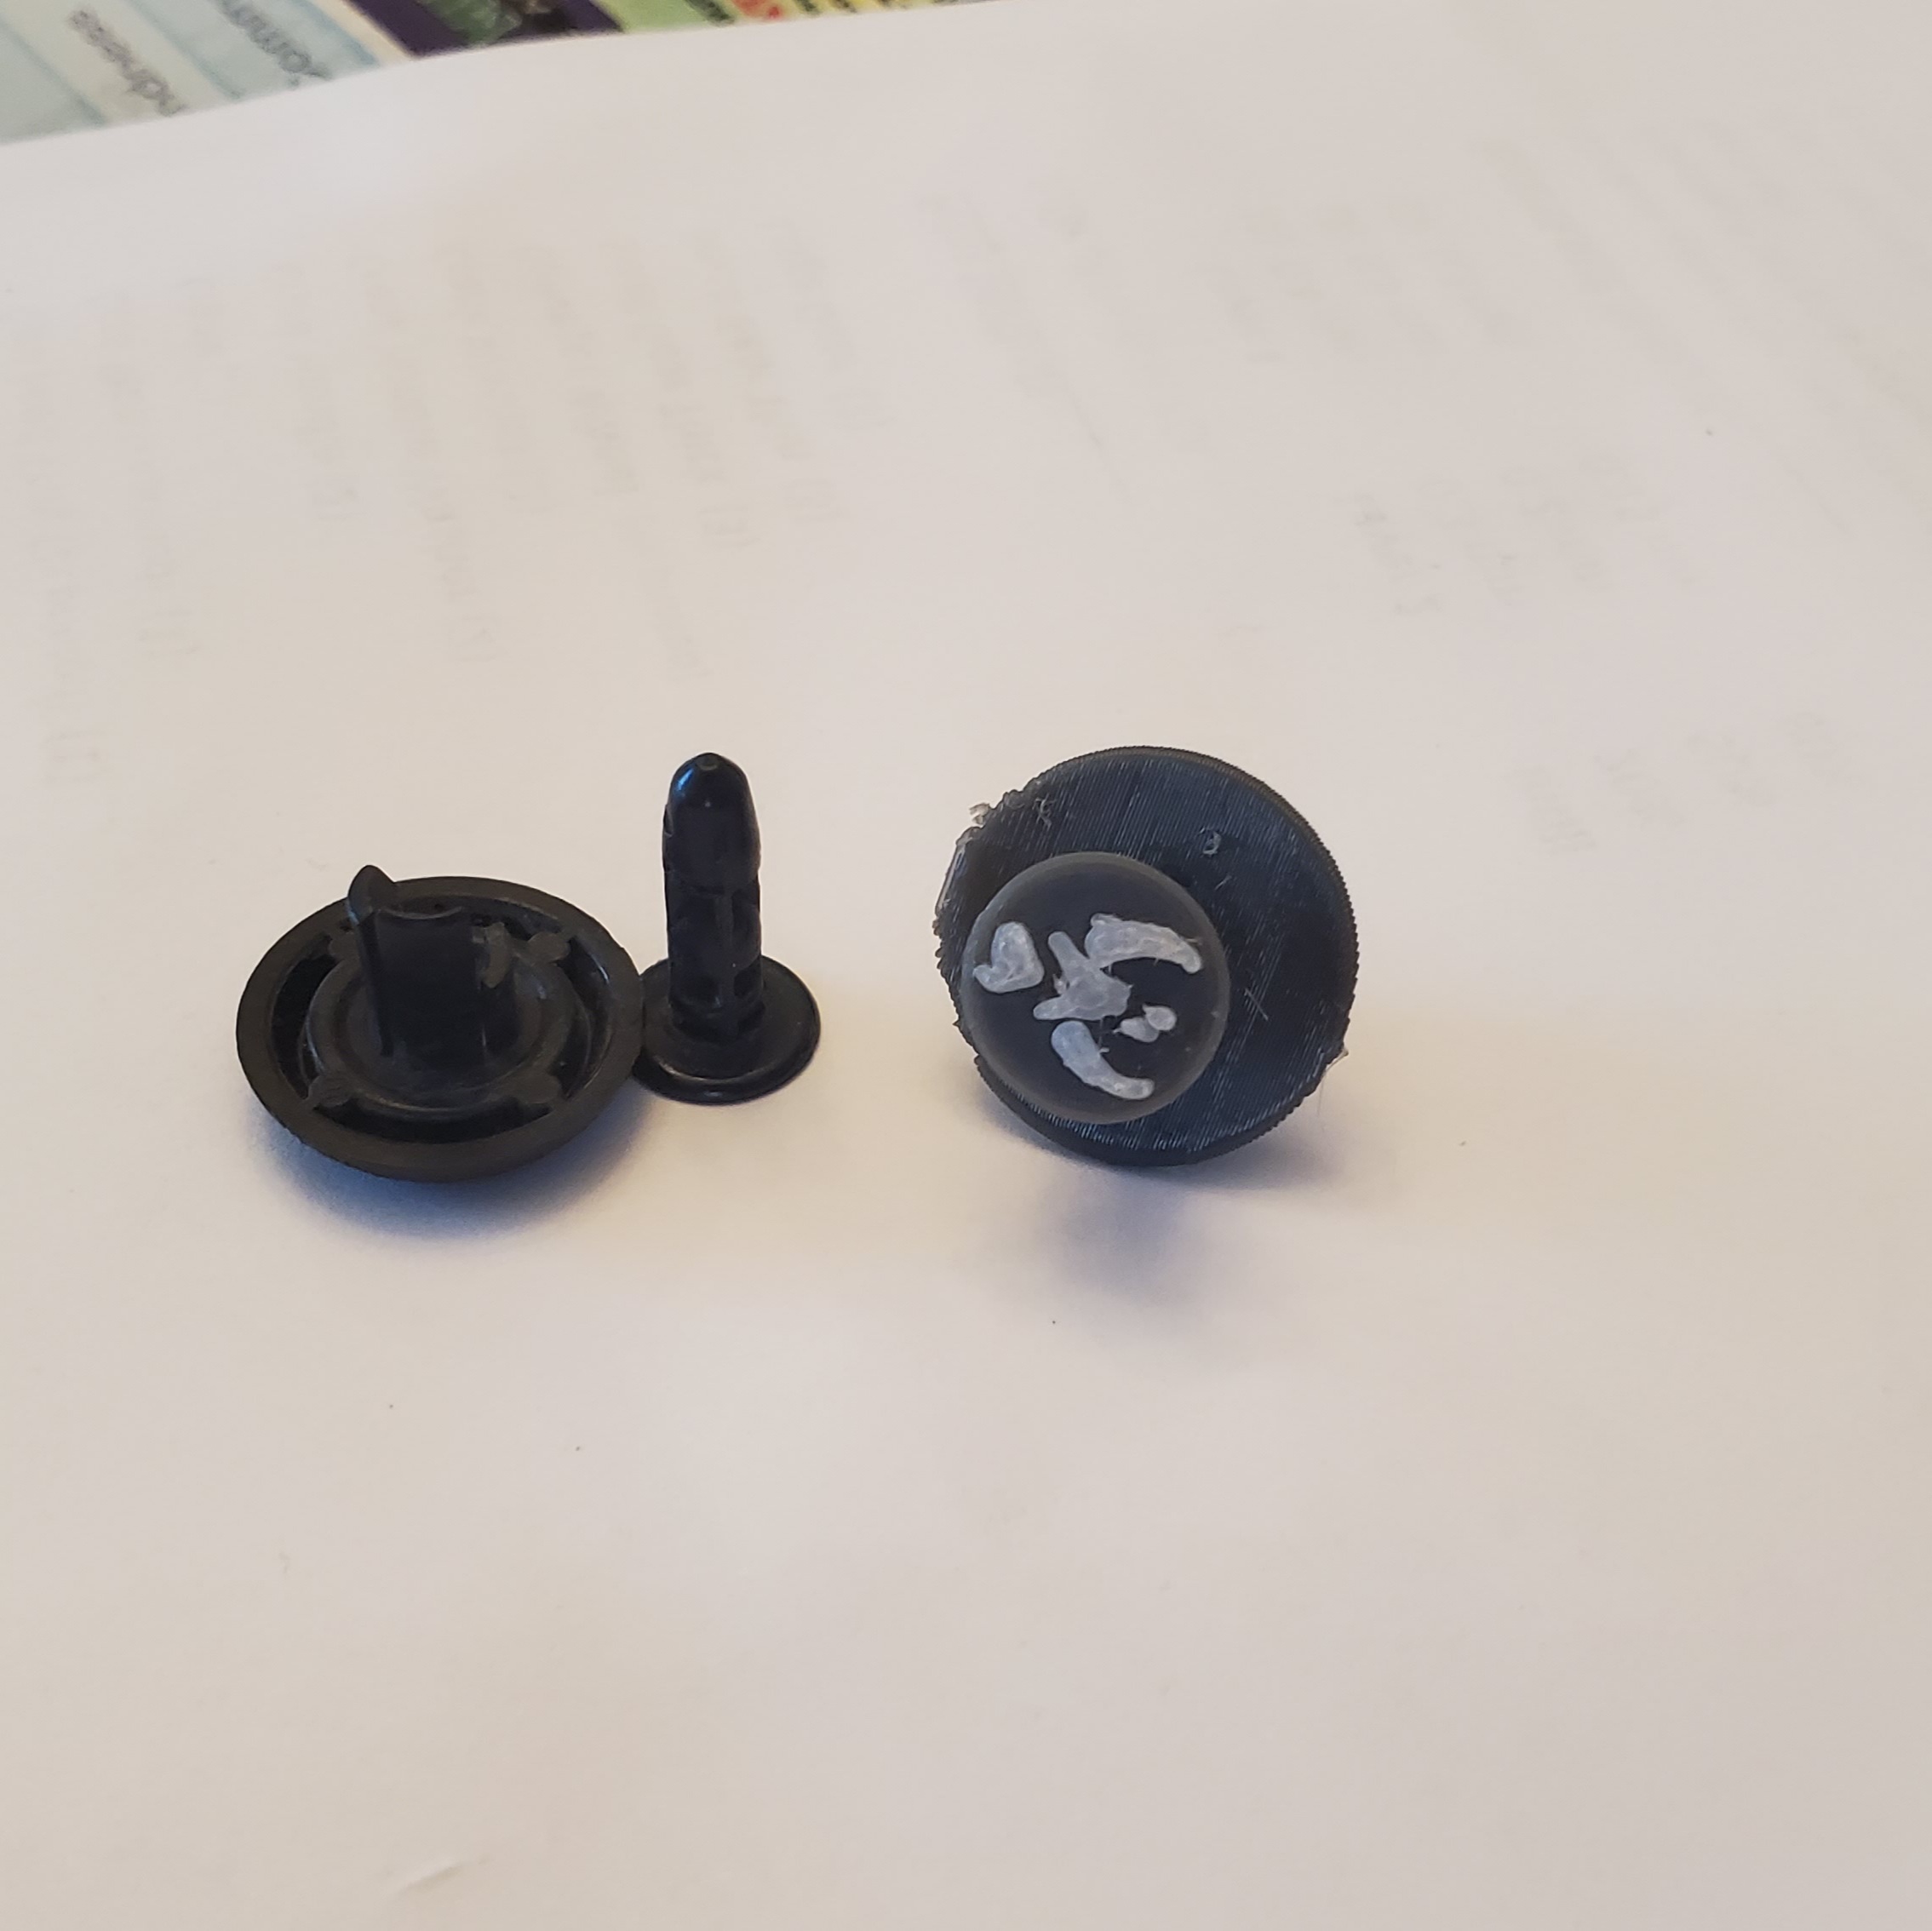
<p>Model from <a href="https://www.prusaprinters.org/social/10799-scottmi">Scottmi</a> looks great and retained my plastic covers perfectly. I highly recommend printing the rivet part at a 90 degree angle, so the layer lines run along the fingers rather than across them. The first time I printed this part the legs practically snapped themselves off because there is a sharp transition in the original model instead of a blend, and the legs weren't as flexible in that orientation. It's only been in the car for a couple weeks, but I don't expect any problems with durability and if I ever need to remove it I would probably just print a new one.</p><p>I wanted to try something new, so I did a 2 color print and added a graphic to the pin with TinkerCAD which was surprisingly easy to do. I recommend printing with the flat as the top surface (even though you need supports then) so it's nice and clean. The top surface looks much better, especially if you use the ironing feature. The first time I printed it I had the flat of the pin on the print bed. That made a very thin support that I needed to cut off which was a different color and went in between the small details so it was a huge pain to remove. If you print the original model with no graphic definitely print it flat side down though, with no supports needed. </p><p>Photo's are broken OEM clip next to new rivet (cover photo), part installed in car, and print orientation of rivet part. Printed in PETG</p>
With this file you will be able to print Plastic Rivet for Car Remix with your 3D printer. Click on the button and save the file on your computer to work, edit or customize your design. You can also find more 3D designs for printers on Plastic Rivet for Car Remix.