Plastic Welding Gun (Plastruder MK4)
thingiverse
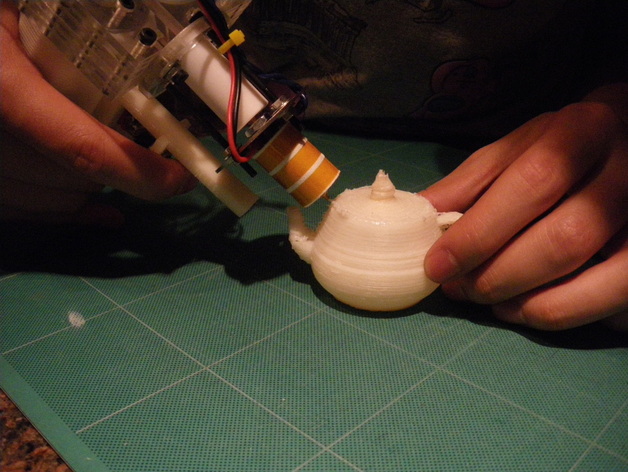
Is your MK4 sitting unused and lonely since you\'ve upgraded to the MK5? Give it a new lease on life and turn it into a handheld welding gun! Use it to patch up any holes or loose threads in your prints or to glue broken plastic parts back together. You can see me welding the lid of a very poorly printed and particularly dangerous teapot shut to prevent accidental use. The STL files include parts for a hand grip that slips over the DC motor, a finger guard so you don\'t burn yourself on the retainer washer, and a trigger bracket for a push button. SolidWorks 2010 model files are also included. Instructions Assembly Instructions: Print out the hand grip, finger guard, and trigger bracket. Glue the finger guard into the slot in the hand grip flush with the bottom of the grip. Separate the DC motor wires with the black wire towards the back and red wire towards the front. Slip the hand grip over the DC motor with the black wire in between the slot in the back and the red wire through the slot in the front. Secure the hand grip to the motor using an M3x15 screw and M3 nut. Do not over-tighten the nut otherwise the tabs may crack. Insert a 1/4 in. push button through the hole in the trigger guard. Solder the red wire of the motor to one of the poles on the push button. Solder another length of wire to the other pole of the button. This will be connected to terminal 1A (+) on the extruder controller. Glue the trigger bracket onto the finger guard. Connect the black motor wire to terminal 1B (-) on the extruder controller. Connect the thermistor and heater wires to the extruder controller. You may need to lengthen the wires if you are connecting to an extruder controller mounted on/in your makerbot. If you have a spare extruder controller you can mount it directly to the MK4 and connect to the motherboard using a CAT5 cable, making it much more portable and interchangeable. Usage: Open up the control panel in ReplicatorG and set the temperature to 220C. When the nozzle is at the right temperature, set the motor PWM to 255 and select \'forward\'. The motor will not turn until you push the trigger button, allowing you to control the extrusion manually. Be careful not to operate the motor until the nozzle is fully heated up, otherwise the filament may strip or the nozzle may break!
With this file you will be able to print Plastic Welding Gun (Plastruder MK4) with your 3D printer. Click on the button and save the file on your computer to work, edit or customize your design. You can also find more 3D designs for printers on Plastic Welding Gun (Plastruder MK4).