PlayStation 5 controller mini wheel
prusaprinters
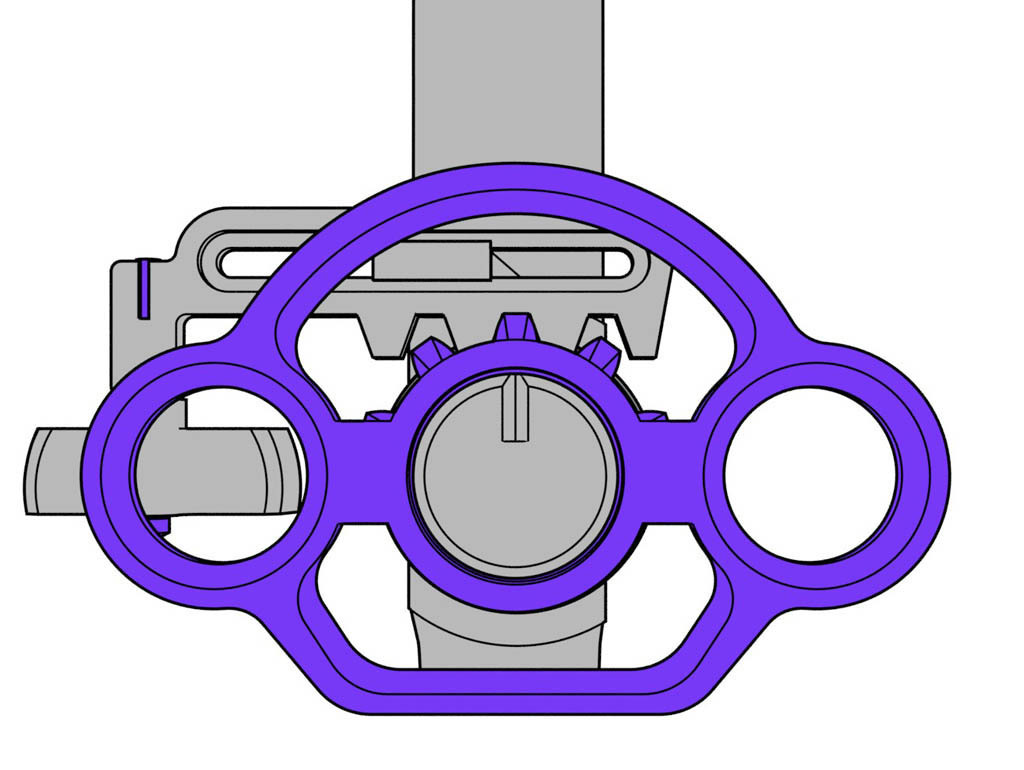
<p>Rack and pinion steering for your PS5 controller. 100 degrees of rotation. Get finer control in racing games.</p><figure class="media"><oembed url="https://youtu.be/Zgiul4cFMUw"></oembed></figure><figure class="media"><oembed url="https://youtu.be/TQauUKt62Xo"></oembed></figure><p> </p><p>What you need:</p><p>608 bearing, 22mm diameter, 7mm thick, 8mm center. Get one from that dusty fidget spinner you have laying around...also skateboard bearings</p><p>1.6mm diameter metal rod X2 [butterfly paper clip/14 gauge finishing nail/wire]</p><p>Superglue</p><h3> </h3><p>You only need to print one frame</p><blockquote><p>Do not use the "wired" frame without a cable inserted in the controller. The frame will</p><p>slide left and right when you hit the rotational limits of the wheel. If your cable is smaller</p><p>than the frame hole, wrap some tape around it to fill the gap.</p></blockquote><p>2 layers [.4 nozzle]</p><p>set walls to 15 for strong solid parts</p><p>0 top/bottom layers</p><p>supports are built into the frame STL</p><p>Tolerances are tight on this model and good layer adhesion is a must. Make sure your printer is properly calibrated before attempting this project.</p><p> </p><h3>Post-Printing</h3><p>Break off the support piece</p><p>Glue the top and bottom edge of the bearing into the frame. Wait for glue to dry. Superglue might leave a white haze on the controller if it's not dry.</p><p>Attach the pivot to the rack:</p><p>Method 1:</p><p>Cut down a 14 gauge finishing nail to a length of 20 mm. Pass the nail up through the pivot and into the rack. The pivot should spin free on the nail with minimal play. Put a drop of superglue in the slotted part of the rack. This is probably the most ideal setup. A piece of paperclip [wire] works but it's tricky to get a tight bend on the end.</p><p>Method 2:</p><p>Kids, don't play with fire...</p><p>Take a straight piece of 1.75mm diameter filament and heat the end with a lighter for just over a second. Mash the end so it looks like a nail head. Pass the filament up through the pivot and into the rack. The pivot should spin free with minimal play. Trim the filament so 3mm sticks out of the rack. Heat with a lighter and mash flat. </p><p>Snap the rack onto the frame</p><p>Attach the assembly to the controller. Start by sliding the pivot on to the left stick. Clip the back of the frame on, then the front.</p><p>Glue a 22mm length of metal rod into the "nub". Pass this down through the bearing and frame. There is a step in the nub, have this on the left side.</p><p>Press the wheel into the bearing and glue the horn on the rod.</p><p>Crank up the in game sensitivity and enjoy</p><figure class="image"><img src="https://media.printables.com/media/prints/157076/rich_content/254a4121-ac70-418d-a943-07f5bc9c39a4/ps5_manual_01.jpg#%7B%22uuid%22%3A%2286c3710e-5629-452f-9225-b778081c3902%22%2C%22w%22%3A1155%2C%22h%22%3A770%7D"></figure>
With this file you will be able to print PlayStation 5 controller mini wheel with your 3D printer. Click on the button and save the file on your computer to work, edit or customize your design. You can also find more 3D designs for printers on PlayStation 5 controller mini wheel.