PolarityGear Fidget Toy 2
thingiverse
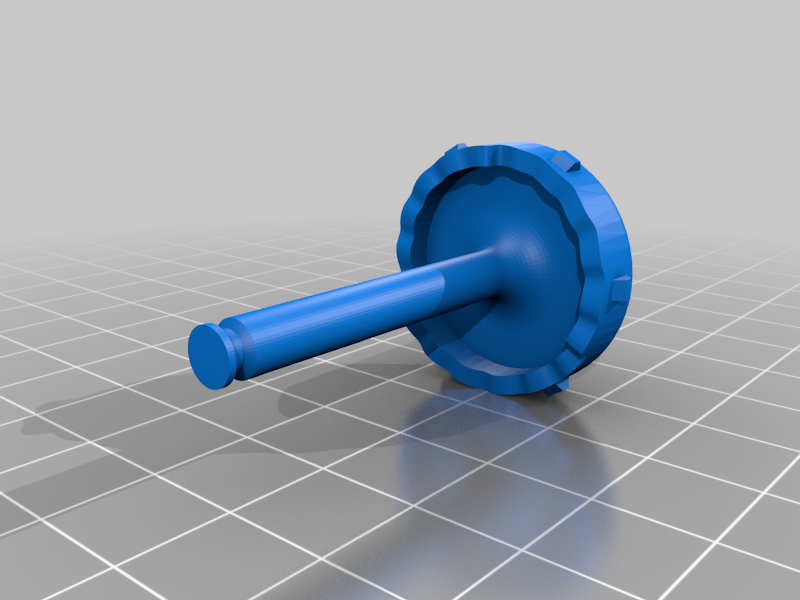
PolarityGear Fidget Toy 2.0 This fidget toy gives feedback as you twist one side relative to the other. Move the adjustment steps to vary the distance between two CMR Polymagnet #1002240’s and feel the difference. Twelve detents per revolution are easily felt and overcome at the toy’s easiest setting. Change the setting to decrease the distance between the magnets and a noticeable difference can be felt at each step to overcome the torque resistance. The feeling from turning these is very satisfying, almost addicting. The model shown in the photos was FDM printed with PLA at 0.2mm layer height for the print with no support material (Finer layer height for the helix steps). For smoother transitioning of adjustment, print the helix steps area at finer resolution (shorter layer height). You can feel the torque resistance increase or decrease with each change in step which is only changing the distance between the magnets by 0.3mm or 0.012 inches. The Good and No-so-good news: Good: The printing and assembly have been tested extensively and all works great for FDM printers. (No support material, 0.2mm layer is fine). You can take it apart if you want to (magnets are not wedged in place). This fidget toy will make you happy. Not-so-good: You have to purchase the two magnets: https://catalog.polymagnet.com/1002240.html or here: https://holdenart.com/collections/polaritygear/products/cmr-2240-pair If you purchase from the holdenart.com website, the magnets have a "CMR 2240" etched on the same side. So, you'd just place them in with that showing and they will be set up to repel each other. (I asked CMR to label them on the same side. Before it was random) List of parts: FT2-FreeEnd FT2-HelixEnd&Shaft FT2-HelixMagHold FT2-M8-Plug (x2) (Notice flat side) FT2-RetRing (retaining ring) The Quick and Dirty Instructions: Support Material NOT needed. Print parts with flat sides down, helix steps up. Layer 0.2mm works great! You can print the helix steps at finer resolution for smoother adjustment if you want. Print an extra ring or two, they tend to fly away never to be found. Insert Plugs into magnets so that: the “FLATS" LINE-UP and magnets Oppose each other when installed. Use a smaller size screwdriver for fastening plugs with magnets. Screw-in until there's no light between magnet and part, slightly snug. Do Not Overtighten. Put helix steps all the way together to attach the retaining ring, flat side up (out). The M8-Plug part can break if you overtighten. If that happens, just jam the screwdriver in and unscrew the broken part, reprint and try again.
With this file you will be able to print PolarityGear Fidget Toy 2 with your 3D printer. Click on the button and save the file on your computer to work, edit or customize your design. You can also find more 3D designs for printers on PolarityGear Fidget Toy 2.