Polypanel Electronics Kit Construction Kit
myminifactory
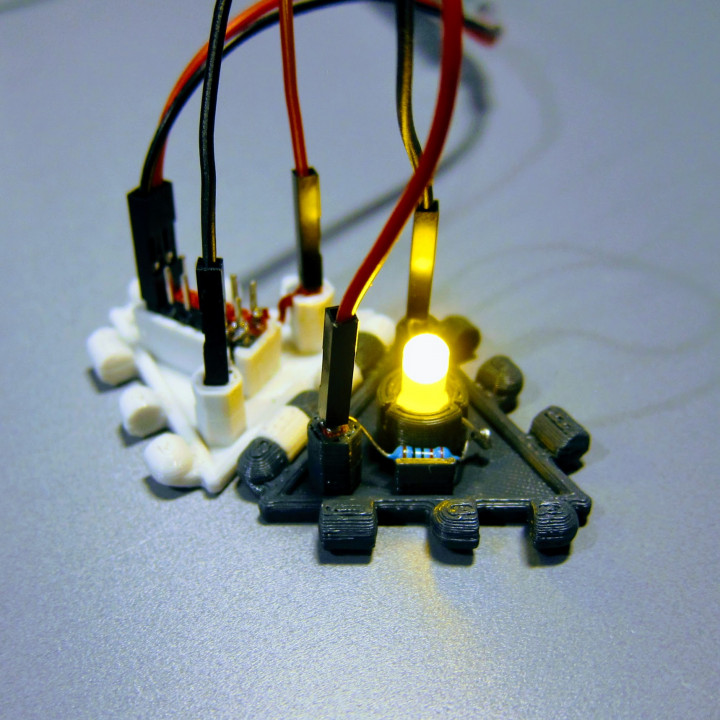
Updated 2019-05-17: Added diode and alternative transistor panels (marked NEW! below). Photos to follow. An experimental set of triangular polypanels that hold various electronics components, suitable for simple experiments (that you'll have to make up yourself for the time being :-). The panel connectors are made from male header strip pins that are cut into 1-pin pieces and pressed into the holders (I recommend getting a few different colors, e.g. red/black for plus/minus), and the component leads are then soldered to the connectors, either directly or using AWG22-24 wire (~0.5 mm diameter) or similar. To create the circuits, the panels are connected using "dupont" female/female jumper cables. All this and the components mentioned below should be available from your local electronics supplier, and can also be sourced from ebay/banggood/aliexpress etc. Note that preparing the panels can be a bit fiddly, and there are different ways to do it. You may want to print out some generic panels and practice a bit until you find an approach that works for you, before you wire up the real components. For the actual experiments, I recommend powering your circuits from a cheap USB powerbank or a small AA/AAA battery pack, or perhaps a 9 V battery. Stay away from wall power. Also, you really don't want to step on these panels. Currently available panels (more are on the way): component-resistor for plain resistors (ISO symbol only at the moment, sorry). A few values from the E3 series (1.0/2.2/4.7×) can be a good start. component-capacitor comes in three variants, standard axial (for ceramic and small electrolytes), radial, and polarized (or you can just add a + with a marker pen). component-led holds a 5 mm LED and a resistor (use e.g. 220-560 ohm for 5V). The LED can be placed either way, either poking trough the panel or standing up, as in the thumbnail. The 3-pin variant can be used to expose the LED pins directly, so you can experiment with different resistors (and quickly destroy the LED, if you feel that way). component-transistor holds a small signal transistor, you can use e.g. BC548 or 2N2222 NPN transistors. The alternative npn and pnp variants (NEW!) are simple 3-pin panels that you can use if you prefer direct point-to-point construction (as used with most other panels). component-diode (NEW!) holds a diode, e.g. 1N4148 or 1N4001. component-dip-8 holds an 8-pin DIP circuit, with 3 signal pins and 2 additional power pins. It can be used for e.g. NE555 or LM358-based building blocks. component-switch holds an OMRON B3F-4000/5000 style tactile button (12×12 mm, e.g. B3F-4055). component-power-busbar expands two single connectors to a 6-pin header each. This is typically used to provide power to multiple components. component-generic are a few 2- and 3-pin panels that can be used to hold arbitrary components (as long as they don't need more pins, obviously). Since the polypanel connectors can be somewhat tight, I've also provided two optional frame objects that you can use to prototype the circuit layout before snapping things together. These individual component panels are only suitable for simple electronics experiments (populating a full frame-10 is pushing it). For more advanced builds, I strongly recommend using a breadboard instead, e.g. https://www.myminifactory.com/object/3d-print-93608 To round off your kit, you can add things like potentiometers, battery holders, etc. A collection of standard panels can also be useful. For more on polypanels, see makeanything.design/polypanels.
With this file you will be able to print Polypanel Electronics Kit Construction Kit with your 3D printer. Click on the button and save the file on your computer to work, edit or customize your design. You can also find more 3D designs for printers on Polypanel Electronics Kit Construction Kit.