Pom Pom Maker, great fun!
thingiverse
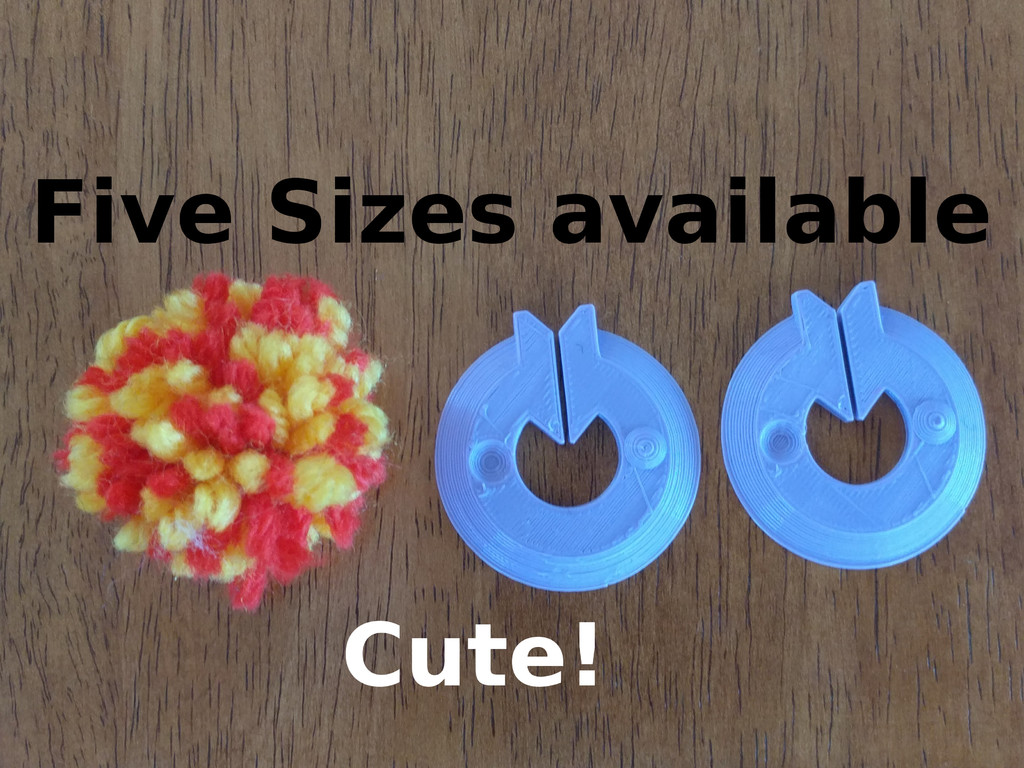
This is a take on how to make Pom Poms easily without laboriously threading knitting wool through an ever diminishing center in a doughnut shape. It allows the wool to be easily wound, then the perimeter to be cut and the central binding string to be tied. The supporting system can be used many times over. It is not rocket science, but some really cute Pom Poms can be made easily using this system. Just print two parts of each size, and hold them so the registration dimples line up, and then begin winding the thread. Paired colours can be wound simultaneously (see Red/Yellow above) or bands of colours (see Red/Blue above). There a five sizes provided here (inner diam mm/outer diam mm), Tiny (16/40) Cute (20/50) Small (25,60) Medium (28,70) Large(34,80). The OpenSCAD file is provided so you mix your own sizes. Thin threads (fine ply wool) make more authentic Pom Poms, but with this design putting more thread on is a breeze. Using multiple coloured threads is also simple, as well as winding on bands of different colours in sequence. Time to use up that left over wool. Just print two each of the sizes you want, and enjoy. They are robust enough that you will make many Pom Poms before they wear out. Most importantly they make Pom Pom making so simple your family or relatives, or friends, or students down to about 6 years of age will be able to do it successfully. It is easy to get disorientated winding on the threads when you are near the slit opening. You can use your thumb to keep the winding going. It is not difficult but does require a bit of hand eye coordination, eg steadying the thread with your left thumb while slipping the thread through the slit with your right hand. Short stumpy scissors are really helpful to cut through the winded thread. Long sloppy scissors just will not do. My wife's nursing scissors with short strong blades made all the difference. Push the scissors into the groove made by the back to back formers and start cutting! You may like to tie the central thread around the Pom Pom twice over to make sure it is sound and really holds all the threads strongly. Give it a good hard yank to make it really tight. This will help hold the threads in place when you pull the formers off. Now pull the formers off each side. Do it slowly to each side in turn but hang on to the Pom Pom threads on the opposite side to make sure it does not get wrecked as you pull the second former off. If you use thinner threads and many winds you will find the Poms Poms come out without needing much trimming. Others may need a little shaping to get that beautiful ball effect. It is really satisfying to be publishing a project that helps kids make heritage handmade goods easily and get a good result. I hope the Scouts, Guides and all other good youth organisations enjoy!! PS The largest pattern had an unintended bump on the base of the print, this has now been corrected.
With this file you will be able to print Pom Pom Maker, great fun! with your 3D printer. Click on the button and save the file on your computer to work, edit or customize your design. You can also find more 3D designs for printers on Pom Pom Maker, great fun!.
