Portable FDM Printer
myminifactory
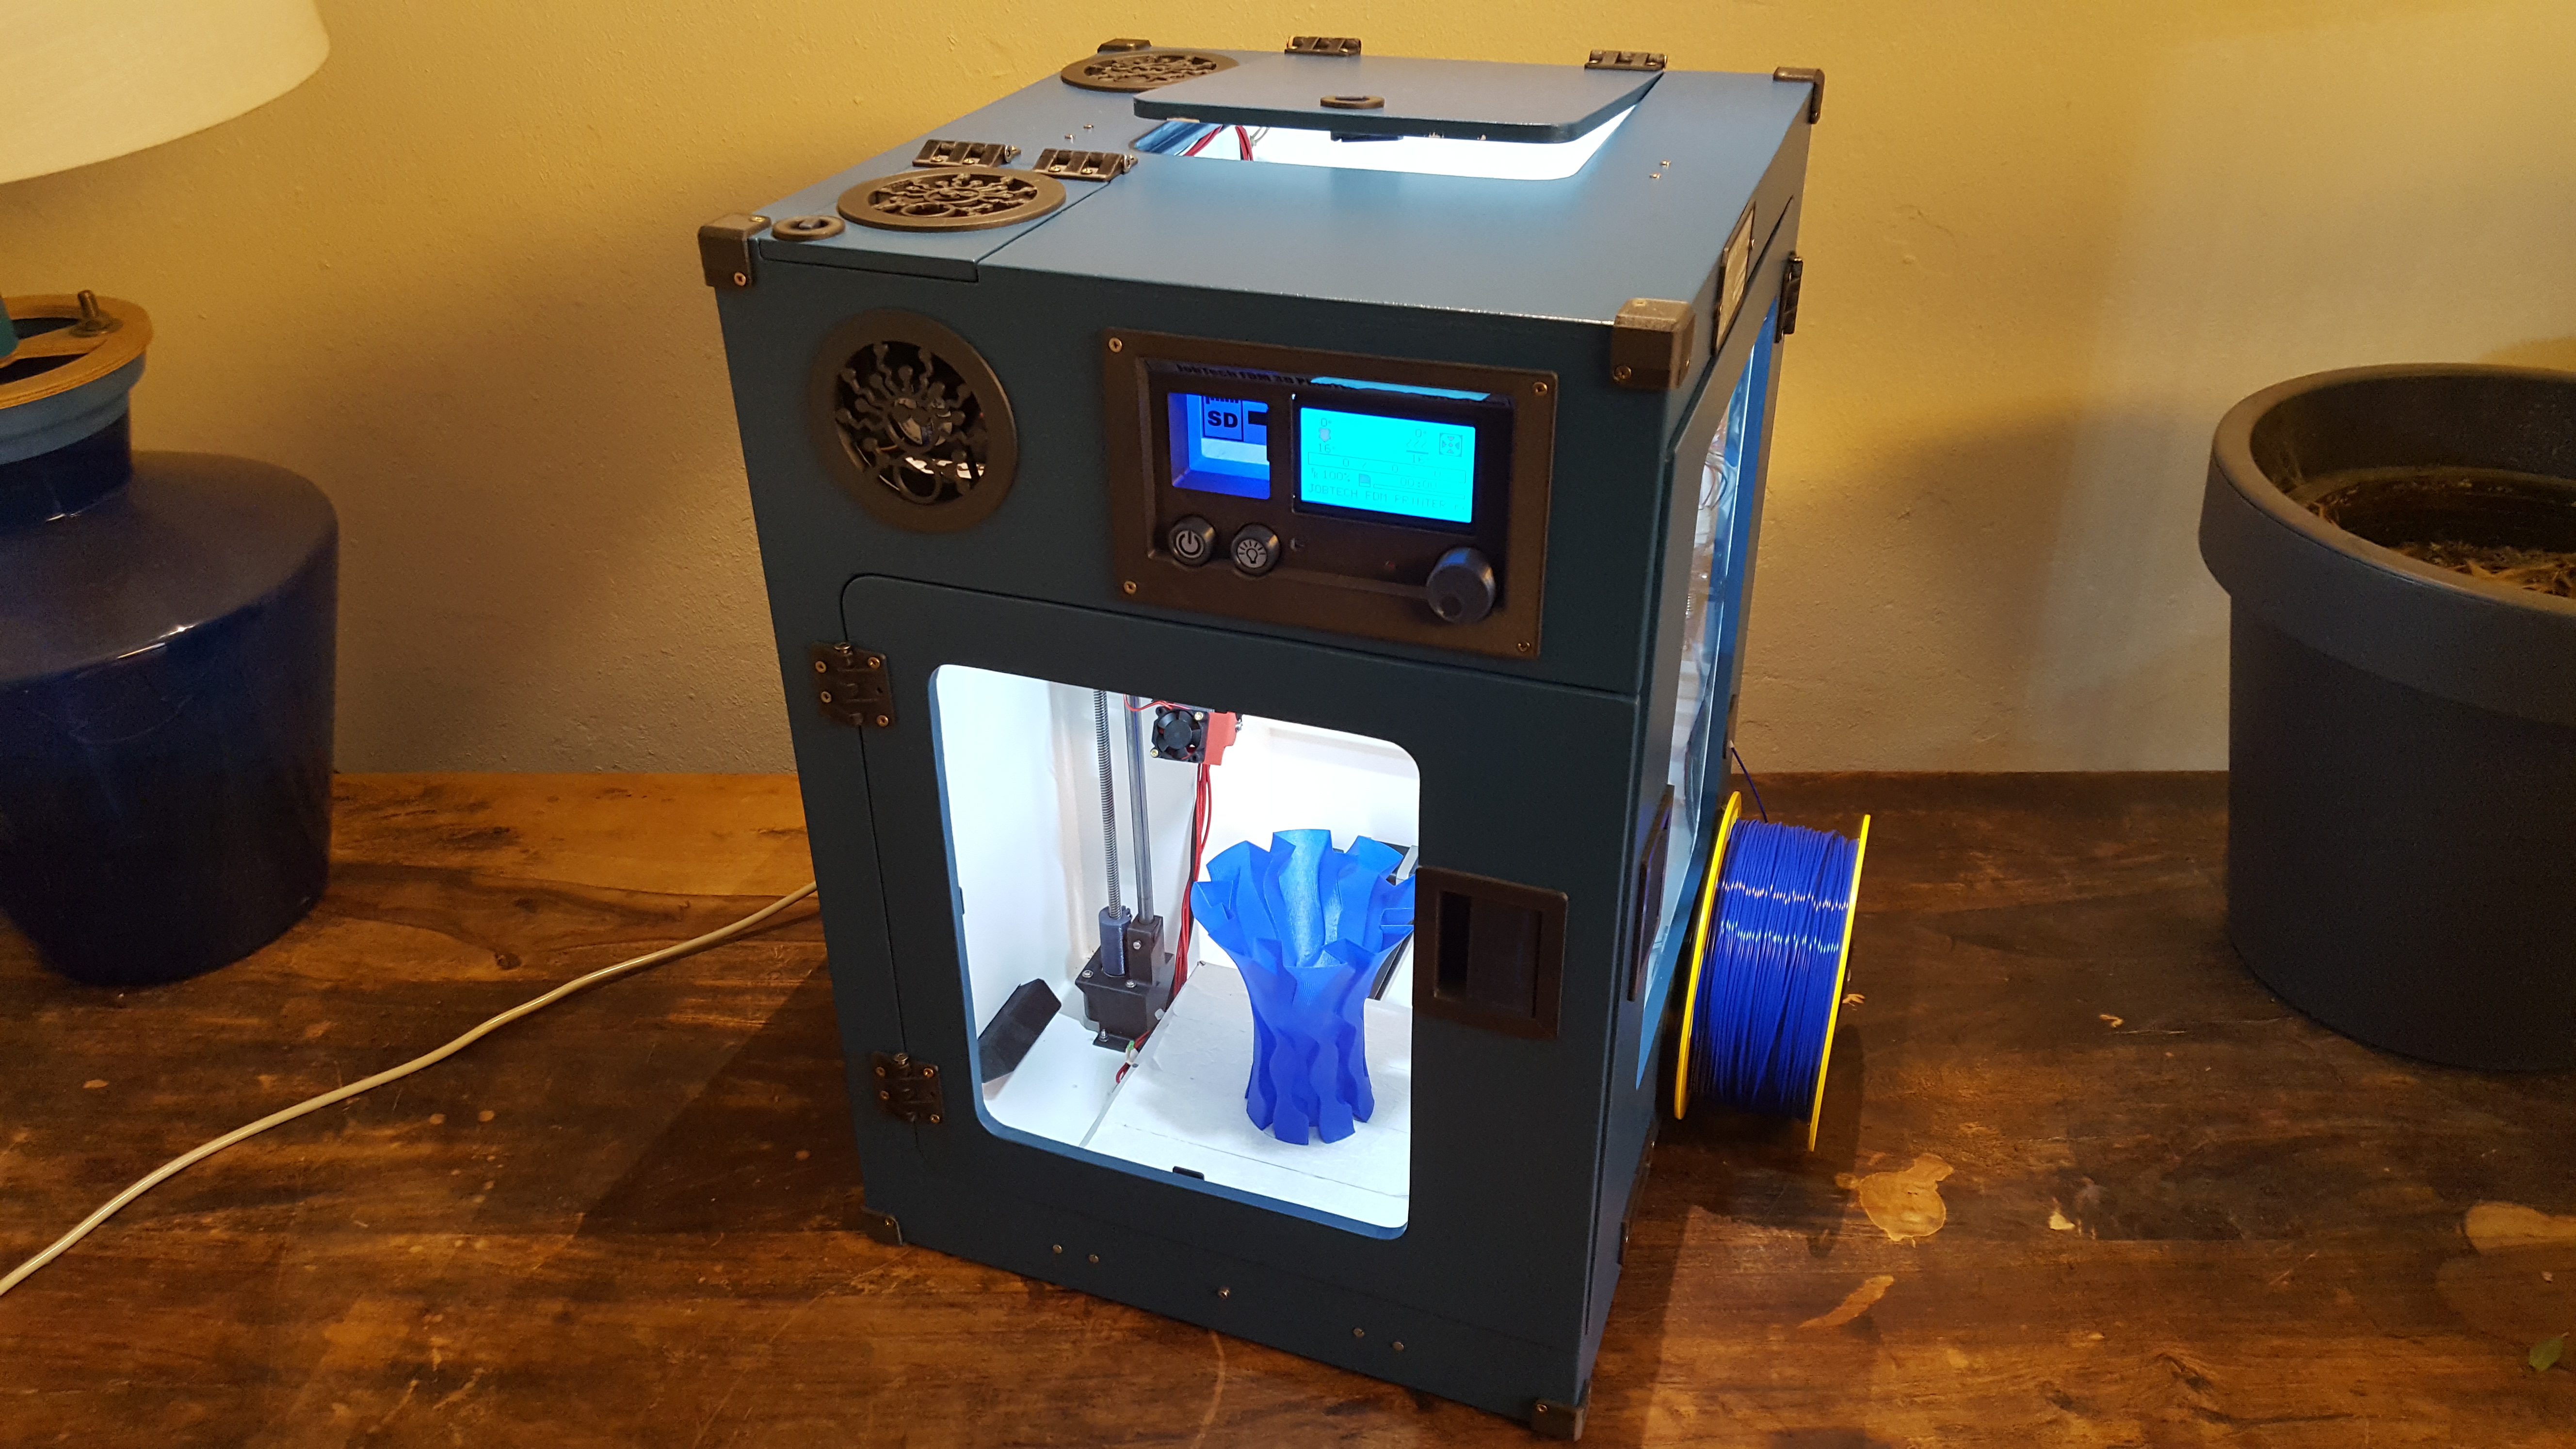
For a newer and improved version on my own website, go to https://www.designuitinspiratie.nl/3d-printer/draagbare-fdm-3d-printer/ ------------------------------------------------------------------------------------------------------------------- I wanted to have a printer that can be transported easy without being damaged in transport. The housing is as small as possible while keeping standard print dimensions. This one can print 200x200x380mm. To keep it light, the housing is made from 9mm plywood. It is basically a square box with the printer mounted inside. So you can make your own housing or frame. Of course the housing is an advantage if you want to print ABS. Then I wanted this printer as fast as possible, because there’s not always much time, printing on site :-). Therefore I used a Bowden setup and a very light X and Y car. The vase printed in the picture is printed at 60mm/s in PLA. I want to test this printer with higher speed, but didn’t have time jet. The Red fan ducts on the side of the nozzle are not my own design (RoPa here on Thingiverse : http://www.thingiverse.com/thing:1264477). Because my printers are very often connected to polluted mains (there are welding, milling and grinding machines nearby), there is a simple mains filter build in. This filter kills most of the EMF frequencies to the Arduino. The Atmel chip can do strange things under EMF stress. Normally I prefer a second ferrite coil but I didn’t have one. For the schematic please see the picture. Note that the capacitors need to be of an X2 and Y2 class so that if they die they are guaranteed not to short. C1 & C2 need to be of class X2. C3 & C4 need to be of class Y2. Also this filter needs to be in a metal case (see picture) and must be earthed always! The controller is an Arduino and a Ramps 14 running on marlin. I included the marlin.ino in the Zip file. For information about configuring Marlin you could consult : http://marlinfw.org/docs/configuration/configuration.html To hold the Teflon tubing in place, I used a gland nut. For some reason the original tube holders I have do not work very well. Note: *for info about the corner handles see: https://www.myminifactory.com/object/54063*for info about the full graphic smart controller panel see: https://www.myminifactory.com/object/54221*for info about the extruder see: https://www.myminifactory.com/object/53859 *for the Extruder motor cooler see: https://www.myminifactory.com/object/nema-17-universal-motor-cooler-36411 * “total ass printer without housing binary.stl” is meant as an assembly example. If you have questions or do you think I forgot something, feel free to ask or comment :-) PS:I made a drawing with the measurements for the 9mm thick wooden plate. I posted it on https://www.designuitinspiratie.nl/3d-printer/draagbare-fdm-3d-printer/ ************************************************************************************************************************************ Parts List for the printer: 2X 608Z bearing 4XGT2 wheel with bearing (bore 3mm) (F625zz) 2XGT2 pulley 5mm bore 2X T2 timing belt (length is determined by the length of the X and Y axis) 2X 8mm spindles and nut ,trapezoid (or treated rode 8mm and M8 nut) 4X Linear bearing LM8UU for the 8mm rods 8X Linear bearing LM10UU for the 10 mm rods 1X drive gear (26 teeth) for extruder 4X gliding rod 10mm (length is determined by the length of the Z & Y axis) 2X gliding rod 8mm (length is determined by the length of the X axis) 2X T2 timing belt (length is determined by the length of the X and Y axis) 3X Nema 17 stepper motor (such as 3X SHENLI SL42S247A 2,5A or Wantai 42BYGHW811) 2X Nema 17 stepper motor for Z axis with max length of 38mm (such as 42BYGHW208) 1X Hot End (heater, heater block, Heat break and Thermistor 100K) 1X Heat Bed (MK3 Aluminum) & Thermistor 100K & 4 springs 1X spring for Extruder 2X Teflon Tube Holder or wartel (gland nut) 1X Teflon tube (length depends on the height of the z Axis) 1X Ramps 14 1X Arduino Mega 4X Stepper driver (DRV8825, A4988 or TMC2100) 1X Power supply 12V 360W and wire for the motors, switches etc. 3X End switch 1X mains power inlet 1X fuse holder 3x 30x30mm fan 1X 80x80mm fan 1X mains switch 1X 12v switch and led strip 1X LED 5mm for back light SD Card slot Wood panel 9mm for the housing Poly carbonate glass plate 2mm Woodscrews 6mm Glue Paint for the housing ************************************************************************************************************************************ Bolts & Nuts For the Heat Bed & Y axis : 33X M3 nut 4X M3 x40mm 4X M3 X20mm 24X M3 x10mm 4X M3 x6mm For the X axis and car: 20X M3 nut 2X M3 x40mm 18X M3 x20mm 4X M3 x6mm For the Z axis: 13X M3 nut 13X M3 X10mm 8X M3 X6mm If you think I forgot something on this list, please inform me :-) Bolts, nuts & screws for the housing are not included in this list. If you want to know feel free to ask :-) The hinges use M4 x60mm bolts
With this file you will be able to print Portable FDM Printer with your 3D printer. Click on the button and save the file on your computer to work, edit or customize your design. You can also find more 3D designs for printers on Portable FDM Printer.