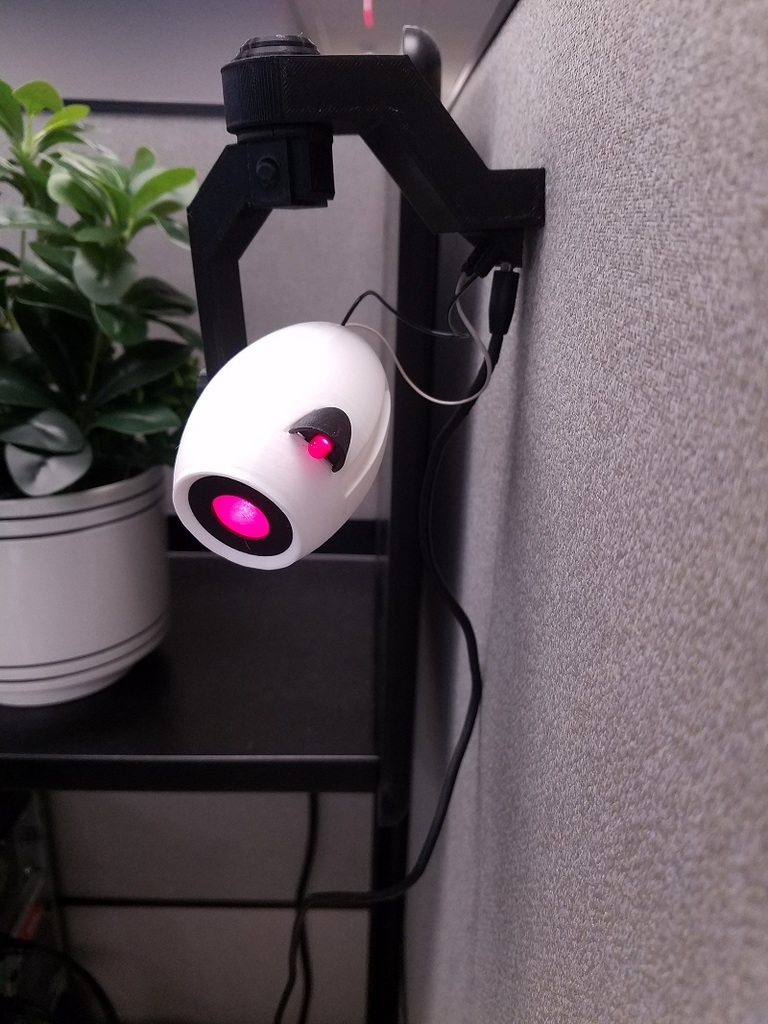
Portal Security Camera w/ LEDs
thingiverse
I wanted to add red LEDs to the model instead of just printing red lenses. The only parts that are modified from the original version by BleedTheWay are those that are named "PortalCam" <b>Camera Body</b> - Added channels through the middle of the camera body to put wiring through. <b>Camera Lens</b> - Hollowed out the inside of the original model to accommodate the LED. I printed the lens with clear PETG. Print it hot, slow, no fan, and thick layers for best results. <b>Side piece</b> - Added a channel to fit the LED. This was a tight fit and to be honest it's still not perfect but it was good enough. <b>USB Mount</b> - This part replaces Wall-Arm-Bottom-Piece-Black. I hollowed out the tubes, and cut a chunk out of the back so you can attach a micro-USB port. I recommend printing this part with supports and orienting the tubes to print straight up. ## <b>Electronics and Assembly</b> ## <b>Parts List</b> 1 - Micro USB Type B Connector - [mouser link](https://www.mouser.com/ProductDetail/GCT/USB3140-30-0170-0-C?qs=sGAEpiMZZMv0NwlthflBi17ZutZ2RGf9Y8C9jPZodxE%3D&countrycode=US¤cycode=USD) 2 - Red LEDs - [mouser link](https://www.mouser.com/ProductDetail/Vishay-Semiconductors/TLDR6400?qs=sGAEpiMZZMtNwx8wKGcP0kdzo90jGqoNnhG2ZssntBs%3D&countrycode=US¤cycode=USD) I ordered 2 different LEDs and found that it was better to have the red tinted lenses, as well as a wider viewing angle specification. 1 - 160 ohm resistor - [mouser link](https://www.mouser.com/ProductDetail/YAGEO/CFR-25JB-52-160R?qs=sGAEpiMZZMug%252BNZZT2EIMx8CS0om38JTKlSohZ%2FM%252BJg%3D&countrycode=US¤cycode=USD) 1 - 320 ohm resistor - [mouser link](https://www.mouser.com/ProductDetail/KOA-Speer/MF1-4DCT52R3200F?qs=sGAEpiMZZMtobO2WyhQg8ORkKiw1xah9YCtfht%252B6ftI%3D&countrycode=US¤cycode=USD) 2 - small gauge wires to lead from the LEDs to the micro-USB port. I stripped a spare USB cable to remove the black and white wires inside. 1 - USB to MicroUSB cable for power Some heatshrink tubing is also very helpful to keep your wire leads from touching when you cram the LEDs in to the housings. <b>Assembly</b> You can experiment with resistor combinations to get the brightness you want on the LEDs. I wired the side LED with the 320 and 160 ohm resistor. I wired the front LED with just one of those two. I can't remember whether the front LED was wired to 320 or 160 ohm. Either will work. If you want the 320 dimming the front LED then just swap the order of resistors on step 2. Take a look at the images for a terrible drawing of how it's all wired. 1. Start with side LED. Shove it in to the side piece. Add some heat shrink tubing to the leads so they aren't contacting each other. 2. Solder the 320 ohm resistor to the side LED. Solder the 160 ohm resistor right after the 320. Trim the leads down as much as you can. This will help when you need to squeeze it in to the camera body. 3. Put a positive and negative wire in the front hole. Use a hook or pick to grab the wires and pull it out the side hole. Solder the positive wire between the two resistors. This will power the front LED with just the 160 ohm resistor. 4. Take another piece of negative wire. Twist it together with the negative wire you just pushed out the side hole. Solder these to the negative lead on the side LED. 5. Solder another piece of positive wire to the end of the resistors. 6. Push the positive and negative wires from the side hole through to back hole. 7. Solder your front LED to the positive and negative wires that are coming out of the front hole. 8. Route your wires coming out of the back hole in to the USB Mount through the tubes. Solder the leads to the 1 and 5 pins on the usb port [(like this)](https://i.pinimg.com/474x/04/04/bb/0404bbed587454b5a5733fb191808ea9.jpg) 9. Glue the USB port to the mount. I used hot glue.
With this file you will be able to print Portal Security Camera w/ LEDs with your 3D printer. Click on the button and save the file on your computer to work, edit or customize your design. You can also find more 3D designs for printers on Portal Security Camera w/ LEDs.
