Power Plug Housing for Sega Naomi Arcade System
prusaprinters
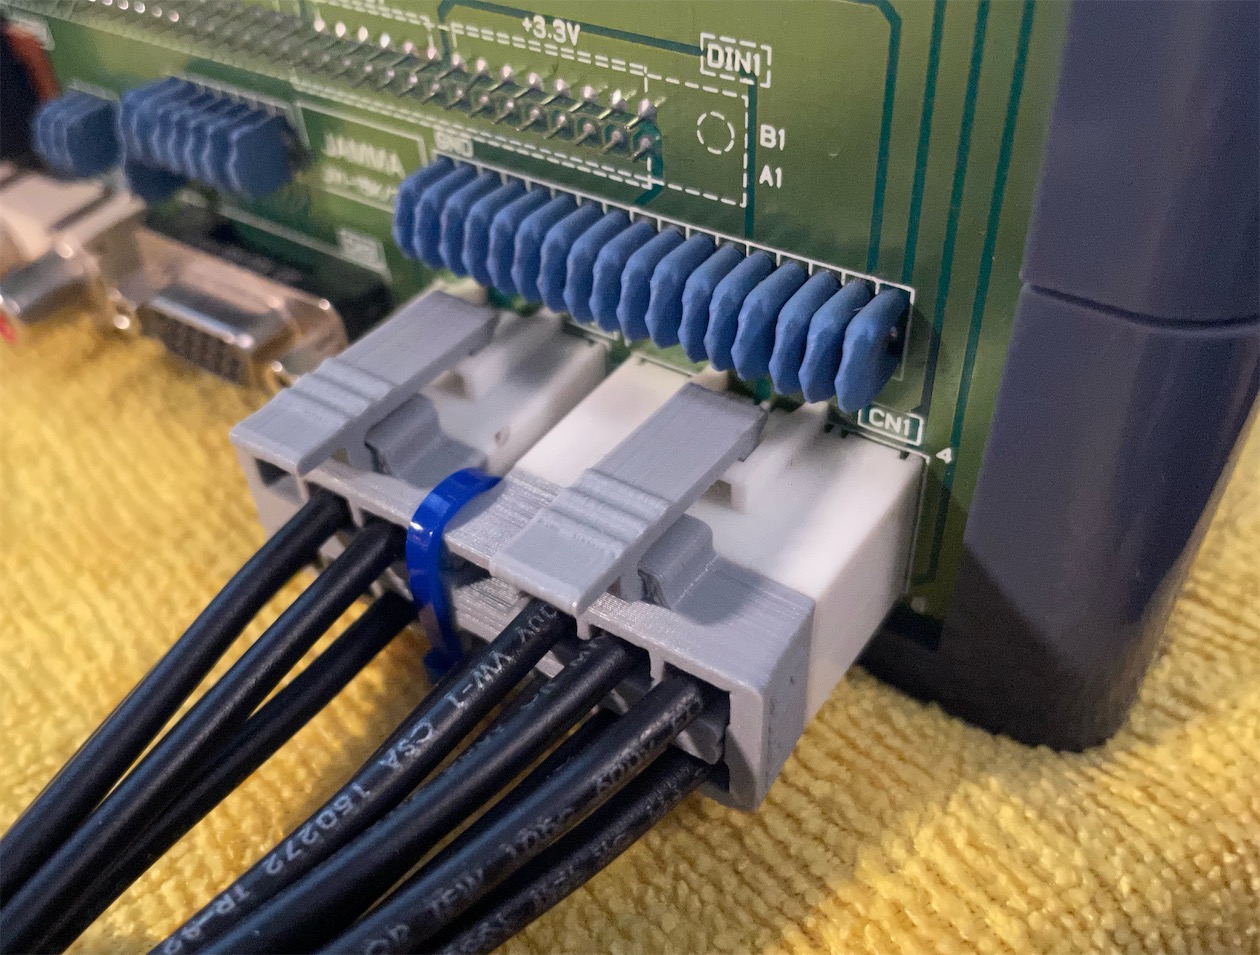
<p>The JST VL power plug housings for Sega Naomi arcade system seem to be out of stock. So I had to create one for myself.</p><figure class="image"><img src="https://media.printables.com/media/prints/213551/rich_content/f61aa7cd-5dd0-464e-b768-3eaabf84a970/qq20220525-131939.jpg#%7B%22uuid%22%3A%2290f0ba58-4830-4a7a-8af8-e56a62c79845%22%2C%22w%22%3A1260%2C%22h%22%3A955%7D"></figure><p>----------------</p><p><strong>3rd-Party Parts</strong></p><p>I used pre-made cables with headers from DigiKey. Part No. is <strong>ASVFSVF14K203 </strong>[<a href="https://www.digikey.com/en/products/detail/jst-sales-america-inc/ASVFSVF14K203/9921419">US</a>] [<a href="https://www.digikey.ca/en/products/detail/jst-sales-america-inc/ASVFSVF14K203/9921419">CA</a>]<strong>.</strong></p><p>----------------</p><p><strong>Printing</strong></p><p>The “ALL.stl” file prints the entire set of models you'd need to assemble ONE power plug housing. Separate STL file for each of the part is also provided for your convenience.</p><p>----------------</p><p><strong>Preparing</strong></p><p>Due to potential stringing on some of the printers, try clearing the gaps between the fingers of obstructions with a thin piece of metal, such as a steel ruler.</p><p>Test fit the housing into the Naomi receptacle without forcing it too much (or it may get stuck too well). If it won't go in, that means the fingers on the plug are a big too fat, and you need to shave off any extra with a blade or steel ruler.</p><p>Try inserting the header into the housing, make sure the little fins on the header are facing away from the center of the plug on both sides, as shown:</p><figure class="image"><img src="https://media.printables.com/media/prints/213551/rich_content/93d67625-23c1-4db8-8122-3ae7c47982fa/pin_facing.jpg#%7B%22uuid%22%3A%227f4c5e52-4a37-4e0c-83ea-90fde424edc3%22%2C%22w%22%3A2217%2C%22h%22%3A1863%7D"></figure><p>Try working each header cavity with a header until the insertion is smooth. Otherwise final assembly could become a pain.</p><p>----------------</p><p><strong>Assembly</strong></p><p>Start from only one side, insert header cables half-way into their cavities, then put the stopper piece of that side over the exposed necks of the pins, then press the stopper piece together with the pins into place. You may have to work the pins one by one, from one side, in order to make them slide in. Have patience and it will go in.</p><p>If you managed to break any of the tiny fingers on the stopper (shouldn't happen a lot), you could still shove the broken fingers in with the stopper, and it should still work. You could also print a new one, for sure.</p><p>After both sides are done, tie down the assembly with a small size zip-tie.</p><figure class="image"><img src="https://media.printables.com/media/prints/213551/rich_content/2bf997db-65e6-4425-bc98-c5bb6f2cb1d3/qq20220525-130129.jpg#%7B%22uuid%22%3A%22022e12ef-8f5e-4a2d-99a4-9626423452f1%22%2C%22w%22%3A926%2C%22h%22%3A848%7D"></figure><p> </p><p>Finally, shove in the locking clips into the holes on top of the housing.</p><figure class="image"><img src="https://media.printables.com/media/prints/213551/rich_content/db641b12-9c73-4724-a890-f259086cf864/qq20220525-131726.jpg#%7B%22uuid%22%3A%22eee9b7b1-ab02-4f27-88c5-0698f9a072f8%22%2C%22w%22%3A918%2C%22h%22%3A726%7D"></figure><p> </p><p>----------------</p><p><strong>Misc</strong></p><p> </p><p>The power plug pinout is as followed. Follow this when you are wiring it up with your power source.</p><figure class="image"><img src="https://media.printables.com/media/prints/213551/rich_content/c469e09a-7850-4cef-bccb-e2a5e062f26e/pinout.jpg#%7B%22uuid%22%3A%223ba4d44d-2375-4718-a1be-a1ee0179e380%22%2C%22w%22%3A1097%2C%22h%22%3A508%7D"></figure><p> </p><p>----------------</p><p>My finished adapter. I only have an FDM printer so the print quality was sketchy. If you have an SLA printer and printed one, please show it off in the comments. I really wanna see it printed with all its details!</p><figure class="image"><img src="https://media.printables.com/media/prints/213551/rich_content/b8b0ebef-cf5c-423f-b50c-36db654b78e5/qq20220525-130116.jpg#%7B%22uuid%22%3A%224f896042-9045-44da-a63e-6927d25a5917%22%2C%22w%22%3A1498%2C%22h%22%3A1072%7D"></figure>
With this file you will be able to print Power Plug Housing for Sega Naomi Arcade System with your 3D printer. Click on the button and save the file on your computer to work, edit or customize your design. You can also find more 3D designs for printers on Power Plug Housing for Sega Naomi Arcade System.